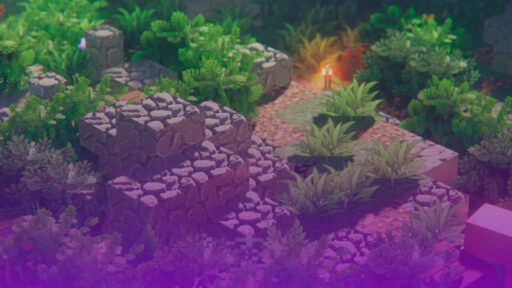
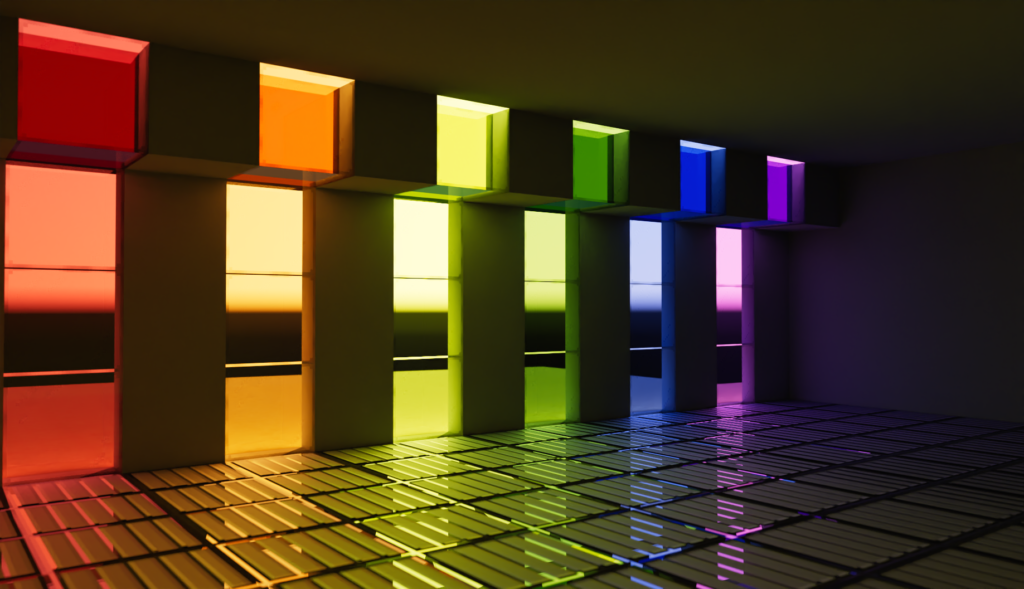
Imagine your Minecraft world, not as you are used to it. Picture sunbeams filtering through the blocky canopy of an oak forest, each leaf gently swaying in a simulated breeze. See the surface of a river, no longer a flat, static blue, but a translucent pane reflecting the sky and distorting the riverbed below. Envision the warm, flickering glow of a torch across the textured stone walls of your base. This is not a different game; it’s still Minecraft, but transformed, elevated from its charming, simple aesthetic into a more modern visual experience.
This guide is your starting point for making that transformation a reality. Minecraft customization can seem convoluted, filled with unfamiliar terms and complex steps. The mission here is to break down that process and serve as a comprehensive manual for beginners to safely install and play with these visual overhauls. The main stars of the show are Iris Shaders and its performance-boosting partner, Sodium. Together, they represent the current standard for achieving a beautiful and high-performance experience.
Tools of Transformation
Before diving into installations, it’s crucial to understand the two primary tools at your disposal: resource packs and shader packs. While they both change how the game looks, they do so in different ways. A resource pack is more about changing the art of the game, usually the look of the items and blocks. While a shader pack alters how the lighting of Minecraft works by adding missing effects such as shadows from the sun, or fluffy clouds.
Resource Packs
At its core, a resource pack (a term that evolved from the older “texture pack”) is a collection of files that replaces Minecraft’s default visual and audio files. It’s a bundle of assets that can alter the game’s aesthetic by modifying a wide range of elements:

- Textures: The most commonly used feature. Resource packs can change the appearance of almost everything, including the textures on blocks (like cobblestone and wood), the look of items in your hand (swords, pickaxes), the appearance of mobs (Creepers, Villagers), and even the graphical user interface (GUI) elements like the health bar and inventory screen.
- Models: Beyond just changing the 2D texture on a block’s surface, some packs can alter the fundamental 3D shape of blocks and items, adding more complex geometry. This has some limitations on what is possible without mods.
- Fonts and Text: The font used to display text in chat, on signs, and in menus can be customized.
- Sounds: A resource pack can also completely overhaul the game’s audio, replacing everything from the background music and cave ambiance to the sound effects of footsteps and breaking blocks.
For Minecraft to recognize and use these files, every resource pack contains a small instruction file called pack.mcmeta. This file acts as a manifest, telling the game the name of the pack, its description, and which version of the game it’s designed for. For the player, this means installation is as easy as placing the pack into the right place; the game handles the rest.
Shader Packs
The most dramatic visual changes happen here. A shader pack, or as is commonly referred to as a “shader”, is a set of programs that run directly on your computer’s graphics card (GPU) to manipulate how the game’s visuals are rendered on your screen in real-time. If a resource pack changes what you see, a shader changes how you see it.
Shaders operate on a more foundational level, controlling light, shadow, and other post-processing effects to create a more realistic and immersive world. The effects they can produce include:
- Dynamic Lighting and Shadows: Instead of the simple, flat lighting of vanilla Minecraft, shaders calculate the position of the sun and cast realistic, moving shadows for every object in the world, from trees to blades of grass.
- Water Effects: Water becomes a dynamic surface with realistic reflections of the sky and landscape, refraction that distorts what’s underneath, and gentle waves that ripple and move.
- Atmospheric Effects: Shaders can introduce volumetric clouds that have depth and shape, realistic fog that settles in valleys, and wind effects that cause leaves, grass, and crops to sway realistically.
- Post-Processing Effects: This category includes cinematic effects like motion blur, depth of field (which blurs objects in the distance to focus the eye), and bloom (which makes bright light sources appear to glow intensely).
Understanding this distinction is the key to a smooth customization journey. A resource pack changes the game’s assets and can be loaded by vanilla Minecraft. A shader pack, however, is a complex program that requires a special type of mod, known as a “shader loader,” to be installed first.
A History of Visual Modding
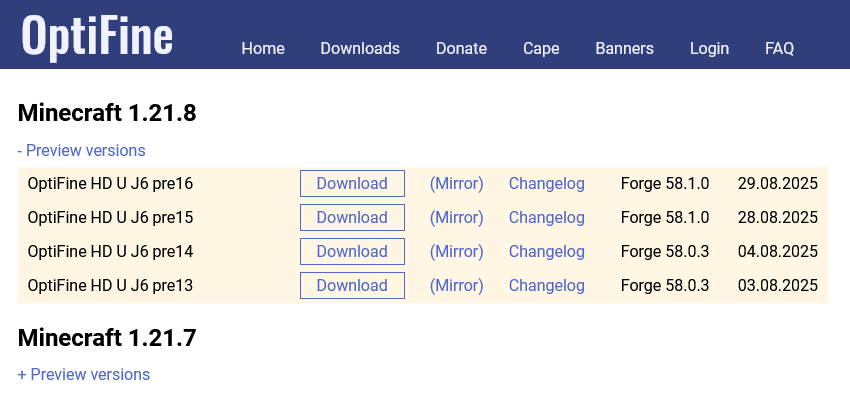
To understand why this guide focuses on a new set of tools, it’s important to look back at the mod that defined Minecraft customization for over a decade: OptiFine. For a long time, if a player wanted better performance or shaders, OptiFine wasn’t just an option—it was the only option.
An Older Era
OptiFine did not intially start off as a single mod, it was a fusion of two earlier projects from the game’s beta days: “Optimine,” which focused on improving rendering performance, and “Optifog,” which optimized the game’s fog effects. When these two mods merged, OptiFine was born, quickly becoming an essential mod for any dedicated Minecraft player.

Its popularity stemmed from its all-in-one approach. It provided a significant boost to frames per second (FPS), it integrated shadersmod; so had proper shader support, and added support for advanced resource pack features that vanilla Minecraft didn’t have, such as connected textures, custom skies, and animated textures. Iconic features like a dedicated zoom key and the coveted, donation-based OptiFine cape became staples of the community.
The Modern Ecosystem
While OptiFine was a jack-of-all-trades, the modding landscape has evolved. The community’s shift away from OptiFine isn’t born out of disdain, but rather a natural progression towards more modern, efficient, and collaborative solutions. This evolution was driven by several key factors:
Captured: optifine.net
- The Closed-Source Problem: OptiFine is “closed-source,” meaning its code is private. This created a major bottleneck. When another mod conflicted with OptiFine—a common occurrence—the other mod’s developer couldn’t see what was causing the problem, making it nearly impossible to fix. This led to widespread mod incompatibilities and game crashes.
- Performance Has Been Surpassed: Modern, open-source alternatives, chiefly Sodium, have been developed from the ground up to take advantage of modern graphics technologies. As a result, they now offer significantly better performance, delivering much higher and more stable frame rates than OptiFine.
- Slow Updates: Because OptiFine is maintained by a single primary developer, it often takes a long time to be updated for new versions of Minecraft. In stark contrast, modern open-source mods like Sodium are often updated within hours or days of a new release, thanks to a more collaborative development environment.
These factors led to the rise of the Fabric modding ecosystem—a lightweight, open-source mod loader that has fostered a new generation of mods built on compatibility, collaboration, and cutting-edge performance.
Installing the Modding Foundation
Getting started with modern Minecraft modding is easier than ever, thanks to streamlined installers. The process involves two main steps: installing the mod loader (Fabric) and then installing the performance and shader mods (Sodium and Iris).
Step 1: The Mod Loader (Fabric)
Before installing any mods, Minecraft needs a “mod loader.” This is a foundational tool that allows the game to load and run custom code. The modern, lightweight choice for this is Fabric.
- Download the Fabric Installer: Navigate to the official Fabric website (fabricmc.net) and download the universal installer file.
- Run the Installer: Open the downloaded .jar file. A small window will appear.
- Configure and Install: In the installer, ensure the “Client” tab is selected. Choose the desired Minecraft version from the dropdown menu. The loader version and install location can typically be left at their default settings. Click “Install.” The installer will automatically create a new game profile in your Minecraft Launcher.
- Install the Fabric API: The vast majority of Fabric mods require a companion mod called the Fabric API. Download the Fabric API file from a reputable site like Modrinth or CurseForge, making sure its version matches your Minecraft version.
- Place the Fabric API: Open your Minecraft Launcher, go to the “Installations” tab, find the new Fabric profile, and click the folder icon to open your Minecraft directory. Inside, create a folder named mods (all lowercase) if one doesn’t already exist. Drag and drop the Fabric API .jar file you just downloaded into this mods folder.
Step 2: The Performance Mods (Sodium & Iris)
With the Fabric foundation in place, it’s time to install Sodium (the performance engine) and Iris Shaders (the shader loader). The developers of Iris have created a user-friendly installer that bundles everything needed, which is the highly recommended method.

- Download the Iris Installer: Go to the official Iris Shaders website (irisshaders.dev) and download the universal installer.
- Run the Installer: Open the downloaded .jar file. A simple installation window will appear.
- Select and Install: The installer will ask which version of Iris to install. Select the option that includes Fabric. Choose your desired Minecraft version. The installer will automatically detect your Minecraft installation directory. Click “Install.” This single action will install both Iris and a compatible version of Sodium.
- Verify the Installation: Open the Minecraft Launcher. A new profile named something like “Iris & Sodium” will now be available. Select this profile and launch the game. To confirm everything is working, go to Options… > Video Settings…. The menu should look different, with new settings from Sodium, and a new tab or button labeled Shader Packs….
Installing and Activating Packs
With the technical foundation laid, the fun part begins: choosing and activating your first resource packs and shaders.
Where to Find Packs
It is critical to only download mods and packs from safe, reputable sources to avoid malware. The two largest and most trusted hubs for the Minecraft Java modding community are Modrinth and CurseForge. Remember that the official Minecraft Marketplace is for the Bedrock Edition; the packs and shaders in this guide are for the Java Edition and are downloaded from these third-party websites.

Activating Resource Packs
- Download the Pack: Download the desired resource pack from a safe source. It will be a single .zip file.
- Open the In-Game Folder: Launch Minecraft. From the main menu, navigate to Options… > Resource Packs…. On this screen, click the button that says Open Pack Folder. This will open the correct folder on your computer.
- Move the File: Drag and drop the downloaded .zip file directly into this folder. It is not necessary to unzip the file.
- Activate in Minecraft: Back in the game’s Resource Packs menu, the new pack will appear in the “Available” column. To activate it, hover over its icon and click the arrow that appears. This moves it to the “Selected” column.
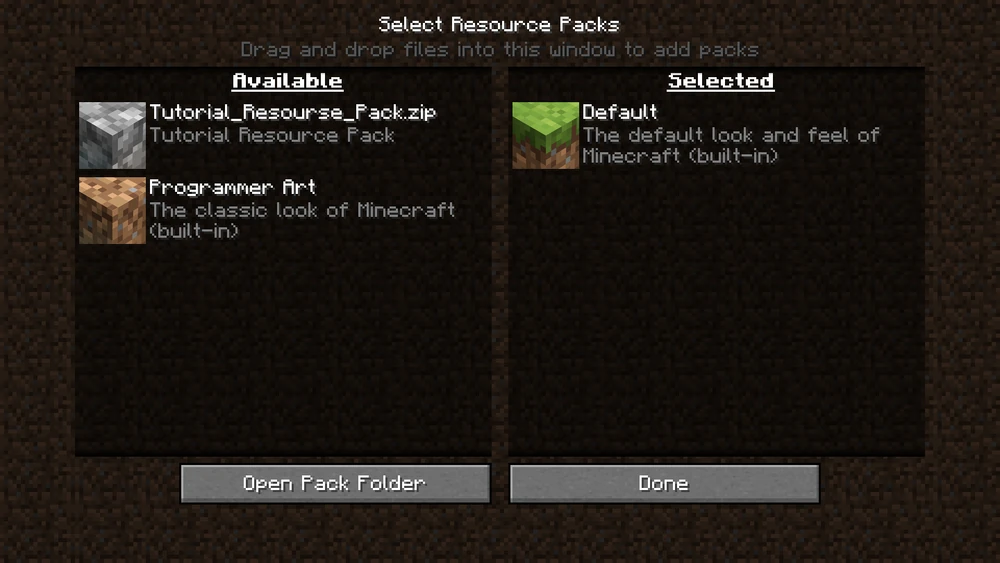
It’s also possible to activate multiple resource packs at once, known as “Pack Stacking.” The packs in the “Selected” column are loaded from bottom to top. This means if two packs modify the same texture, the pack that is higher up in the list will take priority.
Activating Shader Packs
- Download the Shader: Download the desired shader pack from a safe source. Like a resource pack, it will be a .zip file.
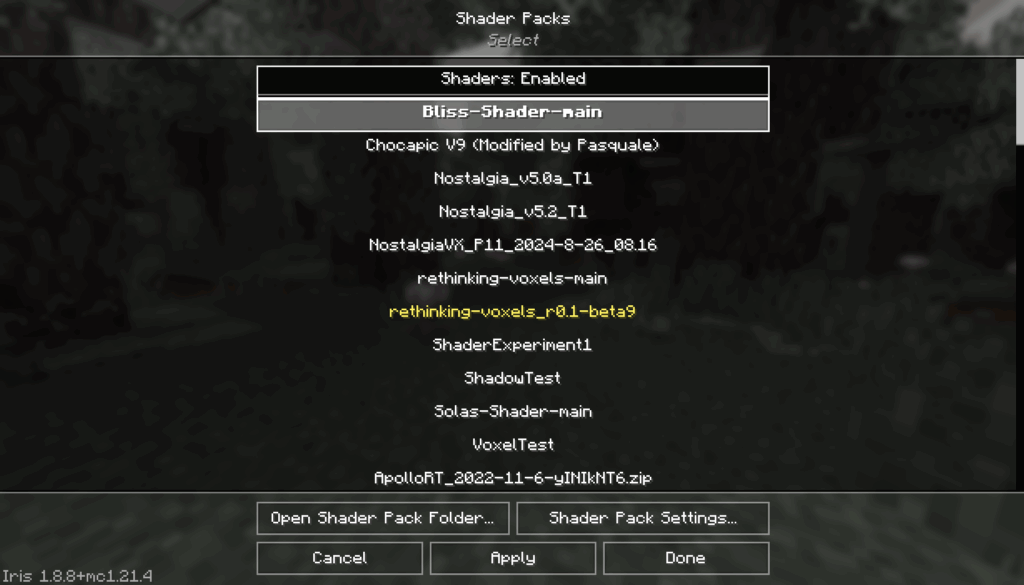
- Open the In-Game Folder: Launch Minecraft using your Iris & Sodium profile. Navigate to Options… > Video Settings… > Shader Packs…. Click the Open Shader Pack Folder button.
- Move the File: Drag and drop the downloaded shader .zip file into this folder.
- Activate in Minecraft: Back in the Shader Packs menu, the new shader will appear. To activate it, simply click on its name, then click the Apply button. The screen will reload. Unlike resource packs, only one shader pack can be active at a time.
Recreating the OptiFine Experience
Sodium and Iris provide performance and shaders, but advanced resource packs rely on features pioneered by OptiFine. In the modular Fabric ecosystem, these are enabled by small, dedicated “companion mods.” This approach offers better performance and stability, as you only install what you need. Each is installed by placing its .jar file into the mods folder.
| Feature | Handled by OptiFine | Modern Fabric Solution(s) |
| Performance Boost (FPS) | Built-in | Sodium |
| Shader Pack Support | Built-in | Iris Shaders |
| Connected Textures | Built-in | Continuity |
| Custom Entity Models (CEM) | Built-in | Entity Model Features (EMF) + ETF |
| Custom Skies | Built-in | Nuit (+ Nuit Interop for compatibility) |
| Dynamic Lighting | Built-in | LambDynamicLights |
| Zoom Functionality | Built-in | Zoomify |
Recommendations and Troubleshooting
With a fully featured mod setup, you are ready to explore. Here are a few curated recommendations and solutions to common problems.
Starter Packs
- Resource Pack Recommendations:
- Faithful 64x / Default HD: For those who love the classic look but want more detail. These packs increase the resolution of default textures for a sharper, cleaner “vanilla-but-better” experience.
- Bare Bones: Designed to make the game look exactly like it does in official Minecraft marketing trailers, featuring a simple, clean, and vibrant art style.
- Fresh Animations: Overhauls the animations of almost every mob in the game, making them move with fluidity and personality.
- Faithful 64x / Default HD: For those who love the classic look but want more detail. These packs increase the resolution of default textures for a sharper, cleaner “vanilla-but-better” experience.
- Shader Pack Recommendations:
- BSL: A long-standing community favorite, known for its bright, clean, and highly customizable look. It strikes a great balance between visuals and performance.
- Complementary: Built with compatibility and performance as top priorities, this is arguably the best shader for new users. It looks beautiful out of the box and runs well.
- Bliss: Best known for its wonderful compatibility with Distant Horizons, it sports breathtaking clouds, a fantastical atmosphere with vibrant colors. Since it is an edit of Chocapic V9, a shader famous for having “Black magic optimization”, Bliss is one of the most performant shaders available
- BSL: A long-standing community favorite, known for its bright, clean, and highly customizable look. It strikes a great balance between visuals and performance.
Common Questions & Quick Fixes
- “My game is crashing on startup!” This is almost always a mod issue. First, ensure the Fabric API is installed. Second, double-check that every mod (including the API) is for the exact same Minecraft version (e.g., 1.20.1) and is for the Fabric loader. A single mismatched mod will prevent the game from launching.
- “My shaders aren’t showing up in the menu!” Confirm that the Iris mod is correctly installed and that you are launching the correct profile. Ensure the shader pack’s .zip file was placed in the shaderpacks folder, not the resourcepacks folder.
- “My FPS is low even with Sodium!” Shaders are quite graphically demanding. Go into the Shader Pack Settings… menu in-game. Most shaders have performance profiles (e.g., Low, Medium, High). Try selecting a lower profile. Additionally, lowering Minecraft’s standard render distance in the Video Settings will generally provide a significant FPS boost.
- “My glass doesn’t connect / mobs don’t look right!” This indicates a resource pack needs a companion mod. For connecting glass, install Continuity. For custom mob models and animations, install Entity Model Features (EMF) and Entity Texture Features (ETF).
Conclusion
You now know how to take vanilla minecraft and transform it into a visually impressive, high-performance, and customized experience. The modular nature of the Fabric ecosystem represents the future of Minecraft modding; a future that prioritizes choice, performance, and compatibility. Even if some miss the old days of having all these features in one mod, many features were underutilized or never used by some players. And so, with the choice now afforded, we wouldn’t be bloating the game with unnecessary, hardly used functions.