
Stepping into the world of Minecraft, you will find a game of survival, creativity, and exploration. But underneath this surface is another layer seldom touched by most, a system that allows players to introduce automation and logic into their worlds: Redstone. At first glance, it is just a glowing red dust mined from the earth. In the right hands, however, this material becomes the foundation for complex contraptions, computation, and incredible machines. It is Minecraft’s equivalent of electricity, a system that transforms players from simple builders into engineers.
The journey into Redstone can seem intimidating. Online, you can find creations of staggering complexity—in-game computers that fill entire landscapes or farms that harvest resources on an industrial scale. These are the culmination of over a decade of innovation, a history written not only by developers, but by a global community who saw potential in the simple on/off signal. This guide is your entry point into that world. We will trace Redstone’s journey from a humble power source to a competent tool capable of logic, movement, and even industry.
First Circuits
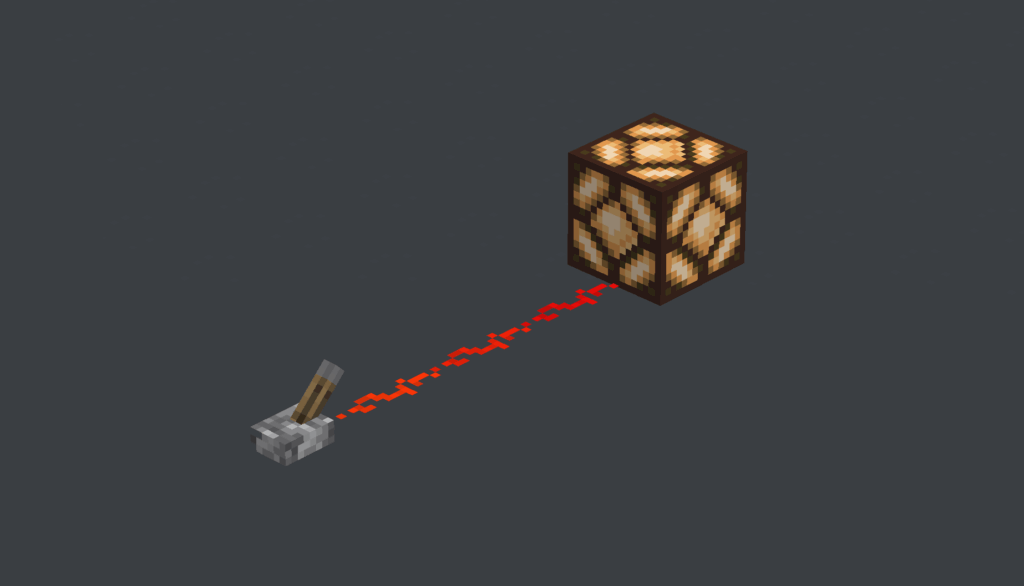
Redstone first appeared in the game’s early days, introduced in Java Edition Alpha v1.0.1. Initially, its function was basic: an ore that, when mined, produced a dust that could transmit a current. It was the birth of the circuit in Minecraft. The concept was simple: a power source (like a lever or a button) generates a signal, Redstone dust acts as a wire to carry that signal, and a mechanism (like a door or a lamp) responds to it.
This fundamental trio, input, transmission, and output, is the basis of all Redstone engineering. Over the past decade, this system has expanded. One of the largest expansions was Version 1.5, the “Redstone Update,” in 2013, which introduced components like the Comparator and Hopper. Thereby transforming Redstone into a robust platform for intricate devices. Subsequent additions like Slime Blocks and Observers each sparked new revolutions in design.
Anatomy of a Redstone Contraption
To begin understanding Redstone, it is essential to first understand the functional roles of the Redstone components. These can be grouped into four categories:
- Power Sources: Components that create a signal. They can be continuous (Redstone Torch, Block of Redstone) or conditional (Levers, Buttons, Pressure Plates).
- Power Transmitters: Components that carry a current. The basic one is Redstone Dust, acting as a wire. Repeaters can be used to extend and transmit signals or serve as one way diodes.
- Signal Manipulators: Slightly more advanced components which alter a charge. A Redstone Torch can invert a signal, a Repeater can delay it, and a Comparator can measure and compare its strength.
- Mechanisms: These are the output components that perform an action. This includes blocks that create movement (Pistons), produce light (Redstone Lamps), or dispense items (Dispensers).
![[Left to Right] Lever, Button, Redstone Torch, Dust, Repeater, Comparator, Piston, Observer.](https://cybrancee.com/blog/wp-content/uploads/2025/11/RedstoneBasicComponents-1-1024x586.png)
| Component | Category | Primary Function |
| Lever | Power Source | Provides a constant ON/OFF signal, toggled by the player. |
| Button | Power Source | Provides a temporary pulse of power when pressed. |
| Redstone Torch | Power Source / Manipulator | Provides constant power by default. Inverts a signal when its attached block is powered. |
| Redstone Dust | Power Transmitter | Acts as a wire, carrying a signal that decays over distance. |
| Redstone Repeater | Transmitter / Manipulator | Refreshes a signal to full strength (15), introduces a configurable delay, and acts as a one-way diode. |
| Redstone Comparator | Power Source / Manipulator | Maintains, compares, or subtracts signal strength. Can also read the state of containers. |
| Piston / Sticky Piston | Mechanism | Pushes or pulls blocks when powered. |
| Observer | Power Source | Emits a short pulse when it detects a block update in front of it. |
Rules of Redstone
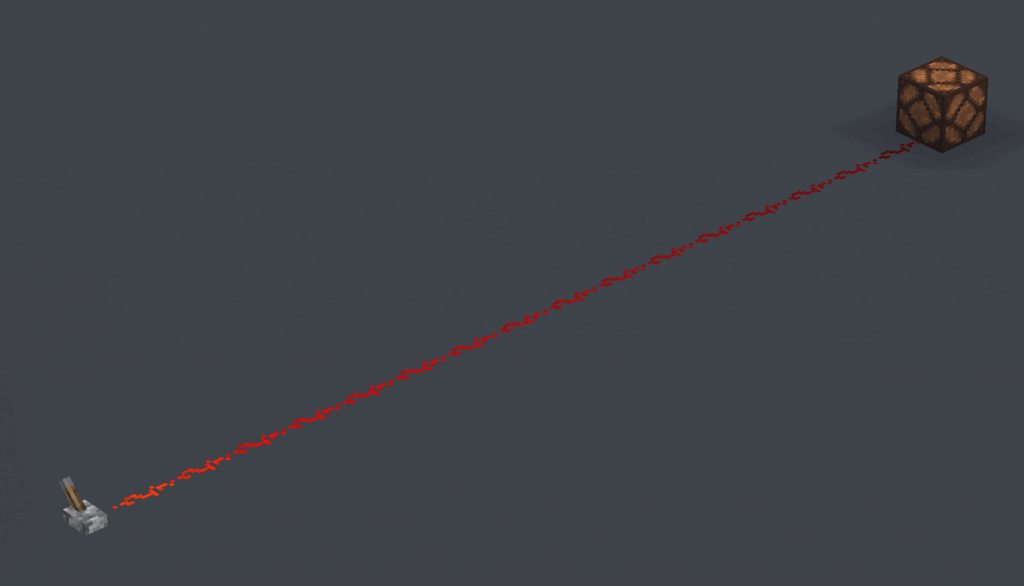
A Redstone signal is not a simple “on” or “off.” It has a power level from 0 (off) to 15 (maximum strength). As a current travels along Redstone dust, its strength diminishes by one for each block, fading to zero after 15 blocks. The decay is a core feature, allowing components like the Comparator to perform calculations based on precise signal strengths.
Power can also be transmitted through solid blocks. A directly powered block (receiving its charge directly from a source like a repeater) can pass energy to adjacent components. An indirectly powered block (receiving its charge from dust) can activate mechanisms but cannot energize other dust lines.
There is a major difference in terms of redstone between game versions. Quasi-Connectivity (QC) is a Java Edition-exclusive behavior where pistons, dispensers, and droppers can be activated if the block above them is powered. This legacy bug was intentionally kept as a feature, enabling incredibly compact designs, but it is one of the main reasons many tutorials are not cross-platform compatible.
Introducing Movement: Pistons
For years, the world of Minecraft was static. That all changed with the introduction of the piston, a block famously inspired by a community-created mod. Suddenly, blocks could be pushed and pulled, opening up a treasure trove of dynamic architecture. The piston became the heart of kinetic Redstone, and being able to utilize it properly is one of the first priorities for every budding engineer. Your first project should be the 2×2 piston door.
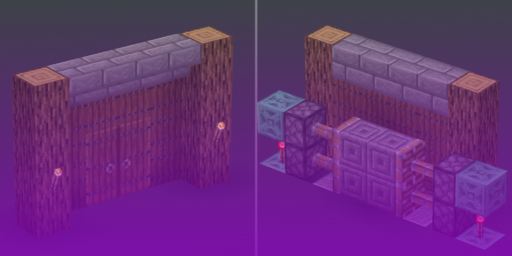
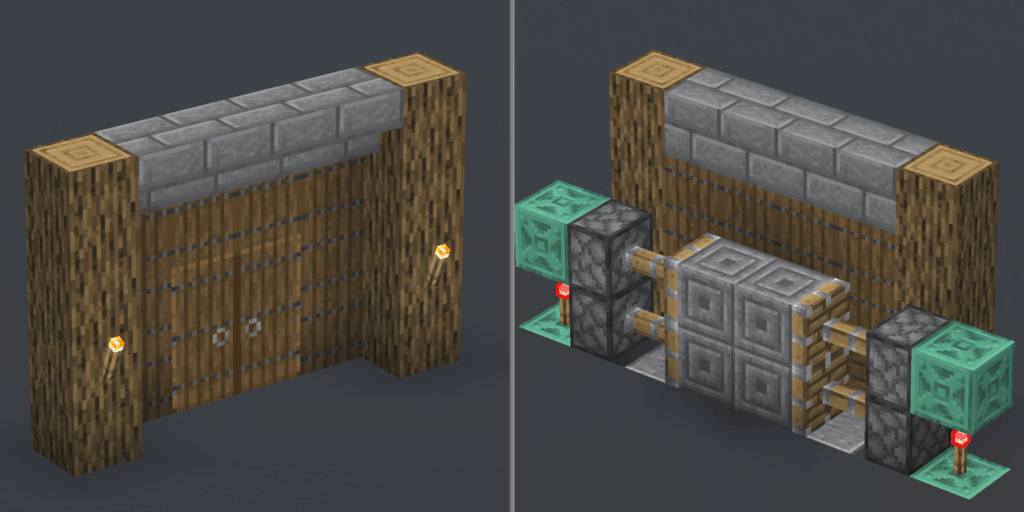
The Classic 2×2 Piston Door
This design creates a 2×2 doorway that sits flush with a wall and opens when a player steps on pressure plates.
Materials Needed: 4 Sticky Pistons, 12 Redstone Dust, 2 Redstone Torches, 4 Pressure Plates, ~20 solid building blocks, 4 blocks for the door.
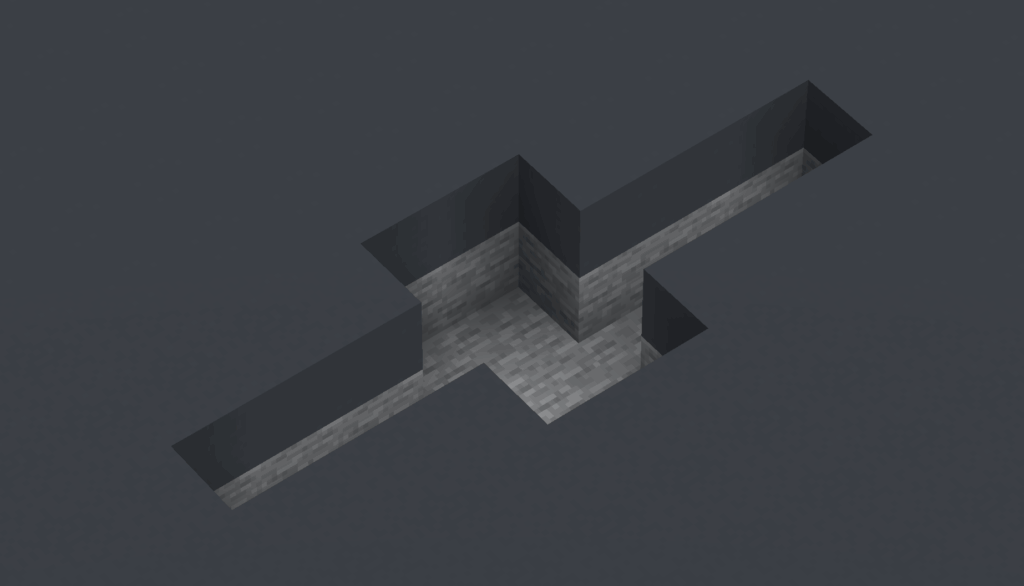
Step 1: Excavate: Dig a 2×3 trench, 2 blocks deep. From the center of each long side, dig out a 1×3 area that is also 2 blocks deep.
Step 2: Wiring: Fill the bottom of the central 2×3 trench with Redstone dust. Place two redstone dust on the each branch leaving 1 block gap at the end.
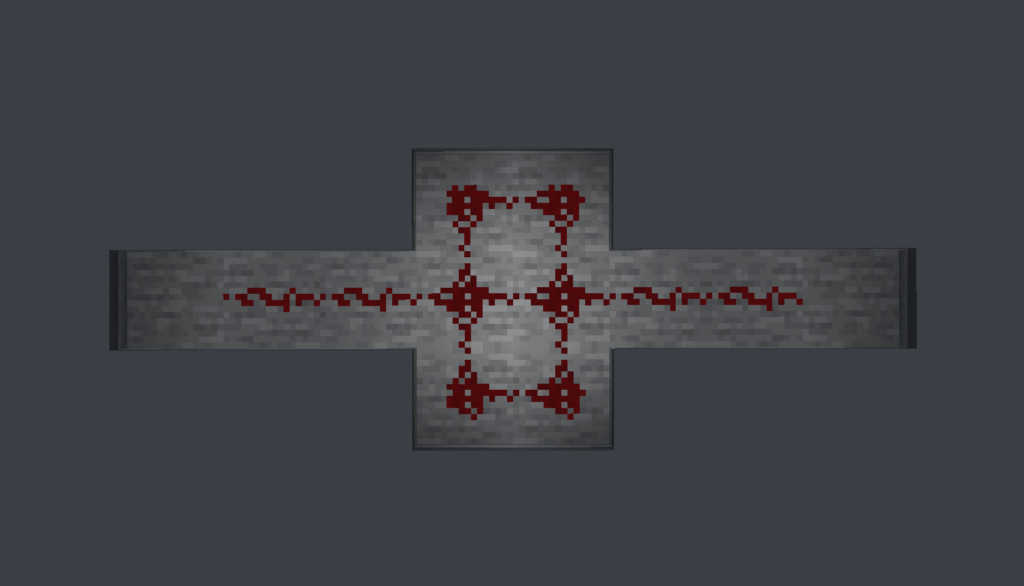
Step 3: Inverters: In each side branch, place a solid block at the far end. Place a Redstone Torch on the top of this block.
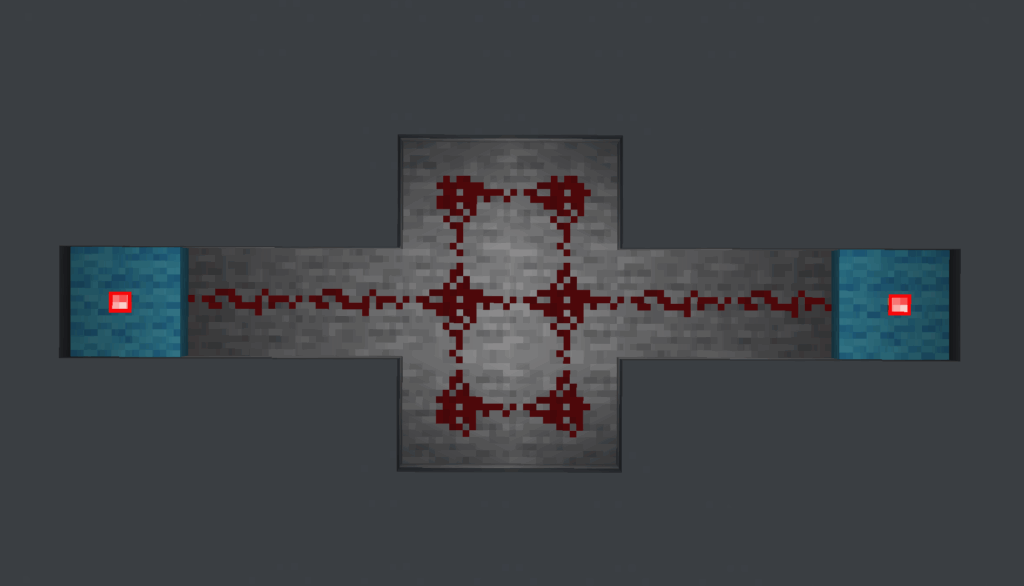
Step 4: Cover Circuitry: Fill in the trench with your floor blocks. Place a solid block directly on top of each Redstone torch.
Step 5: Power Top Pistons: Place one piece of Redstone dust on top of each solid block above the torch from the previous step.
Step 6: Position Pistons: On each side of the 2-block wide doorway, place two Sticky Pistons facing inwards, stacked on top of each other.
Step 7: Place Door and Pressure Plates: Place your four door blocks between the extended piston heads. Place two pressure plates on the floor on either side of your door
This seemingly simple door is a masterclass in Redstone fundamentals. It introduces signal inversion. The door’s natural state is closed, meaning the pistons are powered on. Stepping on the pressure plate must therefore turn the power off. This is achieved by the Redstone torches, which act as NOT gates: when their block is powered, the torches themselves turn off, opening the door.
Redstone Logic Gates
Redstone can do more than just move blocks. With the right components, it can be taught to think. The pivotal “Redstone Update” transformed the system into a platform for computation by introducing components that could manipulate signals with logical precision. This was the birth of Boolean logic in Minecraft. A signal was no longer just on or off; it was True or False, 1 or 0. By combining components, players could construct logic gates—the fundamental building blocks of all digital computers.
- NOT Gate (Inverter): The output is the opposite of the input. This is achieved by placing a Redstone torch on the side of a powered block.
- AND Gate: The output is ON only if both Input A and Input B are ON. A common design involves two input torches that must both be off to allow a final output torch to turn on.
- OR Gate: The output is ON if either Input A or Input B is ON. This is as simple as having two lines of Redstone dust merge into one.
![[Left to Right] NOT Gate, AND Gate, OR Gate](https://cybrancee.com/blog/wp-content/uploads/2025/11/2025-11-12_04.16.39-1024x576.png)
These simple gates are the basis of security and convenience. An AND gate can create a door that requires two keys to be turned simultaneously. An OR gate can wire a lighting system to multiple switches. Their true power, however, is in their foundation. A Redstone torch is, fundamentally, a universal NOR gate, meaning every other logic gate can be constructed from it alone. This simple fact means that with enough torches and dust, one can build a fully functional computer inside Minecraft.
Mobile Redstone: Flying Machines
For a long time, Redstone contraptions were bound to the ground. That changed with the introduction of Slime Blocks and Honey Blocks. These unique blocks had a special property: when moved by a piston, they would pull any adjacent blocks along with them. This, combined with the Observer block—a component that emits a pulse whenever it detects a change in front of it—sparked a new revolution: mobile Redstone. The principle is an elegant loop: an observer sees a piston move, which triggers another piston to move, which is seen by another observer, continuing the cycle.
A Simple Flying Machine
Materials Needed: 2 Observer Blocks, 2 Sticky Pistons, 4 Slime Blocks.
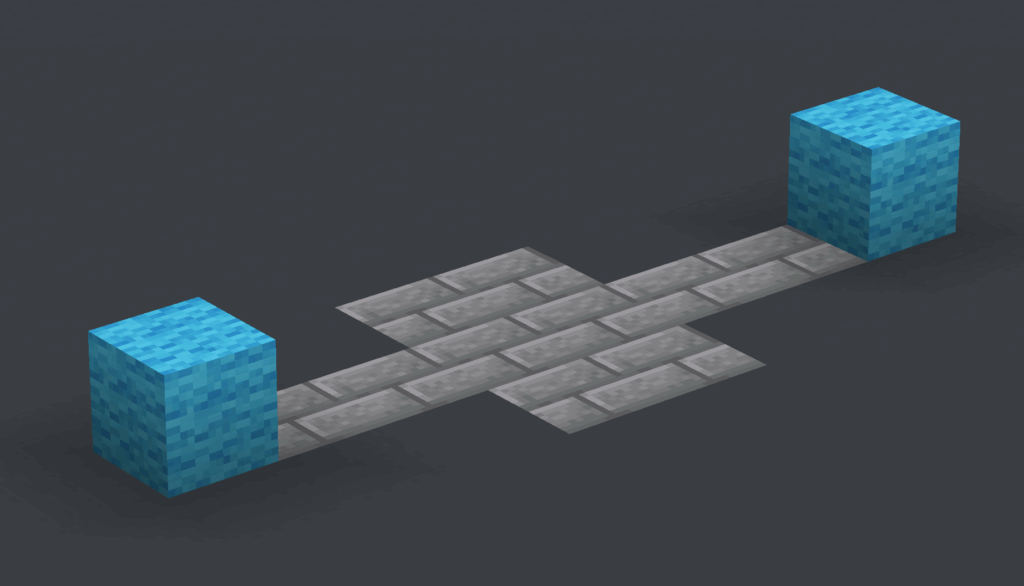
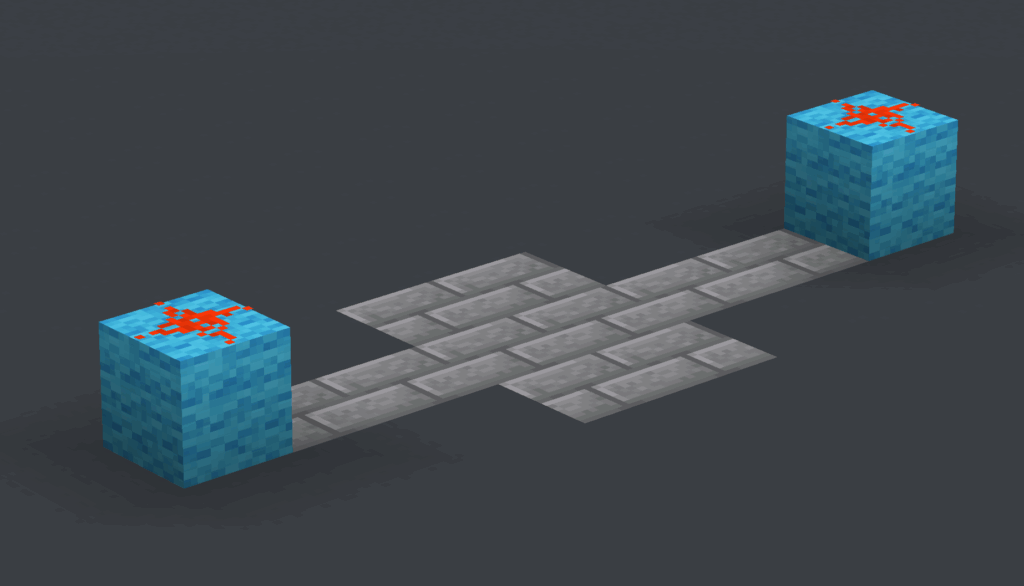
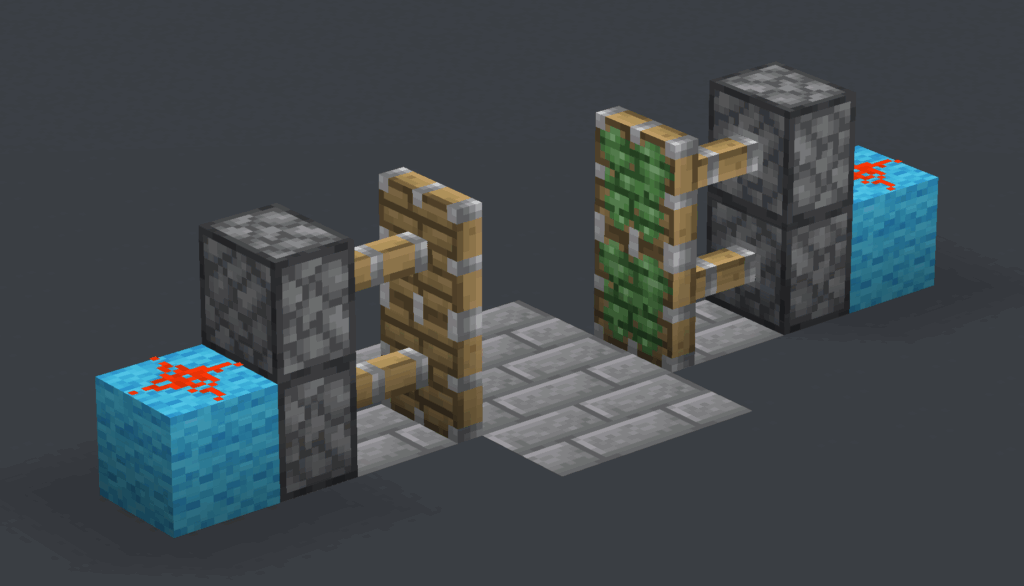
Step 1: Engine: Place an Observer block, and in front of it, a Sticky Piston facing the same direction. Place two Slime Blocks in front of the Sticky Piston.
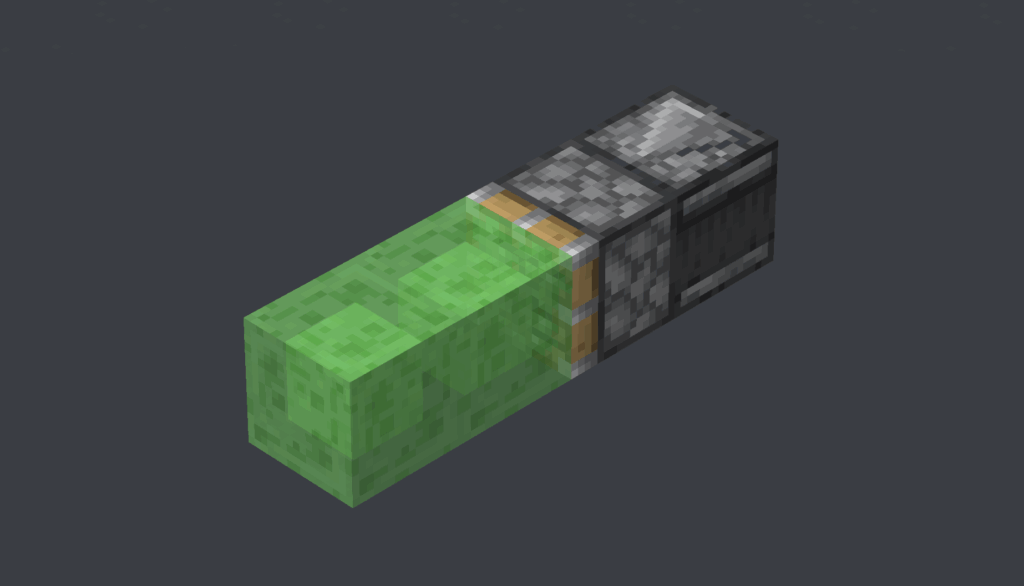
Step 2: Return Mechanism: On the side of the Slime blocks, place an Observer facing the opposite direction, and a Sticky Piston also facing the opposite direction.
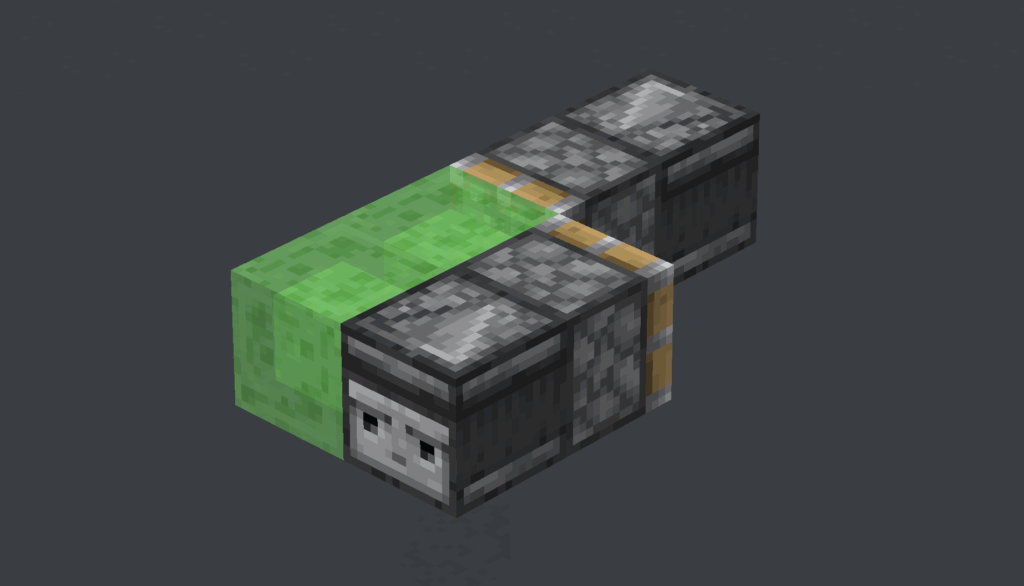
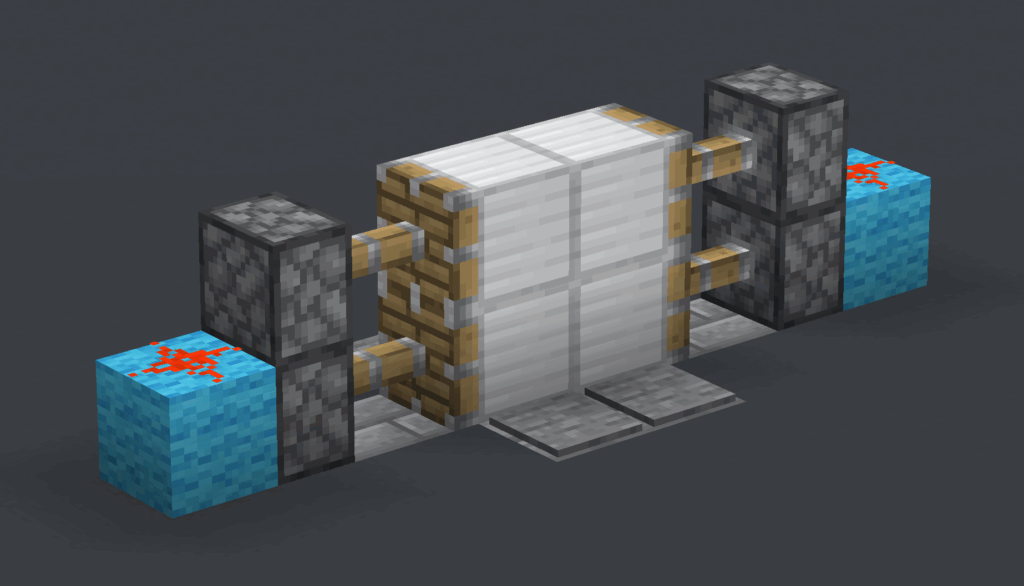
Step 3: Complete Structure: Place two more Slime Blocks on the front of the Sticky Piston to complete the 2×4 body.
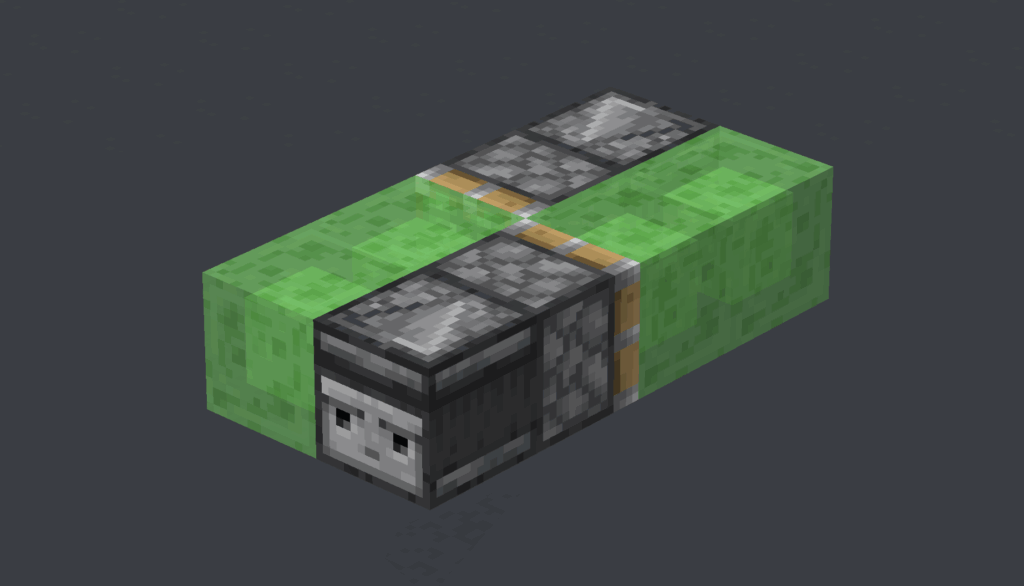
Step 4: Launch: Cause a block update in front of the rearmost Observer (e.g., place or break a block) to start it. To stop it, place an immovable block like Obsidian in its path.
Flying machines opened up a new world of possibilities. They offered automated, hands-free travel and became the engine of large-scale industry. When combined with TNT duplicators (a Java-exclusive mechanic), they became “world eaters,” capable of carving massive craters out of the landscape.
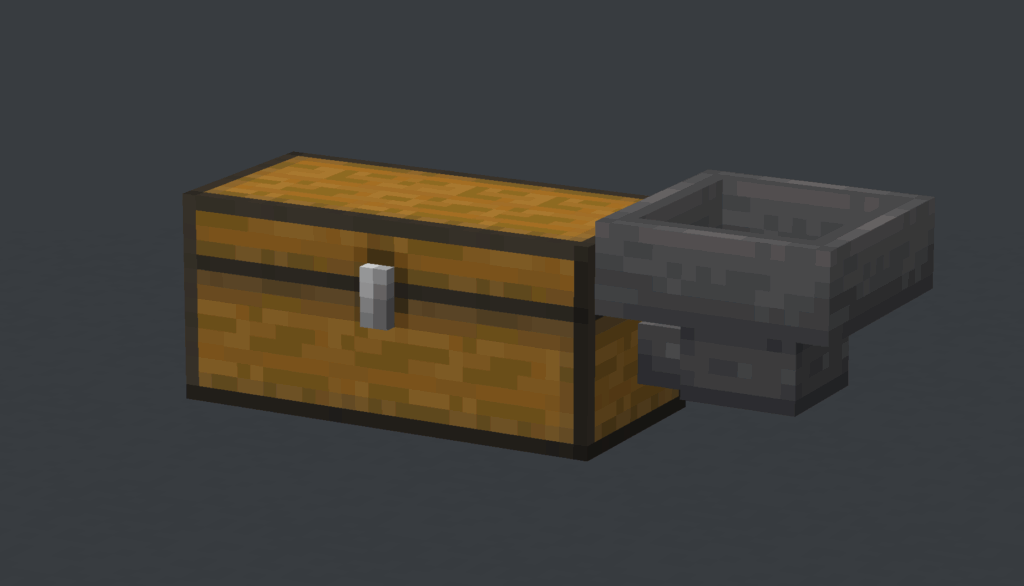
Automated Farms
For many players in survival mode, the most practical application of Redstone is the mechanization of tedious tasks. The Observer block perfected the automated farm. The design is a model of efficiency: an Observer watches a crop like sugarcane. When the crop grows to full height, the Observer detects the change and sends a pulse to a piston, which instantly harvests it. A system of hoppers below collects the drops and funnels them into a chest, all without any player intervention.
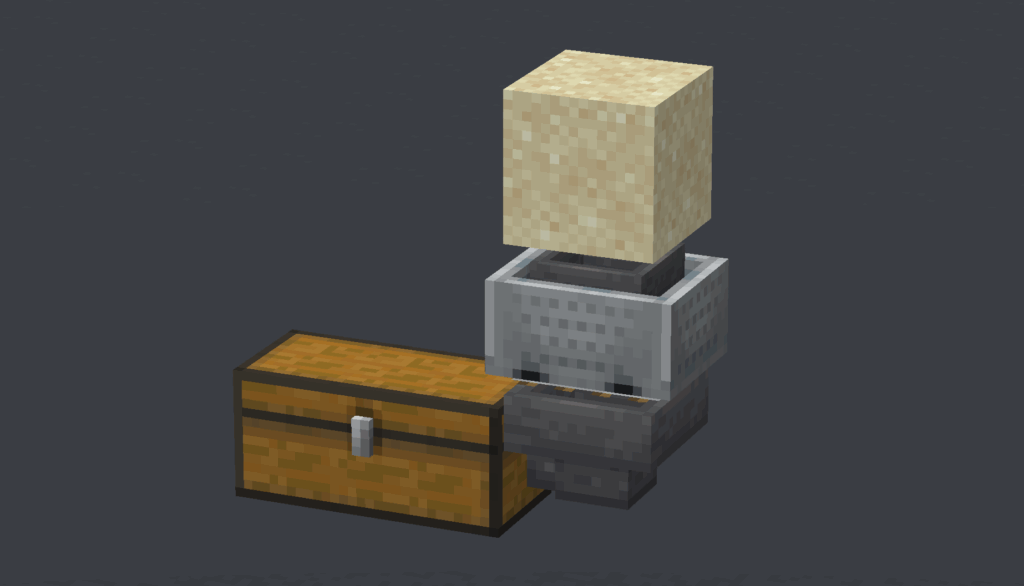
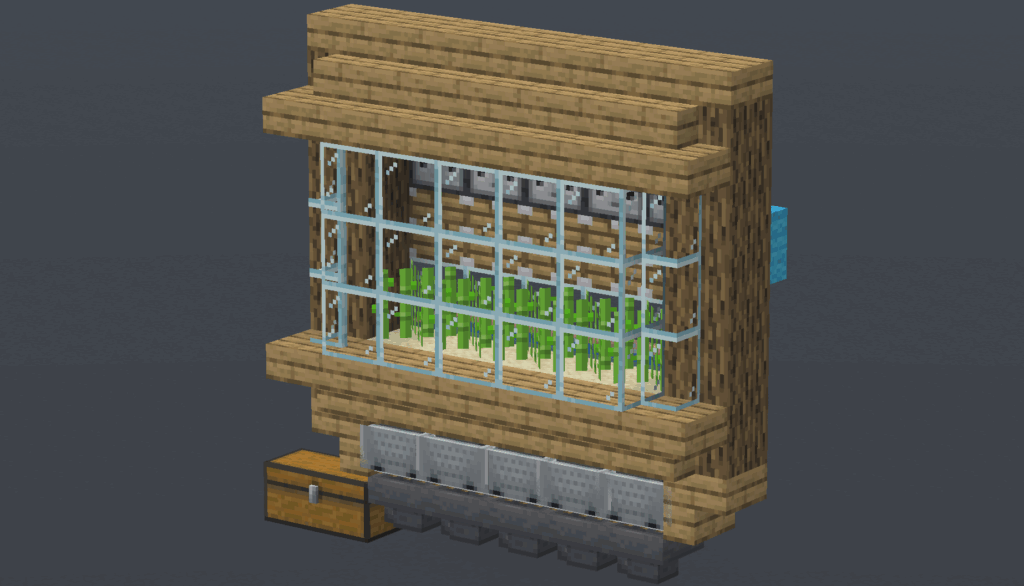
A Sugarcane Farm Module
Materials Needed (per module): 1 Piston, 1 Observer, 1 Redstone Dust, 1 Sugarcane, 1 Water Bucket, 1 Hopper & Chest, 1 Hopper Minecart, 1 Rail, 1 Solid block
Step 1: Storage: Place your storage (preferably double chests), and your hopper facing into it.
Step 2: Base: On top of the Hopper, place the Rail (shift+right click). Place the Sand on top of the Rail and the Hopper Minecart in between.
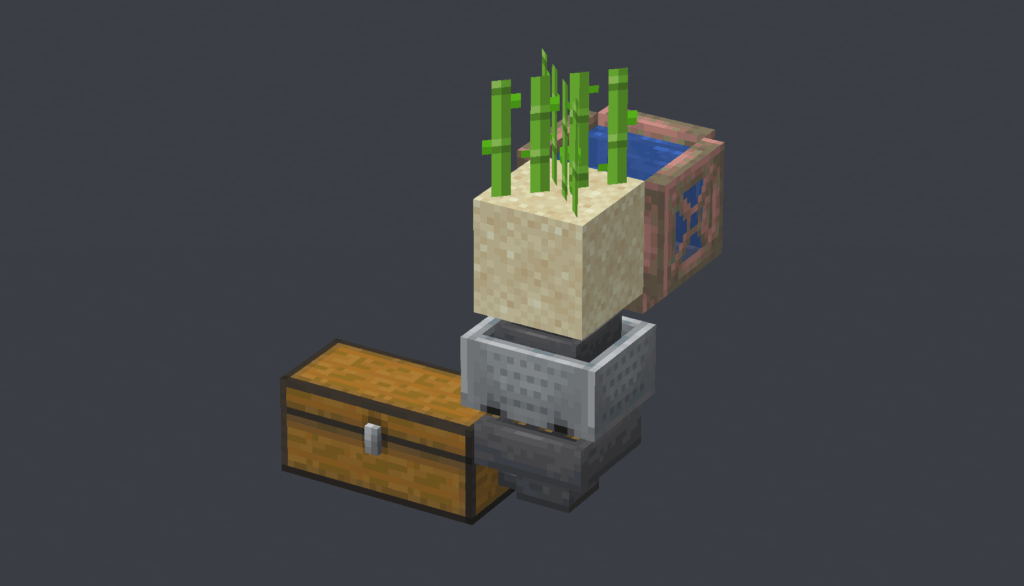
Step 3: Sugarcane: Place the water behind the Sand (surrounded by Blocks of course, we used trapdoors for this tutorial), and the Sugarcane on top of the Sand.
Step 4: Piston: Place a Solid block behind the Sugarcane and then place the Piston facing towards the Sugarcane. On top of the Piston, place the observer with the output facing away from the Sugarcane
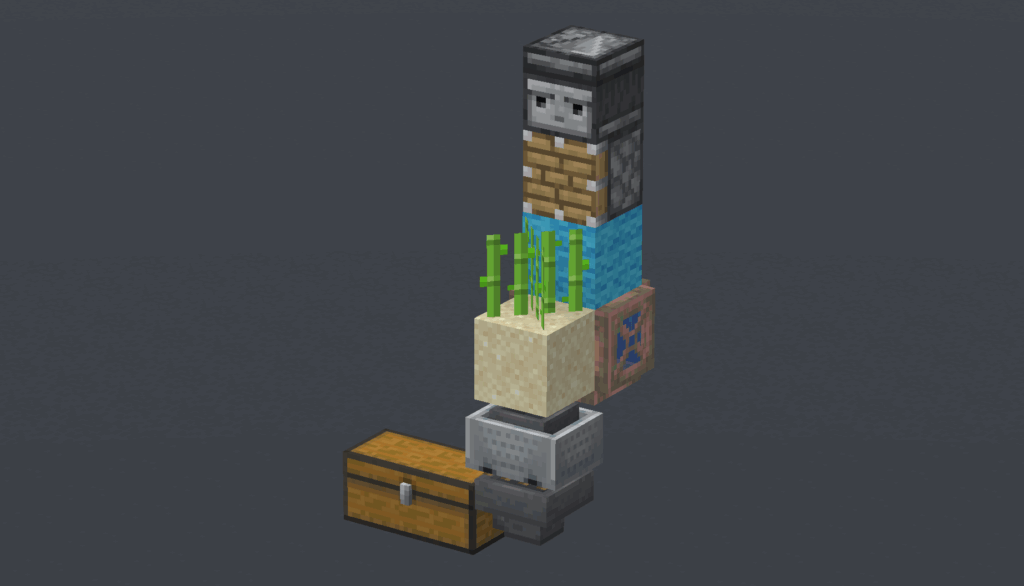
Step 5: Power: Place a Solid Block behind the piston (You can reuse the solid block from the previous step) and put the Redstone Dust on top of it.
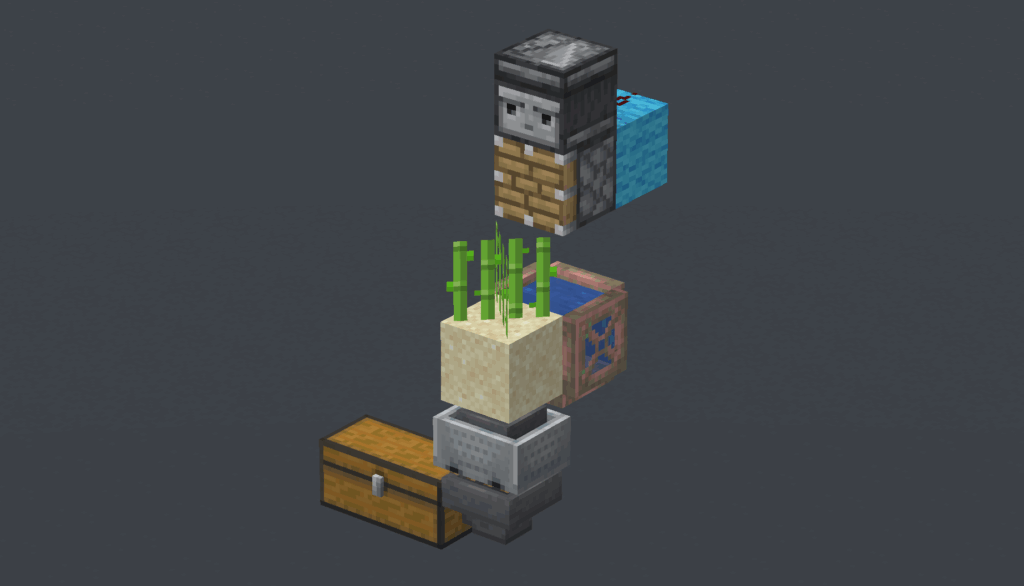
This design is “tileable,” meaning you can build many identical modules side-by-side to create a farm of immense productivity. Each time sugarcane grows, the observer triggers the piston to harvest it, creating a continuous farm that requires no player action. You should surround it with blocks, perhaps glass if you want to see inside so that the sugarcane doesn’t fall out. And a trick for placing the Minecarts is first placing them in every other rail, before quickly placing them in the missing ones.
Conclusion:
Redstone began as a simple tool, then an endlessly creative community took into their own hands and grew it into a system of unexpected depth.
The journey does not end here however. The builds in this guide are fairly basic. With more practice, you may be able to delve into advanced computation, automated storage systems and contraptions so complex they are basically engineering.