

If you’re looking for a great way to enhance your Minecraft survival experience, you’ve come to the right place. Today, we will explore how to add mods using Forge, Fabric, NeoForge, and Paper. Whether you’re playing solo or running a server with your friends, we will guide you through every step. So let us walk you through.
What You Need Before We Begin
Before you begin modding your Minecraft world, there are a few things you’ll need to prepare:
- Minecraft Java Edition: Ensure that you have the Java version of Minecraft installed, as mods don’t work with the Bedrock Edition.
- Java Development Kit (JDK): You must install the JDK to modify your Minecraft World or perform advanced modding.
- Fabric or Forge: Decide which platform you want to use for your mods. Both have their benefits (I will tell you briefly).
What are Forge, Fabric, NeoForge, and Paper? What’s The Difference?
You probably asked yourself: What are Forge, Fabric, NeoForge, and Paper, and what’s the difference? I’m going to give you some quick definitions.
Forge is a complex mod loader widely used for large and complex mods. It can sometimes be slower but more effective than the others (e.g., Fabric, Paper, NeoForge, Bedrock, Vanilla). Forge is considered more effective because it offers extensive tools and deeper integration options, enabling developers to build large and complex mods with its API. Forge usually takes longer to update to the latest Minecraft version.
Fabric is a lightweight mod loader that is faster and more efficient than the rest (e.g., Forge, NeoForge, Paper). It is mainly used for client-side mods (mods that affect only the client and not the rest of the players).
NeoForge is a fork of Forge created by a Forge developer after some disagreements (the specific developer said this on their Official Site). NeoForge is more modern than Forge and provides a more efficient experience for mod developers, thanks to the cleaner code, better tools, and flexible API’s. This loader also updates faster than Forge and has better performance.
Paper is a Server loader that is different from the rest and is made for Minecraft Servers to use plugins (not mods). Paper is a high-performance loader that supports Bukkit and Spigot plugins.
The differences between them are minor. Fabric is faster than Forge and can offer some client-side mods. Forge is more effective than Fabric because of its API, but updates more slowly to the release version of Minecraft. NeoForge is more modern than Forge and has a bigger library of mods because of its advanced API.
If you are wondering which one to choose to host your next server, either Forge or Paper, you can have a look at our other blog on Should You Choose Minecraft Forge or Minecraft Paper to Host Your Next Server?
Setting Up For Multiplayer
I. Forge/Fabric/NeoForge:
Now let’s start setting up Forge/Fabric/NeoForge for a multiplayer world. Here are the simple steps to add mods in a multiplayer survival world. In this blog, I will use Cybrancee Game Hosting services to host the server, but you can host your server on your PC if you wish.
Check Cybrancee Game Hosting. Prices start at $1.99.
Important!
If you already have a Minecraft server at Cybrancee.com, go to the “Switch Loader” tab and click Install next to Forge/Fabric/NeoForge. If you did this, skip to step 2.
Step 1: Buying the Server
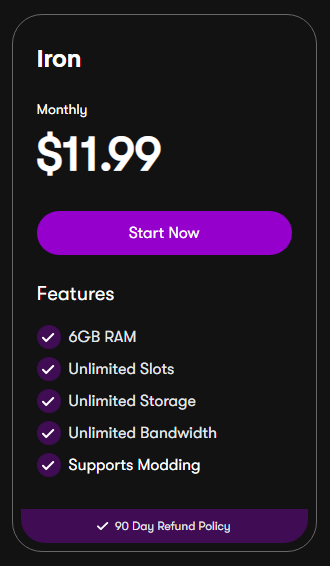
You need to purchase one of the server plans. In this blog, I will use the Iron plan, which supports modding.
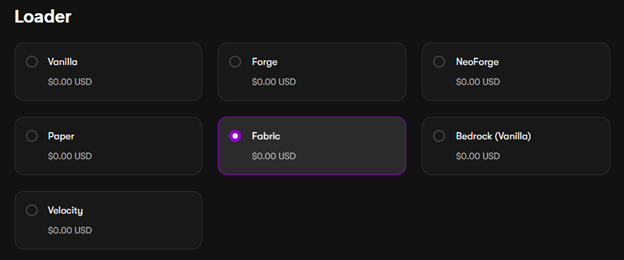
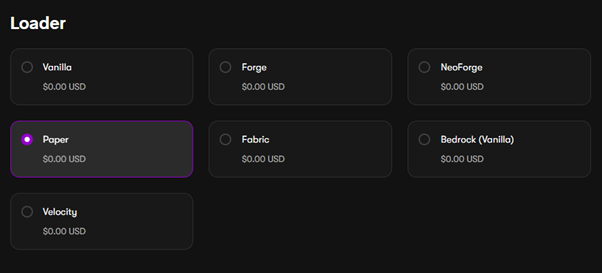
When you are on the checkout page, you must select either Fabric, Forge, or NeoForge Loader.
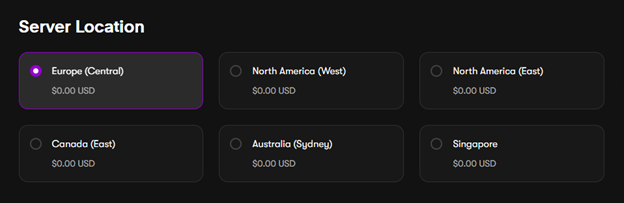
Then select the Server location. (The server’s location should be the closest to your location.)
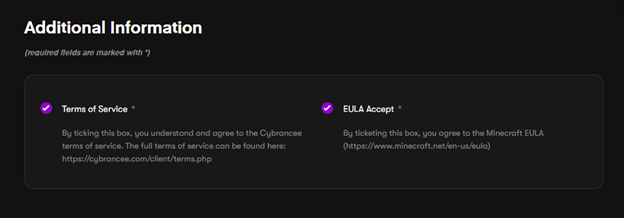
You must accept the Terms of Service and EULA.
After you have finished selecting, click “Continue” and complete the payment.
Step 2: Getting the Server Ready With Mods
After successfully purchasing the server, you should see a confirmation like this.

Click on “Continue to Client Area,” and your server should appear in the “Your Active Products/Services” section.

When you see the status as “Active”, click “Manage”.
You should see two buttons.

If this is your first time using our services and you have not set up a panel password, click “Set a Panel password.”
After setting up your panel password, click “Go to Panel”.
Now you should see your list of servers.

Choose your server and click on “Manage server.”

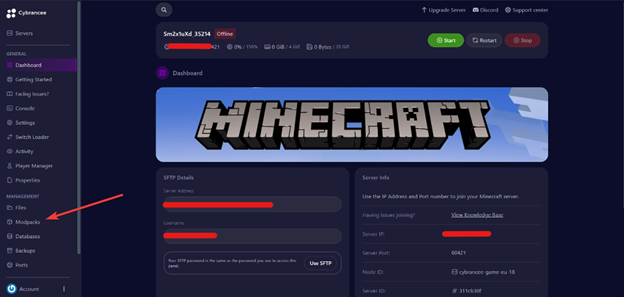
You are now on the Dashboard of your server.
Now, you can install mods on your server. You can do it yourself or use the Cybrancee modpack installer. We’ll explain both options and how to do them.
How to Install Mods Using the Cybrancee Modpack Installer
The first step is to go to the “Modpacks” tab.
Here, you will find a library of modpacks from which you can choose.
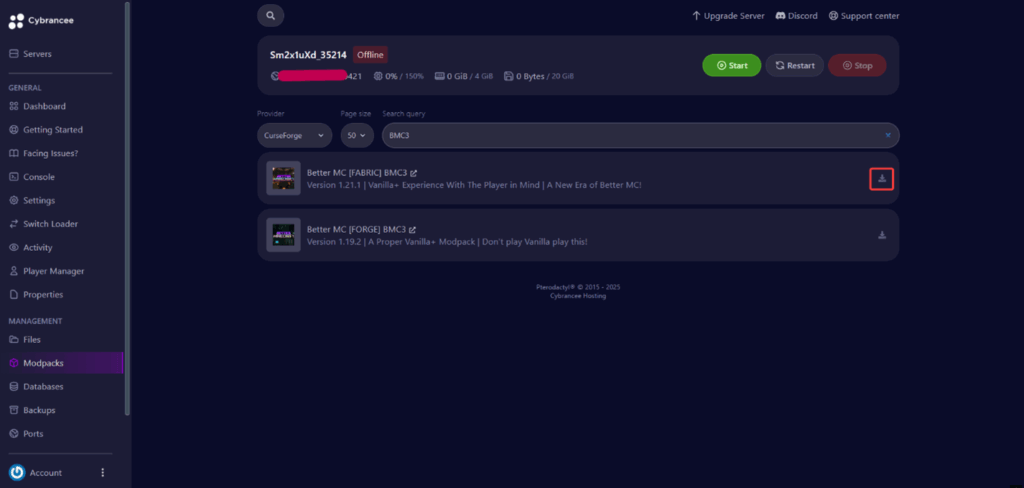
To install any modpack, click the download button next to the modpack’s name. I will install Better MC (BMC3 Fabric) for this blog.
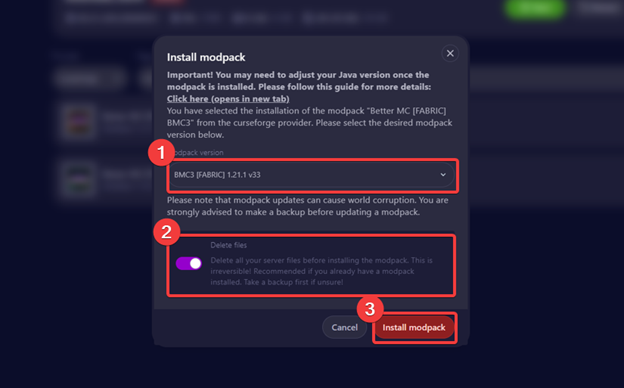
After you click the download button, you should see a pop-up with the version being installed. Select your version and check the settings that say “Delete files” so your modpack can be installed without interference. The last thing to do is click on “Install modpack.”
After installing the modpack, you must get the CurseForge app from the CurseForge Website.
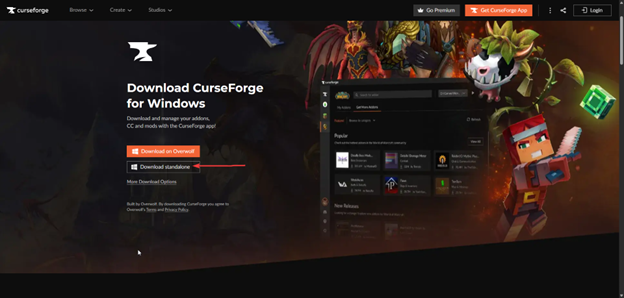
Download the Standalone version and run the installer.
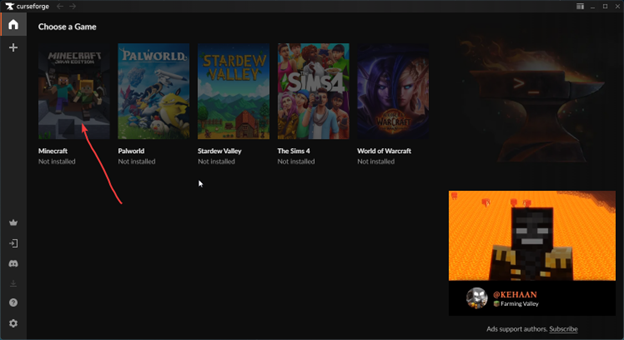
After you’ve installed the CurseForge app, start it up, and you should see a tab with multiple games. Choose Minecraft and install it.
After that, you should see two options: “Create Modpack” or “Browse Modpacks”.
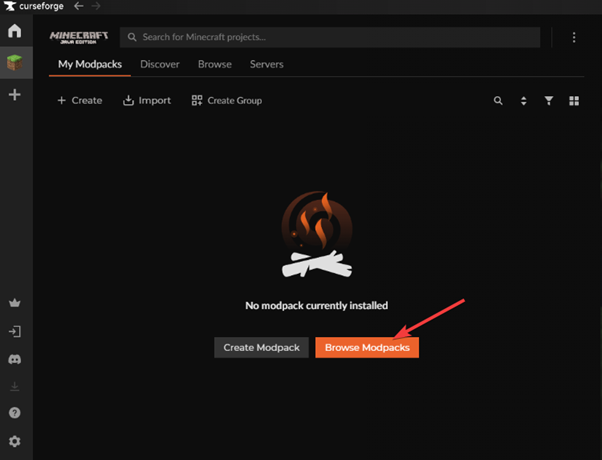
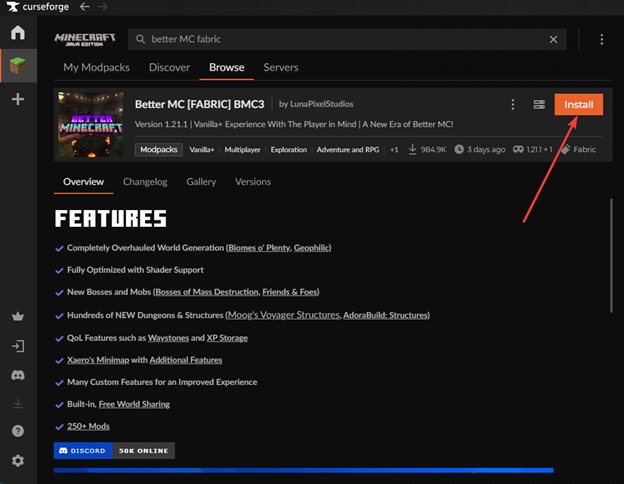
Click “Browse Modpacks” and find the modpack with the same version you installed on your server. In our case, we need to find Better MC (BMC3 Fabric) with version 1.21.1.
After you’ve found it, click on install and wait for it to install.
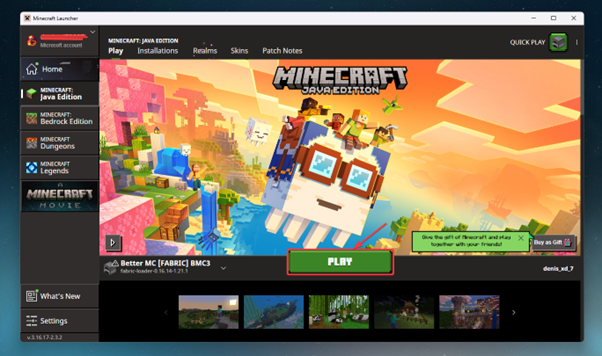
After the installation is completed, click on “Play”.
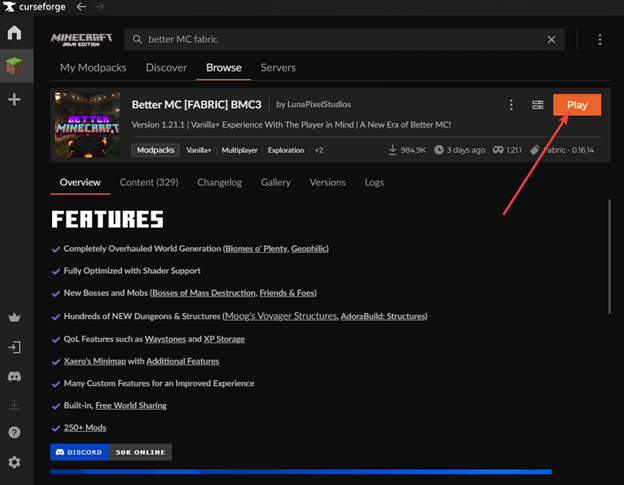
It will open your Minecraft Launcher app, and then you need to press again on “Play”
How to Install Mods Manually for Forge/Fabric/NeoForge.
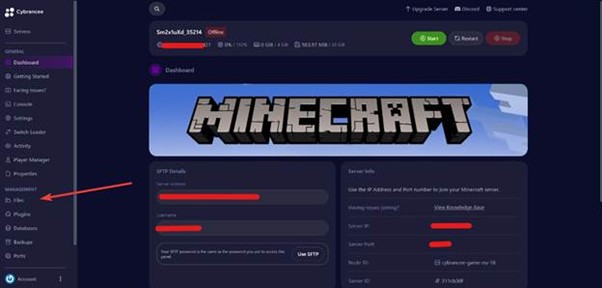
First, go to the “Files” section.

Now you should see your server files, find the mods folder.
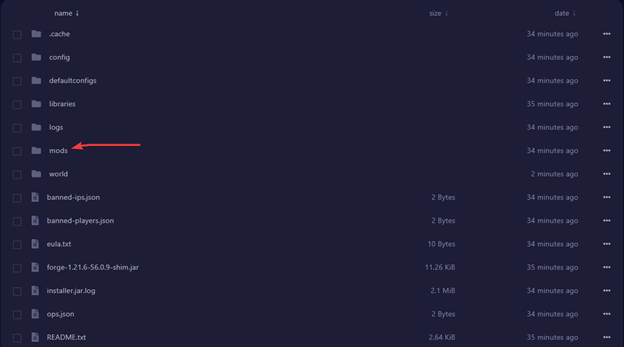
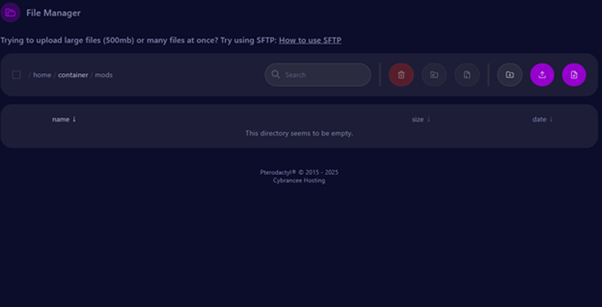
Open the folder; it should be empty by default.
Find your favourite mods and download them onto your computer.
You can find a lot of mods on these websites:
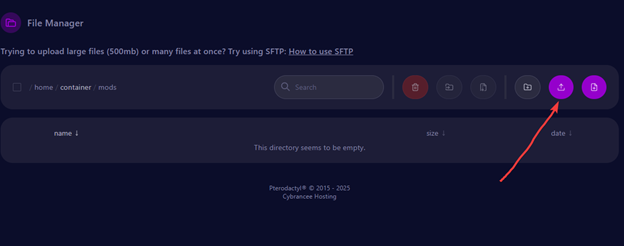
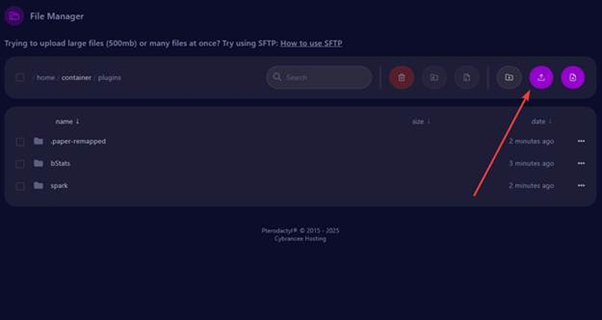
Now, click the upload button, select the mods you want to upload, and upload them to the server files.
II. Paper:
Now, we will explain to you how to set up a multiplayer server using Paper by adding plugins. We are using plugins because Paper doesn’t support mods, and it works only with plugins. Maybe you are wondering what plugins are, and what the difference is between mods and plugins? If you want to know more about mods and plugins, you can check out our other blog on Minecraft Mods vs Plugins: What’s the Difference?
Now, let’s get our Paper server ready with some plugins.
Step 1: Buying the Server
It’s the same steps as Forge/Fabric/NeoForge, but make sure to select the Paper Loader.
Step 2: Getting the server ready with plugins
After successfully purchasing the server, you should see a confirmation like this.
Click on “Continue to Client Area,” and your server should appear in the “Your Active Products/Services” section.
When you see the status as “Active”, click “Manage”.
You should see two buttons.
If this is your first time using our services and you have not set up a Panel password, click “Set a Panel password.”
After setting up your panel password, click “Go to Panel”.
Now you should see your list of servers.
Choose your server and click on “Manage server.”
You are now on the Dashboard of your server.
Now you can install some plugins. You can install plugins by manually downloading them or by using the Cybrancee Plugins Installer. We’ll explain both options and how to do them.
How to Install Plugins Using the Cybrancee Plugins Installer
Now you should see a big list of plugins that you can choose from.
Pick your favorite plugin and install it.

To install a plugin, simply press the download icon next to the plugin’s name. We are going to install “Villager in A Bucket” in this blog, but you can install whatever you want.

After you click the download button, you should see a pop-up telling you what version you want to install. Select your version and click on “Install plugin”.
How to Install Plugins Manually on a Paper Server
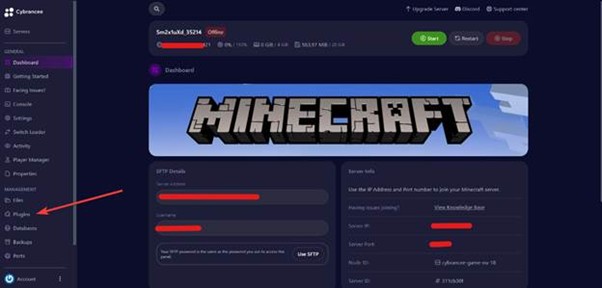
First, go to the “Files” section and click on it.
Now you should see your server files, find the plugins folder.
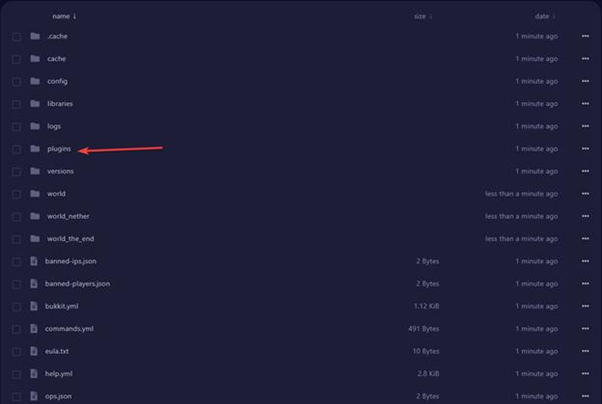
Open the folder; it should have some plugins by default.
Find your favourite plugins and download them onto your computer. You can find plugins on these websites:
Now, click the upload button, select the mods you want to upload, and upload them to the server files.
Starting up Your Server
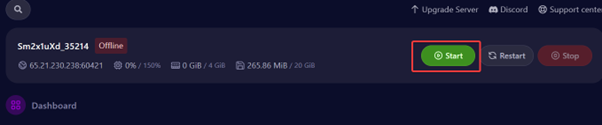
After you add your mods or install modpacks/plugins, you need to start your server. To do that, go to the Dashboard section and click on the green button that says “Start.”
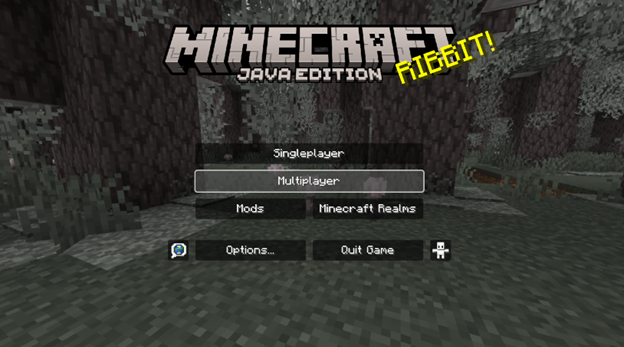
After launching Minecraft, click on Multiplayer.
Click on “Add a server”.
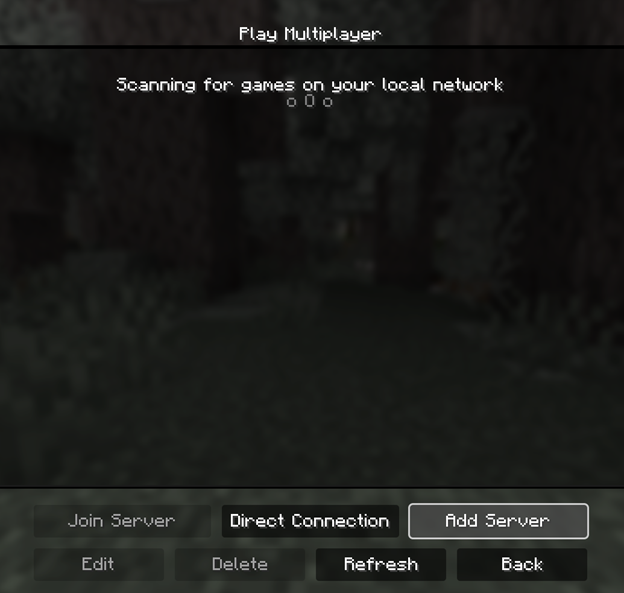
Enter the IP address and Port into the “Server Address” field, use the format IP_ADDRESS:PORT. Like this:
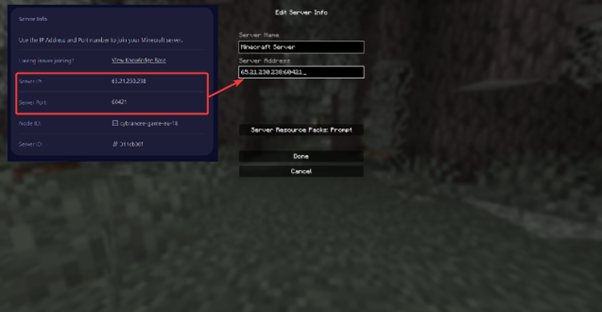
Click “Done” and join your server.
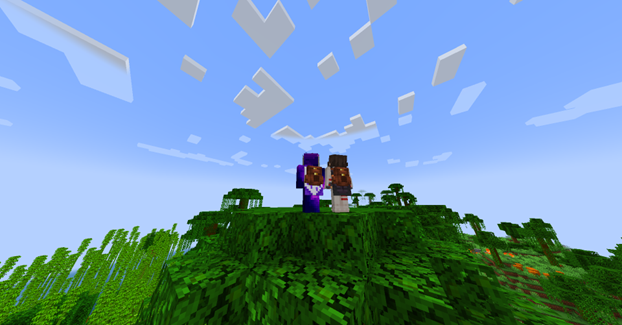
If you followed all the steps correctly, your mods should be working.
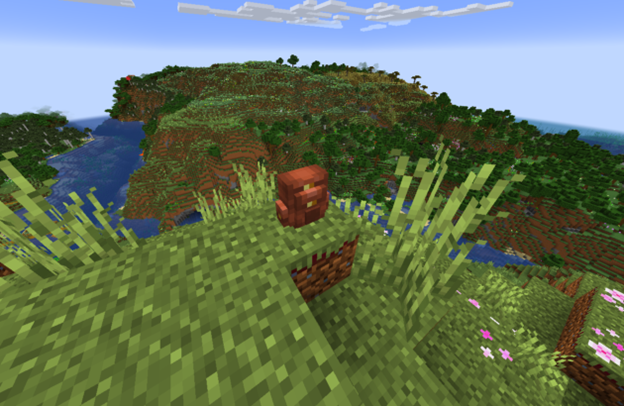
Here is an image of my friend and me with some nice custom backpacks.
Setting Up For SinglePlayer
I. Forge
Let’s first start setting up Forge for a single-player world. Here are the simple steps to use Forge mods in a single-player survival world.
Step 1: Install Forge
Go to the Forge Website and download the installer. You can choose any version, but I will select version 1.21.4 in this blog because it’s compatible with more mods. You can choose from the latest version or the recommended version. I suggest picking the recommended version.
After downloading your version, you must run the installer. After running the installer, you should see a pop-up window with multiple options, something like this.
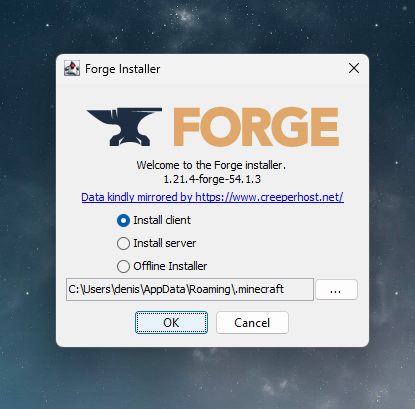
Now, you need to select “Install client” and then click “OK”.
After the program completes the installation, you should see a pop-up confirmation like this one.
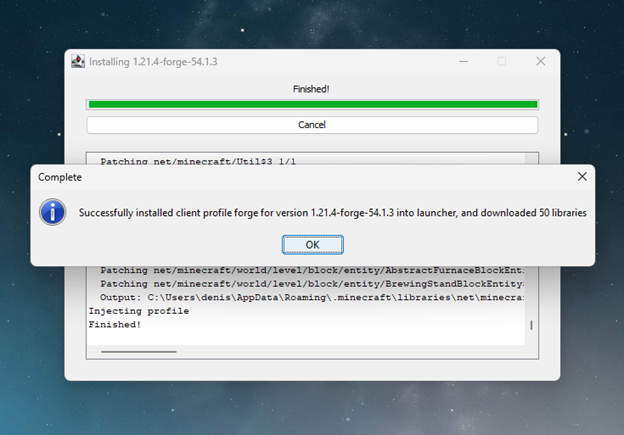
Now, click “OK”, you have successfully installed the Forge client in your Minecraft files. Yipeee!
Step 2: Add Mods
We must find some mods to install and play with. Now you probably have a lot of mods in your head, or probably not, but you can find almost any mod possible on these two sites:
Make sure to pick mods that are compatible with the Forge API.
After you have picked your favourite mods, you need to add them to your game files.
First, press Win + R on your keyboard. You should see a Run window open that you can type in.
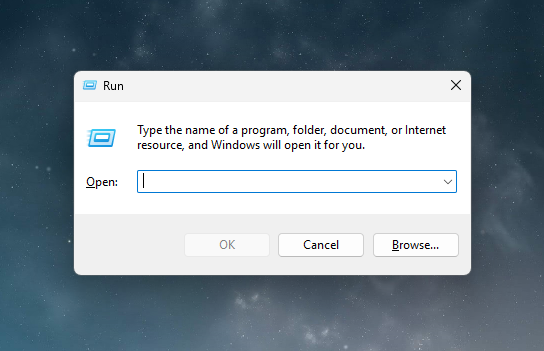
Type “%appdata%” and press Enter on your keyboard. You should see a new window appear. We are doing this so we can access the mods folder to add our mods.
Now, find the folder named “.minecraft” and open it.
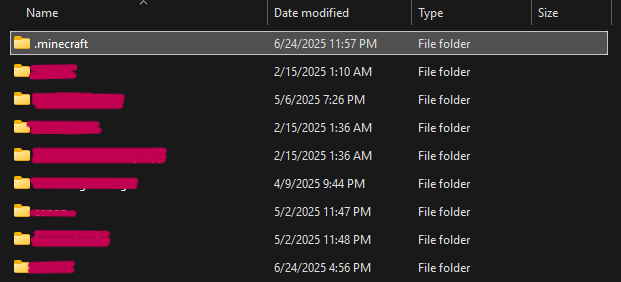
You should find a folder named “mods” there. If not, don’t worry; create a new folder and name it “mods”.
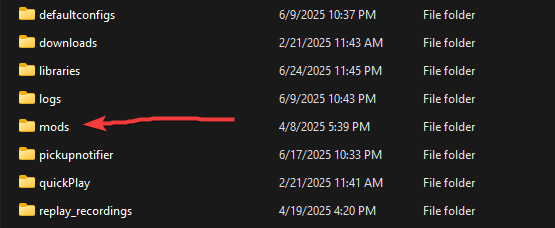
Please open it and add the mods you have downloaded. After that, close the Explorer window.
Step 3: Run the Game
You are at the last step, launching the game. Now you need to launch the Minecraft Launcher. You should see a new profile named “Forge”.
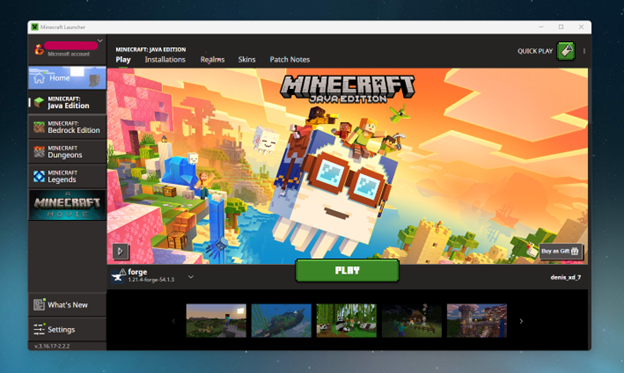
Now click “Play” and wait for your game to start. After your game launches, join or create a single-player world, and if you followed all the steps correctly, you should have your mods enabled. I’ve downloaded a mod that adds some backpacks to my game; as you can see, it works.
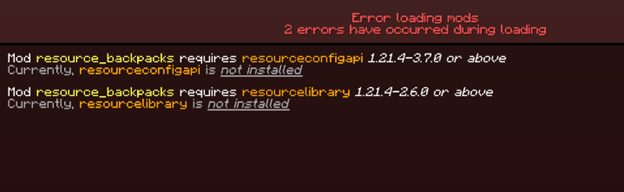
If something went wrong or your mods don’t work, review all the steps and check for any missing mods. Some mods require additional mods to work. Like this:
II. Fabric:
Let’s start setting up Fabric for a singleplayer world. Here are the simple steps to use Fabric mods in a single-player survival world.
Step 1: Install Fabric
Go to the Fabric Website and download the Windows installer. Fabric doesn’t require the user to select their version on the website; it can only be done after running the installer.
After the download is finished, run the installer.
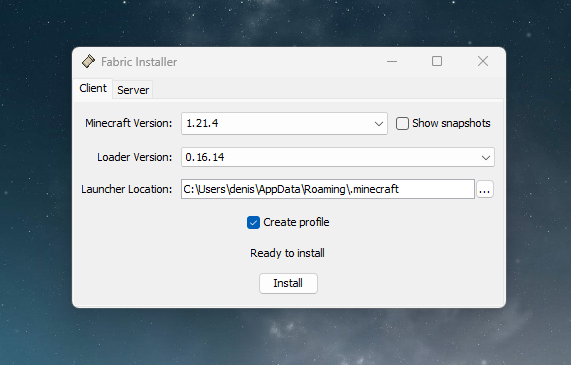
Now you need to select the “Client” tab, select the version you want to use, and check the “Create profile” box. Then click “Install”.
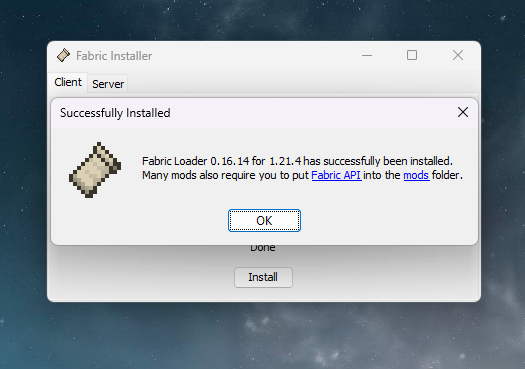
Now, you should see a pop-up confirmation that also mentions installing the Fabric API. Click on the “Fabric API” text and download the mod (make sure it’s the same version as the one you’ve selected to install).
After that, click on “OK”.
Step 2: Add Mods
Once again, you can find almost any mod possible on these two sites:
Make sure to pick mods that are compatible with the Fabric API.
After you have picked your favourite mods, you need to add them to your game files.
First, press Win + R on your keyboard. You should see a Run window open that you can type in.
Type “%appdata%” and press Enter on your keyboard. You should see a new window appear. We are doing this so we can access the mods folder to add our mods.
Now, find the folder named “.minecraft” and open it.
You should find a folder named “mods” there. If not, don’t worry; create a new folder and name it “mods”.
Please open it and add the mods you have downloaded. After that, close the Explorer window.
Step 3: Run the Game
You are at the last step, launching the game. Now you need to launch the Minecraft Launcher. You should see a new profile named “Fabric-loader”.

Now click “Play” and wait for your game to start. After your game launches, join or create a single-player world, and if you followed all the steps correctly, you should have your mods enabled. I’ve downloaded a mod that adds a 3D totem of undying to my game; as you can see, it works.
If something went wrong or your mods don’t work, review all the steps and check for any missing mods. Some mods require additional mods to work.
III. NeoForge:
Let’s start setting up NeoForge for a singleplayer world. Here are the simple steps to use Fabric mods in a single-player survival world.
Step 1: Install NeoForge
Go to the NeoForge Website and download the installer. You can choose any version, but I will select version 1.21.4 in this blog because it’s more compatible with more mods.
After downloading your version, you must run the installer. After running the installer, you should see a pop-up window with multiple options, something like this.
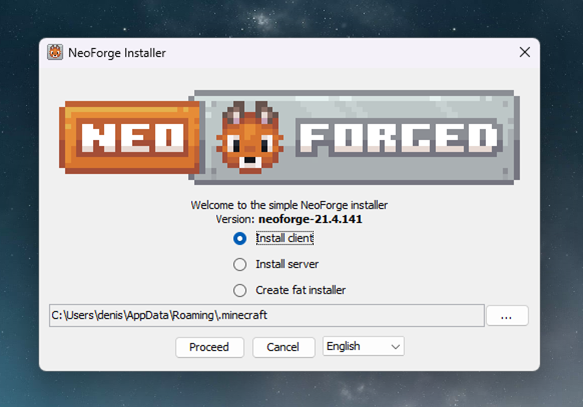
Now, you need to select “Install client” and then click “Proceed”.
After the program completes the installation, you should see a pop-up confirmation like this one.
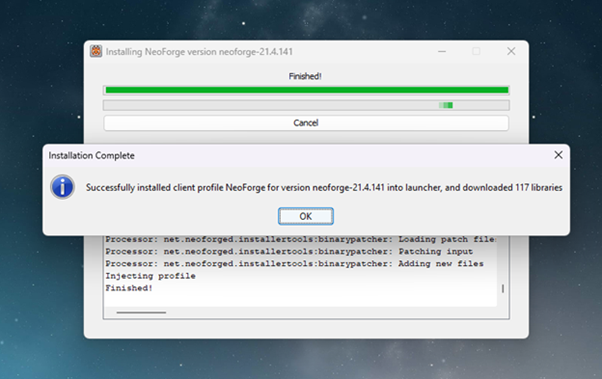
Now, click “OK”, and you have successfully installed the NeoForge client in your Minecraft files. Yipeee!
Step 2: Add mods
Once again, you can find almost any mod possible on these two sites:
Make sure to pick mods that are compatible with the NeoForge API.
After you have picked your favourite mods, you need to add them to your game files.
First, press Win + R on your keyboard. You should see a Run window open that you can type in.
Type “%appdata%” and press Enter on your keyboard. You should see a new window appear. We are doing this so we can access the mods folder to add our mods.
Now, find the folder named “.minecraft” and open it.
You should find a folder named “mods” there. If not, don’t worry; create a new folder and name it “mods”.
Please open it and add the mods you have downloaded. After that, close the Explorer window.
Step 3: Run the Game
You are at the last step, launching the game. Now you need to launch the Minecraft Launcher. You should see a new profile named “NeoForge”.
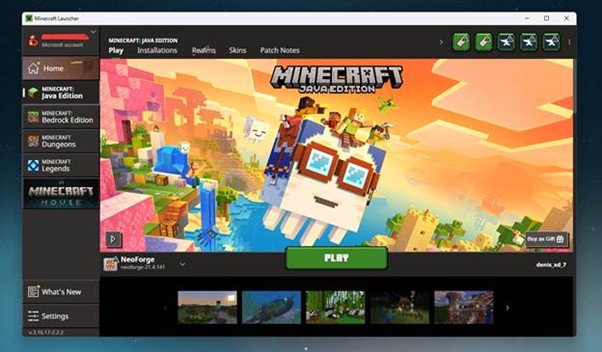
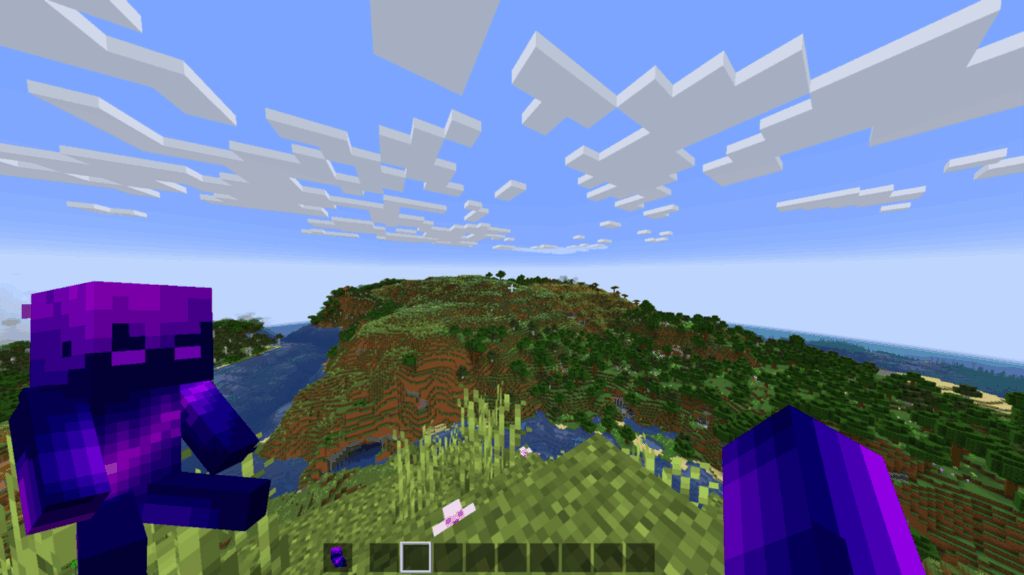
Now click “Play” and wait for your game to start. After your game launches, join or create a single-player world, and if you followed all the steps correctly, you should have your mods enabled. I’ve downloaded a mod that adds some nice guns to my game; as you can see, it works.

If something went wrong or your mods don’t work, review all the steps and check for any missing mods. Some mods require additional mods to work.