

When playing Minecraft, you can play either locally or on a server. Playing locally means you are all playing in the same room on a shared world. However, if you want to be able to play in a shared world outside of your home, you need a server.
Starting a server means the world will be online 24/7, so your friends can join the server anytime, even when you are away. These are two options to create a Minecraft server on PS5. You can either use the built-in Minecraft Realms option or use a hosting provider (like Cybrancee).
In other words, here is how to create a Minecraft Server on PS5.
Option 1: Creating a Minecraft Realm
Minecraft Realms is the easiest way to get a server running on PS5, as it’s built directly into the game. To create a Minecraft Realm on PS5, open Minecraft and sign in to your Microsoft account if you haven’t already. From the main menu, select “Play” and navigate to the Realms tab. Select “Add/Join a Realm” and then click “Add a Realm Subscription”.
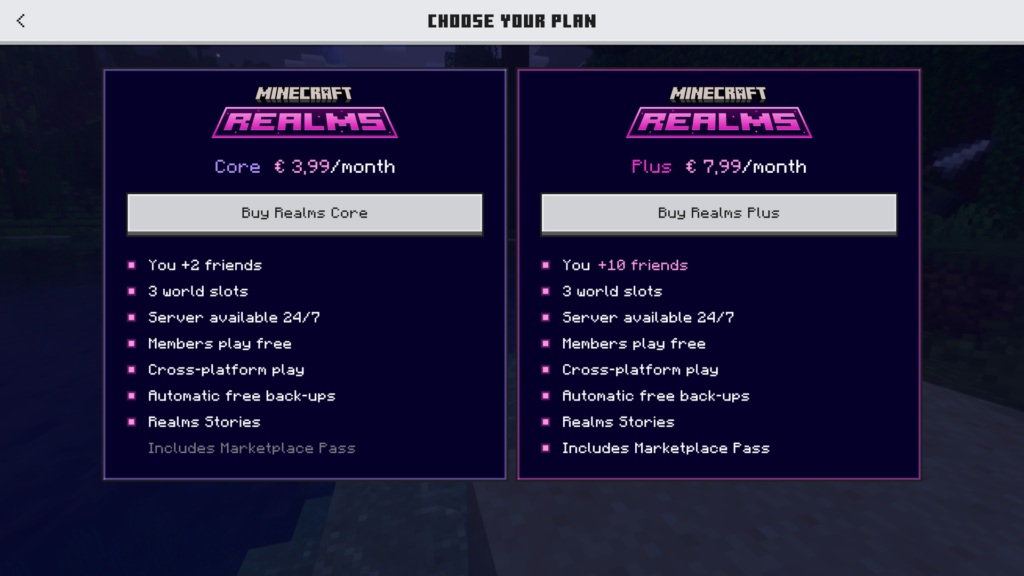
You’ll then be prompted to choose a plan. Both plans include 24/7 access, a 30-day free trial to test the service (only for new subscribers to Realms), and cross-platform play. The server will always stay online, even when you are away from your PS5. Friends who are on PC (Bedrock edition), Nintendo Switch, Xbox, and other Bedrock Edition devices can also join your realm. Plus, included in both plans are three world slots. This allows you to switch between different worlds or game modes without losing any data.
However, the core plan only allows you and up to two friends in the world simultaneously. The Plus plan allows up to ten friends to be online simultaneously and also includes the marketplace pass. The pass gives you free access to themed worlds, texture packs, mini-games, skin packs, and more.
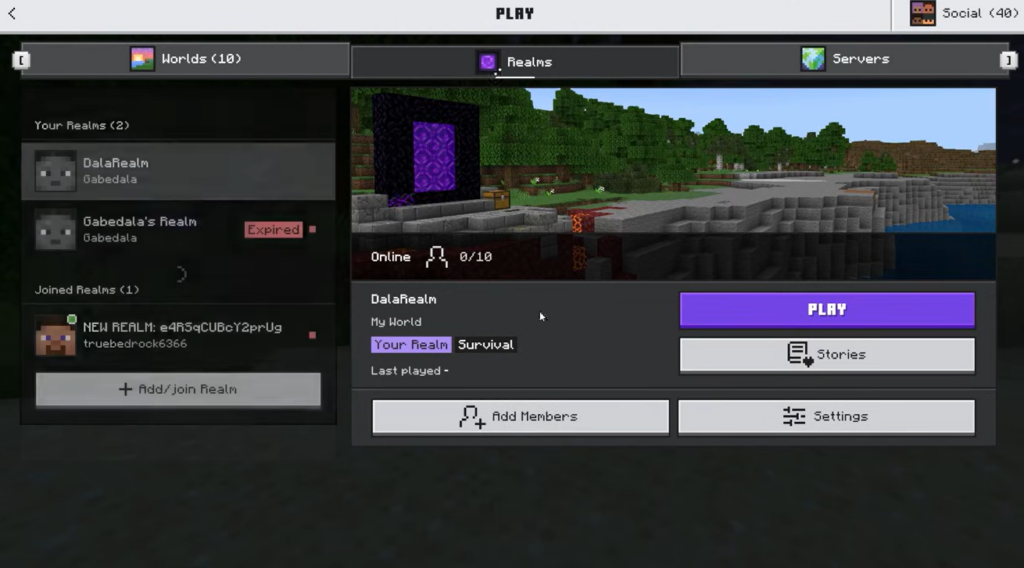
Once you choose a plan, purchase the plan, and move into configuring your Realm’s settings. First, you need to name your realm, select a world, and adjust the world settings. Choose a Realm name that you and your friends will remember and recognize. When picking a world, you can choose between generating a brand new world, choosing from a template from the marketplace (if you bought a map or have Realms Plus), or duplicating an existing world you’ve already been playing on and attaching it to the Realm. Make sure you set your preferred difficulty level and what game mode you want the Realm to be on in your world settings.
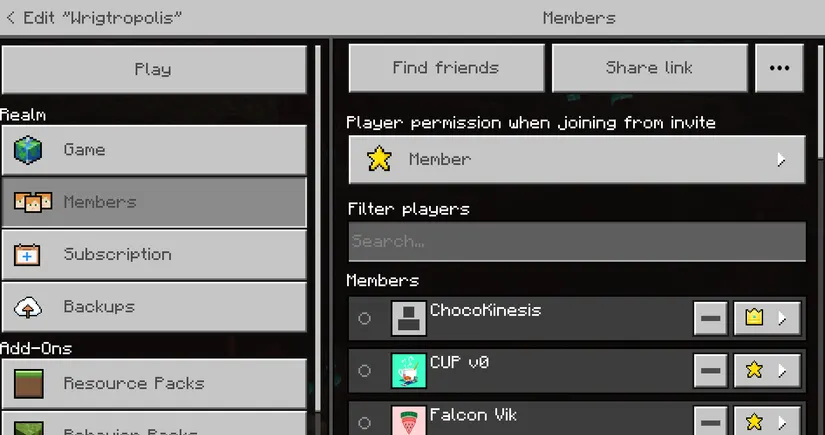
To invite your friends to the Realm, select Members and either search for your friends by their username or send them a unique share URL. If you sent an invite by providing their username, they will see an invite in their inbox letting them know they’re invited to your Realm when they launch Minecraft. If you sent them a shared link, clicking the link will automatically add the Realm to their Realms list.
The owner of a Realm can also assign players as admins to help manage the Realm. Admins are able to adjust the members list by adding or removing members and configuring the Realm settings. They cannot manage the subscription to the Realm or promote other members to admin; only the owner of the Realm can adjust those settings.
Limitations of Minecraft Realms

Although Realms works well with small groups, it’s extremely limiting.
Even on the plus plan, Realms limits you to ten players concurrently. If you have a large friend group, a Realm won’t be able to support everyone at once. You are also unable to make changes to the server’s core configuration files.
Basically, Minecraft Realms forces you into the vanilla Minecraft experience with limited options. If you want more than ten players or any customization, Minecraft Realms is not worth it.
Option 2: Using a Hosting Provider
If Minecraft Realms does not suit your needs, consider using a hosting provider. A hosting provider runs your server in a data center for a low monthly price. Similar to Minecraft Realms, your world will always be online 24/7, even when you’re not online. However, with a server, you have more options than Realms, since you get access to a server control panel to view and manage everything on your server.
For PS5 players, you will need a host that supports Bedrock Edition, since that is the edition PS5 runs on. We recommend using Cybrancee as the hosting provider, as they’re ranked #1 in the top 5 best Minecraft server hosting providers. They offer Minecraft Bedrock Edition hosting with high-performance Ryzen CPUs and NVMe SSD storage. They also have a 90-day money-back guarantee, which is three times more than Minecraft Realm’s free trial.
Choosing the right plan
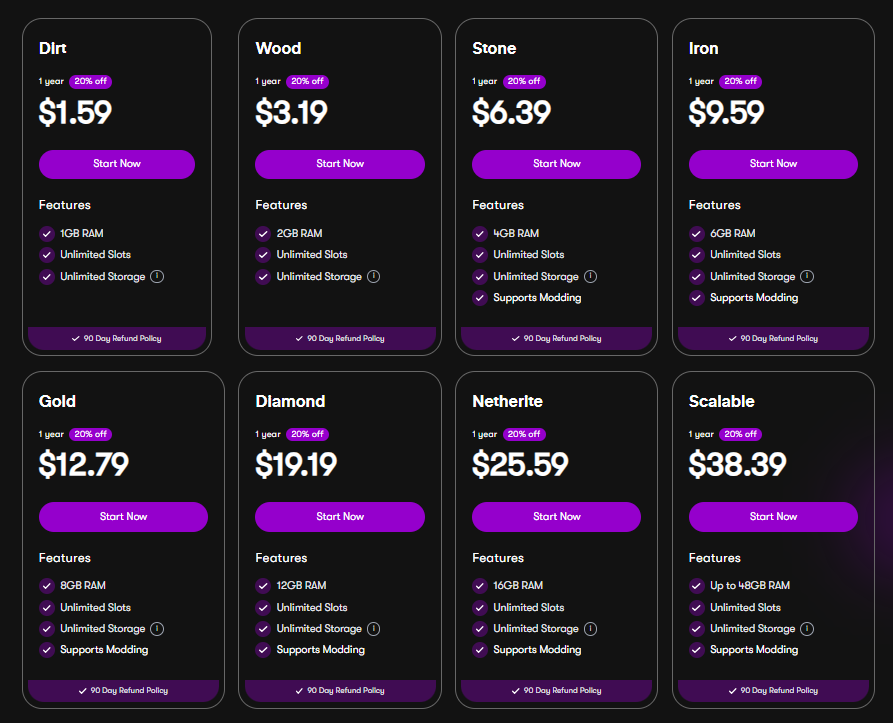
Most hosting providers, like Cybrancee, list all their plans by RAM. Server RAM is the biggest factor in Minecraft server performance. If your server has more than 10 players online concurrently, it’s recommended to have at least 4 GB of RAM. However, if your server has fewer than 10 players online concurrently, consider picking a plan with 2 or 4 GB of RAM.
When in doubt, pick a plan with more RAM than what you think you might need. If you’re not sure which plan you need, Cybrancee has a Minecraft Server RAM Calculator that can help guide you towards a plan based on expected player counts.
Even though RAM is an important factor, there are other factors to consider, such as storage and CPU.
As players explore chunks, server storage increases. Larger worlds with more players will generate more data quickly than servers with small worlds and fewer players. SSDs are way faster than traditional hard drives for chunk loading and saving, which is what most hosting providers (like Cybrancee) use. Specifically, Cybrancee uses NVMe SSDs for server storage.
CPU also matters in server performance. A modern single-core processor handles more players and complex redstone builds far better than a multi-core setup. Look for providers that are transparent about their processors, such as Cybrancee, which runs on high-performance Ryzen CPUs.
How to Set Up Your Server
Step 1 – Choose a plan: Based on your expected player counts, choose a server plan based on your expected player counts. If you know you’ll have the server for 6 months or longer, consider paying semi-annually or annually for a discount.
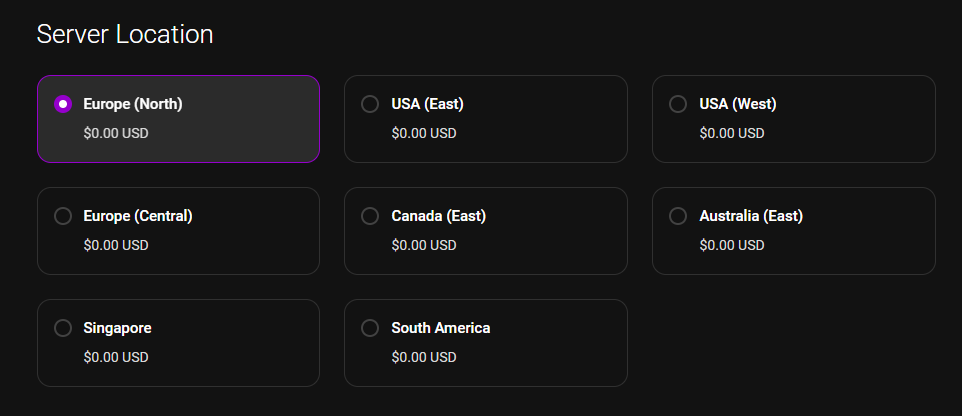
Step 2 – Pick a server location close to you and your players: Choose the location closest to you and your players for the best performance. If you pick a location that is far away, you’ll likely experience more lag than usual. Cybrancee has servers across North America, Europe, Canada, Australia, Singapore, and South America.
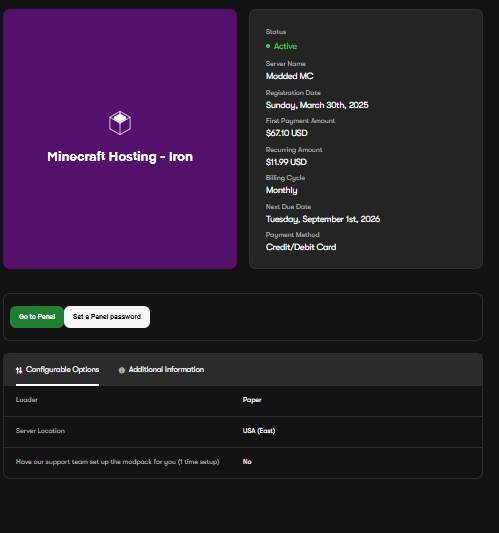
Step 3 – Purchase the plan and access the control panel: Once you pick your server location, purchase the server plan. After you complete your purchase, click the “Go to Panel” button to go directly into the panel. In the panel, you’ll be able to start and stop your server, manage server files, view the performance of the server, and more.
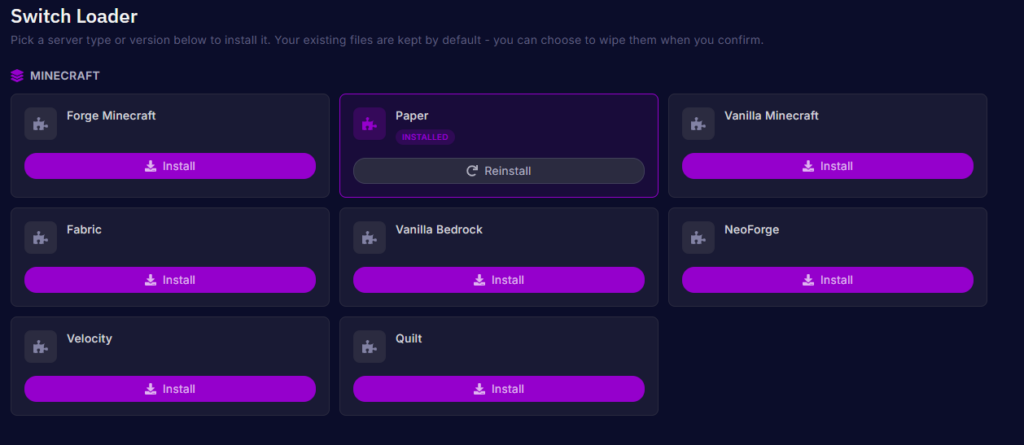
Step 4 – Install the Vanilla Bedrock server software: From the control panel, select the “Switch Loader” tab. You’ll then see a list of Minecraft server software. Select “Vanilla Bedrock” and install it. Double-check to make sure it is NOT Java Edition. If it is, you need to change it.
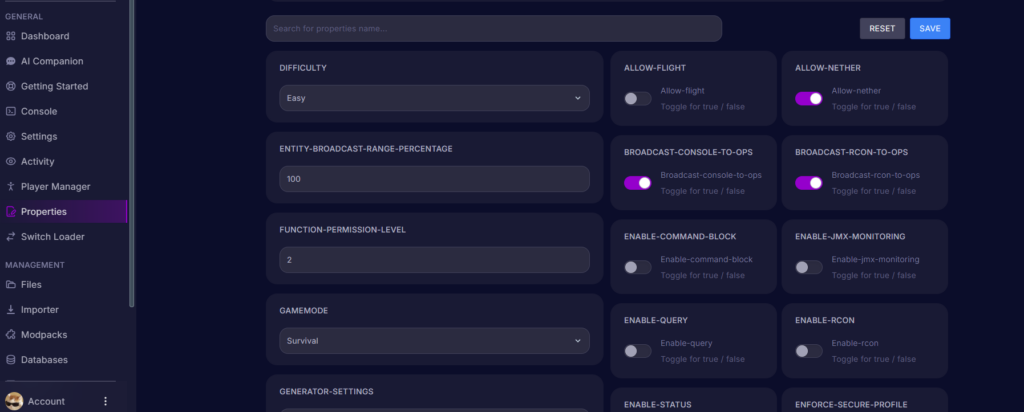
Step 5 – Configure your settings: Open the server.properties file and configure the server name, max player count, game mode, and all other details you wish to configure. Make sure you click “Save” to save your changes.

Step 6 – Go live: Once you have configured the settings to your preferences, start your server from the control panel. Under the server name, you will find the IP address. Click on it to copy it to your clipboard. This is what you will give to players so they can join. Note that both the IP and port are copied to the clipboard and are separated by a colon.
Joining on PS5 with BedrockConnect

Unfortunately, due to strict security policies by PlayStation, players are not able to manually add third-party servers to their server list the same way PC and mobile players can.
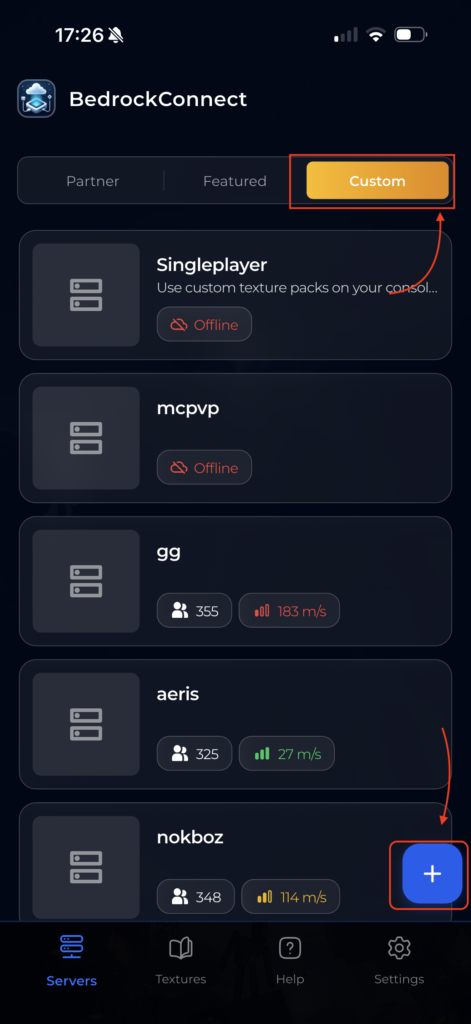
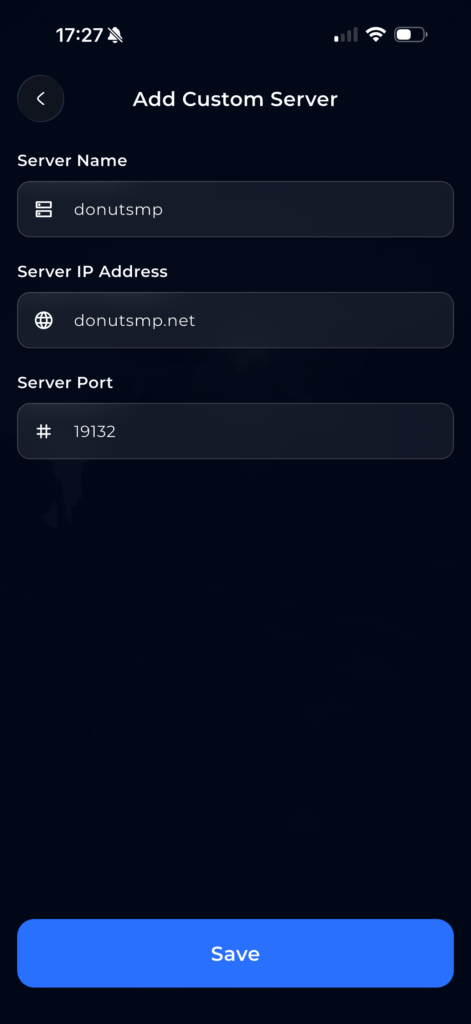
The BedrockConnect app fixes this problem. When you download the app, enter the server IP and port from the server panel into the app and add the server. Tap the server you just added and click the start button.
If you’re on an iOS device, you will see a pop-up asking to find and connect to devices on your local network. Make sure you tap “Allow”. Otherwise, the app can’t communicate with your console, and you won’t be able to join your server.
You must also have an active PlayStation Plus membership to join using BedrockConnect. Without one, you won’t be able to join your server.
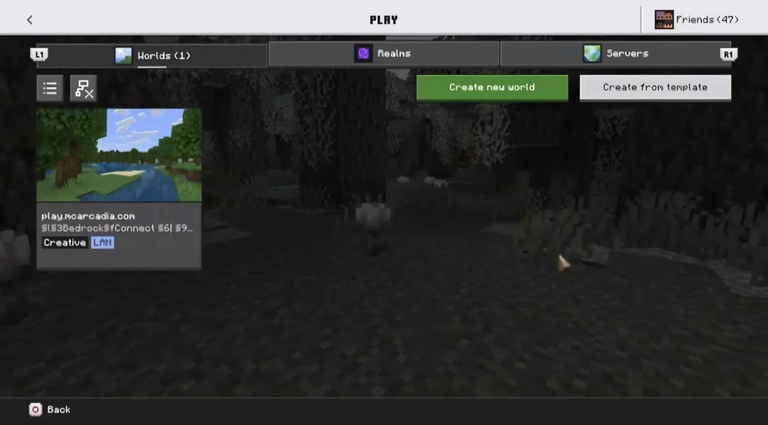
Now, launch Minecraft on your console and go to your worlds tab. Find the server on the world list and click it to join.
If you don’t see the server on the world list, make sure your device that is running the app is on the same Wi-Fi network as your console. You can double-check this by going into your device settings and console settings. Also, make sure you’re not using a VPN, mobile data, or a guest Wi-Fi network on both your console and device running BedrockConnect.
How to Join The Server For Non-Console Players
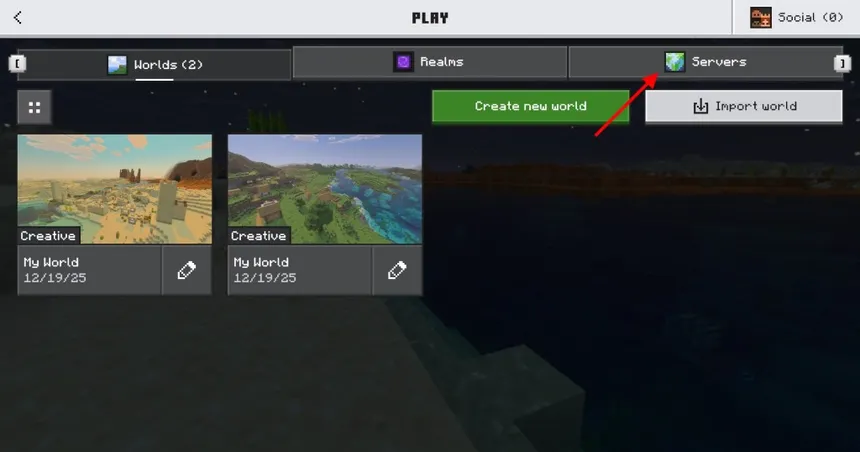
To join a Bedrock Edition server on non-console devices, launch Minecraft Bedrock Edition and click the Servers tab. Scroll down and find the “Add Servers” button. Enter the server name, IP address, and port. Save it, and the server will be added to your list. Select the server and click “Join Server” to connect.
If you or your players are not able to connect to the server, check to see if the IP or port is mistyped, the server is stopped in the control panel, or you didn’t whitelist yourself or your players if one is turned on. All of these can be checked and corrected in the Cybrancee control panel.
Control Panel Features
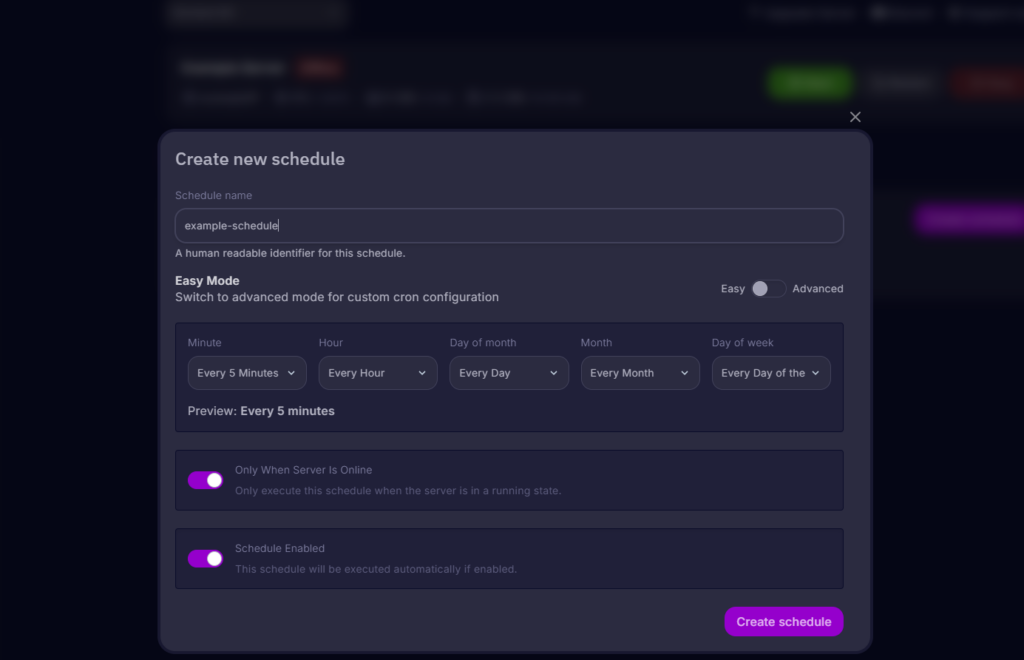
Scheduled backups: You can set up automatic backups on a schedule. If something goes wrong, you can restore your server to a previous state at any time in the backups tab in your panel. You can also download the backups or lock them. When you lock a backup, it prevents it from being deleted accidentally or automatically (if you use the scheduling tool). You can optionally create a backup manually by clicking “Create backup” in the backups tab.
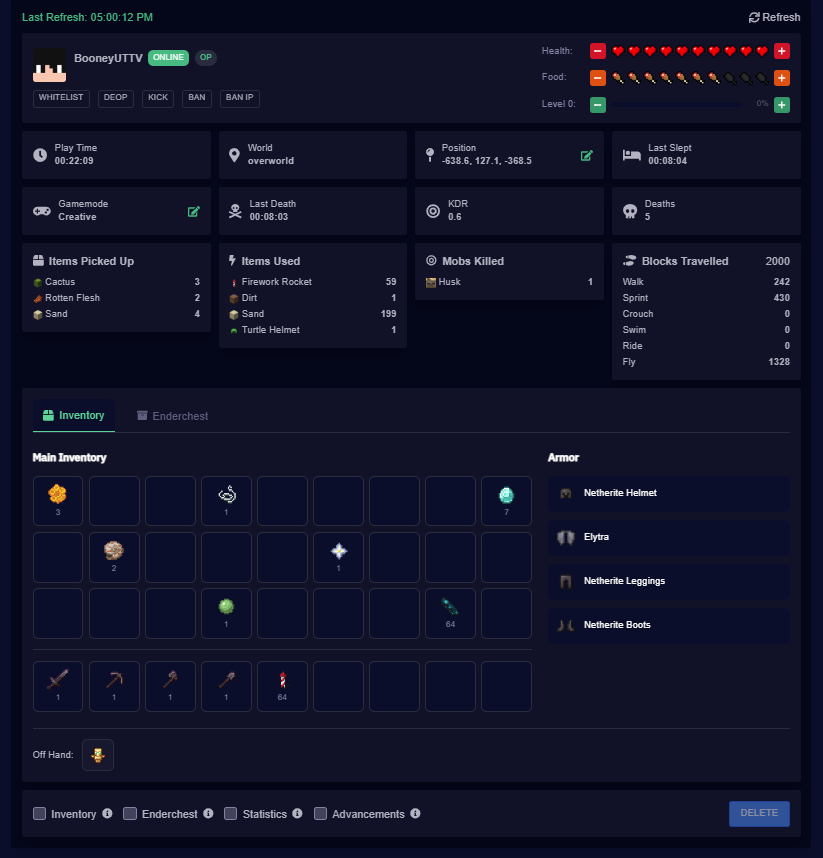
Player manager: From the player manager, you can click on any player that has joined your server and view their inventory, enderchest, playtime, health, and more. You can also manage their permissions, kick, or ban them right from the manager without having to use the server console.
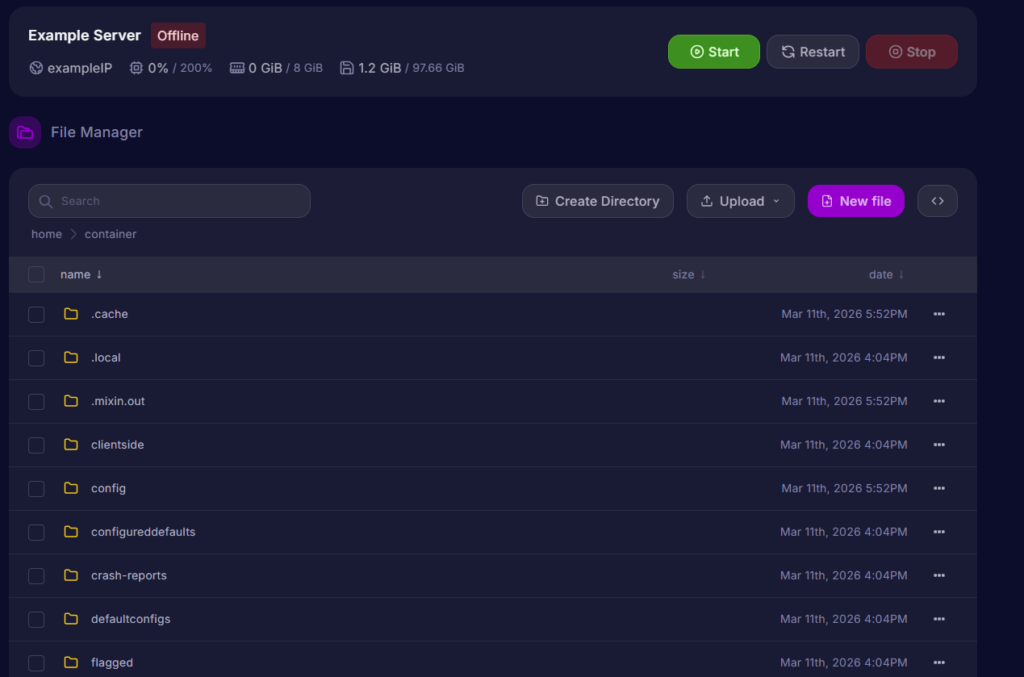
File manager: You can access and edit all server files directly in the panel.
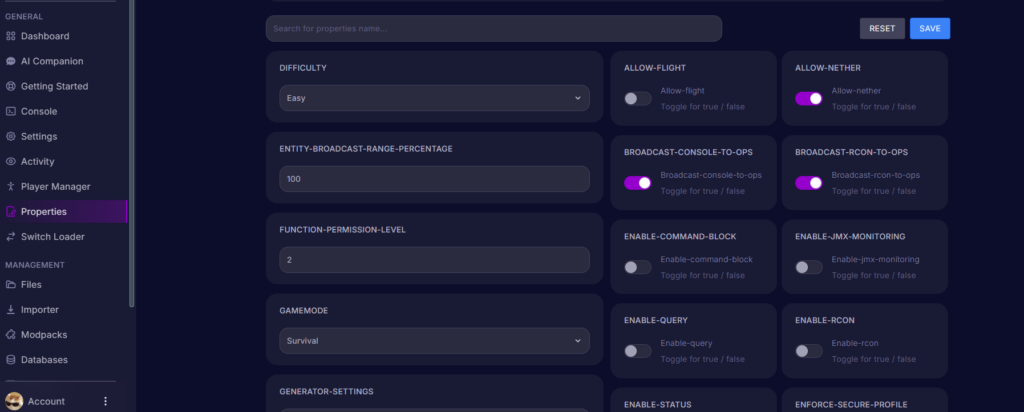
Properties: Control how the world behaves by adjusting the spawning of structures, game rules, and more. You can adjust the world generation, max player count, command blocks, and more within the Properties tab of the panel.
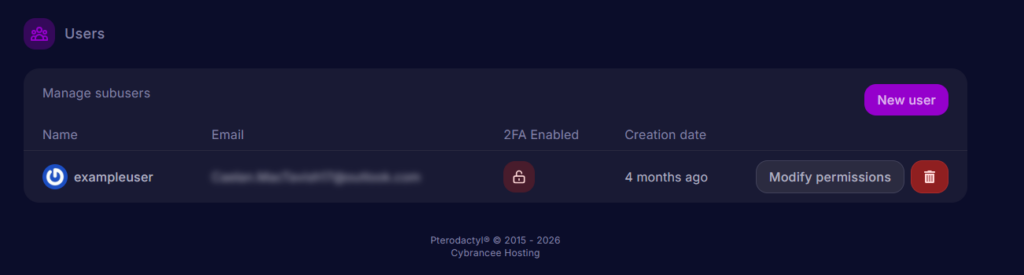
Users: If you would like to add someone to help manage the server, you can do so in the Users tab. You may also assign certain permissions to them, such as only being able to see the server console or having server file access.
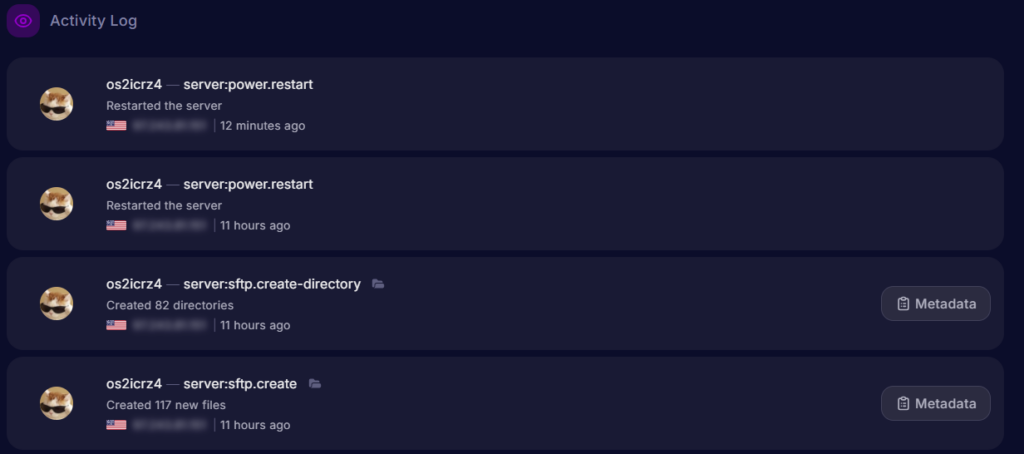
Activity Log: You can view all actions that were taken on your server in the activity log. This is especially useful when you have multiple people added to manage your server.
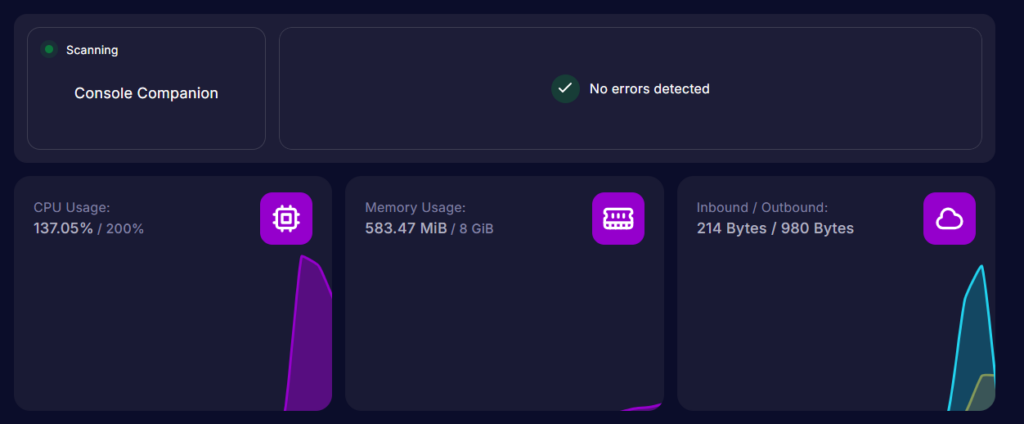
Server performance monitor and console companion: The console companion will scan your console for errors and will notify you if any are detected, and how to correct them. Plus, the server performance monitor lets you see your server’s CPU and memory usage in real-time.
Best practices
Keep the server updated: As Minecraft releases updates and bug fixes regularly, make sure you stay up to date for better performance and security.
Set up a whitelist: To prevent strangers from joining your server, turn on a whitelist. Make sure to add your friends or other people you want on your server so they can still join.
Monitor your TPS: A server’s TPS (ticks per second) usually sits around 20. If it isn’t around 20, it usually means something is overloading the server, like a farm with many mobs or a large redstone contraption.
Back up regularly: Set up automatic backups and store them separately from your server files. You can set this up using Cybrancee’s scheduling tool.
Know when to upgrade: A consistently low TPS and a growing player count are serious signs to consider upgrading your server’s RAM to maintain good performance.
Summary
There are two ways to run a server on PS5.
Realms is the easiest option as it’s built into the game, has no advanced technical setup, and works well with small friend groups. However, you cannot modify any of the server configuration files, which forces you into the vanilla experience.
However, a hosting provider gives you more control. With Cybrancee’s Minecraft server hosting, setup takes only a few minutes, the performance is reliable, and you are not limited to how many players can join.
For PS5 players, you need the BedrockConnect app and a PlayStation Plus membership due to PlayStation’s restrictions on manually adding servers. Non-console players on Bedrock can connect directly to servers using the Servers tab without using BedrockConnect.
Happy Gaming!