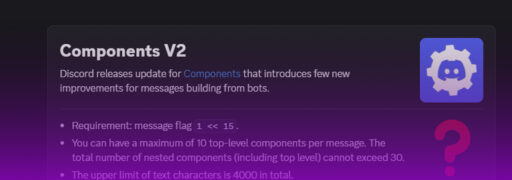

Introducing Components V2!
If you have been using Discord for a long time, you have likely tried to code a Discord bot. Now here comes the interesting part, in your journey, you probably encountered these things called “components” which include buttons, dropdown menus, embeds, etc. These components are old and can’t be used in many ways, but about a month ago, Discord decided to release an update. This new update is called Components V2, and it comes with a new look and a new way to work with components. Sounds interesting? If so, let’s dive into them!
What is Components V2?
Alright, let’s get down to it. Components V2 creates a new method for developers to offer a modern look to their Discord servers and enrich the user experience. It’s an update that lets us create new styles of messages by assembling components. Text, images, files, buttons, etc., can be placed (almost) everywhere and in (almost) any order!
Imagine being able to style the output of your bot. Make interactive menus cleaner, more interesting, and use a modern design that expresses your server theme. Sounds cool, right? Let’s get started!
Limitations of Components V2
Unfortunately, this update comes with some limitations, although these are not very important, it’s necessary to mention them. Here are the limitations:
- The ability to use content, embeds, stickers, and the poll field will be disabled.
- No support for audio files.
- No simple text preview for files.
- No embeds for URLs.
Important!
In this blog we are going to use the latest version of discord.js, and we assume that you know the basics of discord.js and that you have knowledge about creating a Discord app in the Discord Developer Portal
1. Getting Started
If you are a developer, I am sure that you already have a Discord Bot with some commands or functions. So, before we begin with creating our components, make sure you grab your Bot’s TOKEN and Client ID.
2. Creating Your Components
Now you have your bot’s TOKEN and Client ID, we are now ready to build some commands with these new components
Here is what we are going to use in this blog:
- Buttons: Very easy to use and have an infinite range of functions.
- Dropdown Menus: Also, quite easy to use and can be used to make interactive menus for people to use (e.g., selecting a role, selecting a ticket category)
- Separators: A new component added in this update, and as the name suggests, it separates text, buttons, files, etc.
- Containers: This is the most interesting component. Containers allow you to give a new face to the menu that you are building. Now, you can use
separators,buttons,text,thumbnails, and the rest in these containers.
Some important points to mention before we begin to code these components.
First point, if we code these components without the new flag, the bot will send them as legacy components and not the V2 ones, so we need to enable them by adding IsComponentsV2 message flag (I will show you this in just a bit)
Second point, this update comes with a new feature. Buttons and dropdown menus can now have specific IDs.
Now, we will begin with the buttons
In this update, we can now place buttons anywhere we like, plus they have a new modern look. Here is a simple example of discord.js command that uses Components V2.
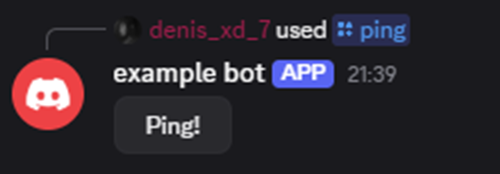
This is a simple slash command that sends a button with the label “Ping!”, after the button is pressed, the bot replies with “Pong!” and the latency of the bot is displayed.
// Calling our requierments
const { Client, GatewayIntentBits, REST, Routes, SlashCommandBuilder, ActionRowBuilder, ButtonBuilder, ButtonStyle } = require('discord.js');

 // Setting our variables
const TOKEN = 'YOUR_BOT_TOKEN';
const CLIENT_ID = 'YOUR_CLIENT_ID';

const client = new Client({
  intents: [GatewayIntentBits.Guilds],
});

client.once('ready', async () => {
  console.log(`✅ Logged in as ${client.user.tag}`);

  // Register the /ping command
  const commands = [
    new SlashCommandBuilder()
      .setName('ping')
      .setDescription('Sends a ping button')
      .toJSON()
  ];

  const rest = new REST({ version: '10' }).setToken(TOKEN);
  await rest.put(Routes.applicationCommands(CLIENT_ID), { body: commands });
  console.log('✅ Slash command registered');
});

  // When the command is used it sends the button
client.on('interactionCreate', async interaction => {
  if (interaction.isChatInputCommand() && interaction.commandName === 'ping') {
    const components = [
        new ActionRowBuilder()
            .addComponents(
                new ButtonBuilder()
                    .setStyle(ButtonStyle.Secondary)
                    .setLabel("Ping!")
                    .setCustomId("ping_button"),
            ),
];

    await interaction.reply({ components: components, flags: MessageFlags.IsPersistent | MessageFlags.IsComponentsV2}); // As we can see, we've set the messsage flag to IsComponentsV2 so we can use them
  }
    // Sends the response after the button was clicked
  if (interaction.isButton() && interaction.customId === 'ping_button') {
    const ping = client.ws.ping;
    await interaction.reply({ content: `🏓 Pong! Latency is ${ping}ms`, ephemeral: true });
  }
});

client.login(TOKEN);
Now let’s start the bot and see what happens. As you can see, the command gets registered and can be used.
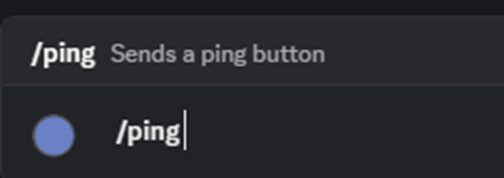
After we use the command, you can see that the bot sends the button that has a new look.
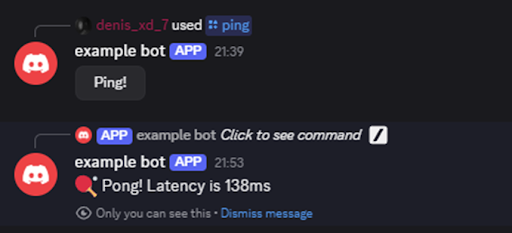
After we press the button, you can see that the bot replies to the message and sends the specific message that you have set, along with the latency.
Now, the second component we will explore is dropdown menus
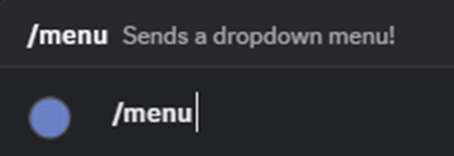
Here we have a simple command that sends a dropdown menu that we can use to select different custom options.
 // Calling our requierments
const { Client, GatewayIntentBits, REST, Routes, SlashCommandBuilder, ActionRowBuilder, MessageFlags, StringSelectMenuBuilder, StringSelectMenuOptionBuilder } = require('discord.js');

 // Setting our variables
const TOKEN = 'YOUR_BOT_TOKEN';
const CLIENT_ID = 'YOUR_CLIENT_ID';

const client = new Client({
  intents: [GatewayIntentBits.Guilds],
});

client.once('ready', async () => {
  console.log(`✅ Logged in as ${client.user.tag}`);

  // Register the /menu command
  const commands = [
    new SlashCommandBuilder()
      .setName('menu')
      .setDescription('Sends a dropdown menu!')
      .toJSON()
  ];

  const rest = new REST({ version: '10' }).setToken(TOKEN);
  await rest.put(Routes.applicationCommands(CLIENT_ID), { body: commands });
  console.log('✅ Slash command registered');
});

  // The bot sends dropdown menu after the command was used
client.on('interactionCreate', async interaction => {
  if (interaction.isChatInputCommand() && interaction.commandName === 'menu') {
    const components = [
        new ActionRowBuilder()
            .addComponents(
                new StringSelectMenuBuilder()
                    .setCustomId("dropdown_menu")
                    .setPlaceholder("Plan selector")
                    .addOptions(
                        new StringSelectMenuOptionBuilder()
                            .setLabel("Discord Bot hosting")
                            .setDescription("(cheapest option)")
                            .setValue("discord_hosting")
                            .setEmoji({
                                name: "🤖",
                            }),
                        new StringSelectMenuOptionBuilder()
                            .setLabel("Game Hosting")
                            .setValue("game_hosting")
                            .setDescription("(best resources)")
                            .setEmoji({
                                name: "🎮",
                            }),
                        new StringSelectMenuOptionBuilder()
                            .setLabel("Web hosting")
                            .setValue("web_hosting")
                            .setEmoji({
                                name: "🌐",
                            }),
                    ),
            ),
];

    await interaction.reply({ components: components, flags: MessageFlags.IsPersistent | MessageFlags.IsComponentsV2 }); // As we can see, we've set the messsage flag to IsComponentsV2 so we can use them
  }

  if (interaction.isStringSelectMenu() && interaction.customId === 'dropdown_menu') {
    const selection = interaction.values[0];
    let response;
    if (selection === 'discord_hosting') {
      response = '🤖 You selected **Discord Bot Hosting**.';
    } else if (selection === 'game_hosting') {
      response = '🎮 You selected **Game Hosting**.';
    } else if (selection === 'web_hosting') {
      response = '🌐 You selected **Web Hosting**.';
    }
    await interaction.reply({ content: response, ephemeral: true });
  }
});

client.login(TOKEN);
Now let’s start the bot and see what happens. As you can see, the command gets registered and can be used.
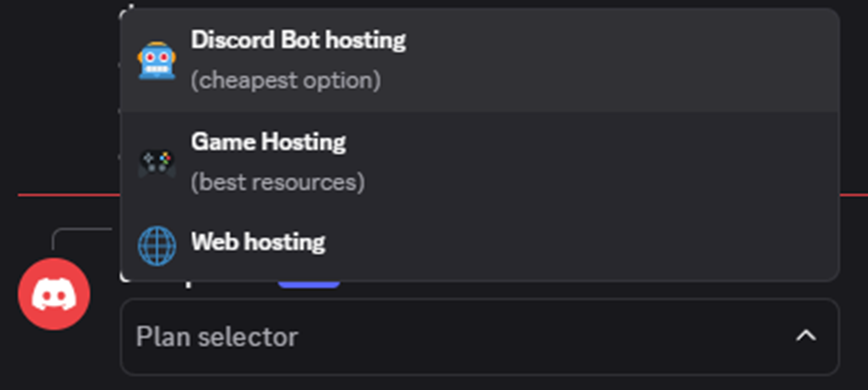
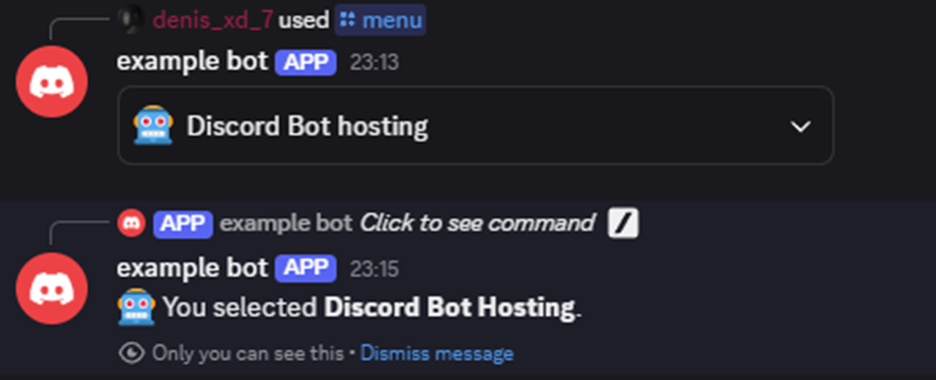
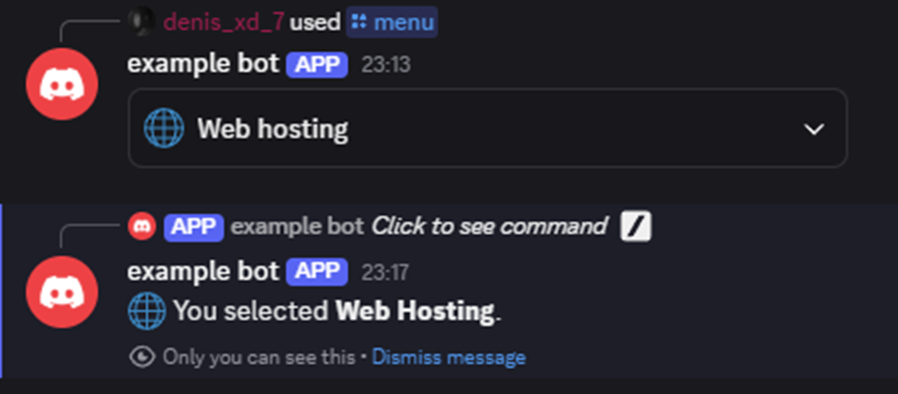
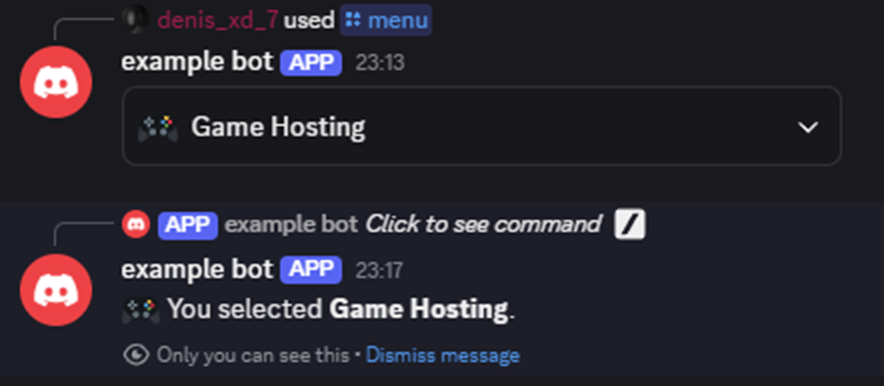
After we use the command, the dropdown menu gets sent and we can use it like a normal menu, but now the options have a description, and a new modern look.
If we select any option, we can see that the bot sends a confirmation message of the option that we’ve selected.
Now, of course, this doesn’t do much; it just tells us what we’ve selected, but you can develop a more advanced command that gives a role to the user or creates a voice channel that they can control. Your imagination is your limit; you can do a lot of things with these new dropdown menus!
Last but not least: Separators and containers.
Separators and containers unlock a much more customizable and modern alternative to an embed. Let’s dig into it!
 // Calling our requierments
const { Client, GatewayIntentBits, REST, Routes, SlashCommandBuilder, ActionRowBuilder, MessageFlags, TextDisplayBuilder, SeparatorBuilder, SeparatorSpacingSize, ButtonBuilder, ButtonStyle, ContainerBuilder } = require('discord.js');

 // Setting our variables
const TOKEN = 'YOUR_BOT_TOKEN';
const CLIENT_ID = 'YOUR_CLIENT_ID';

  // Register the /plan command
  const commands = [
    new SlashCommandBuilder()
      .setName('plan')
      .setDescription('Sends a container plan!')
      .toJSON()
  ];

  const rest = new REST({ version: '10' }).setToken(TOKEN);
  await rest.put(Routes.applicationCommands(CLIENT_ID), { body: commands });
  console.log('✅ Slash command registered');
});
  // The bot sends the container after the command was used
client.on('interactionCreate', async interaction => {
  if (interaction.isChatInputCommand() && interaction.commandName === 'plan') {
    const components = [
        new ContainerBuilder()
            .addTextDisplayComponents(
                new TextDisplayBuilder().setContent("## Welcome to Cybrancee!"),
            )
            .addTextDisplayComponents(
                new TextDisplayBuilder().setContent("Please select the plan you want to join!"),
            )
            .addSeparatorComponents(
                new SeparatorBuilder().setSpacing(SeparatorSpacingSize.Small).setDivider(true),
            )
            .addActionRowComponents(
                new ActionRowBuilder()
                    .addComponents(
                        new ButtonBuilder()
                            .setStyle(ButtonStyle.Primary)
                            .setLabel("Discord Bot Hosting")
                            .setCustomId("plan_bot"),
                        new ButtonBuilder()
                            .setStyle(ButtonStyle.Success)
                            .setLabel("Game Hosting")
                            .setCustomId("plan_game"),
                        new ButtonBuilder()
                            .setStyle(ButtonStyle.Danger)
                            .setLabel("Web Hosting")
                            .setCustomId("plan_web"),
                    ),
            )
            .addSeparatorComponents(
                new SeparatorBuilder().setSpacing(SeparatorSpacingSize.Small).setDivider(true),
            )
            .addActionRowComponents(
                new ActionRowBuilder()
                    .addComponents(
                        new ButtonBuilder()
                            .setStyle(ButtonStyle.Link)
                            .setLabel("Visit our website!")
                            .setEmoji({
                                name: "🌐",
                            })
                            .setURL("https://cybrancee.com/"),
                    ),
            ),
];

    await interaction.reply({ components: components, flags: MessageFlags.IsPersistent | MessageFlags.IsComponentsV2 }); // As we can see, we've set the messsage flag to IsComponentsV2 so we can use them
}});

  client.on('interactionCreate', async interaction => {
  if (!interaction.isButton()) return;

  switch (interaction.customId) {
    case 'plan_bot':
      await interaction.reply({ content: '🤖 You selected **Discord Bot Hosting**.', ephemeral: true });
      break;
    case 'plan_game':
      await interaction.reply({ content: '🎮 You selected **Game Hosting**.', ephemeral: true });
      break;
    case 'plan_web':
      await interaction.reply({ content: '🌐 You selected **Web Hosting**.', ephemeral: true });
      break;
  }
});

client.login(TOKEN);
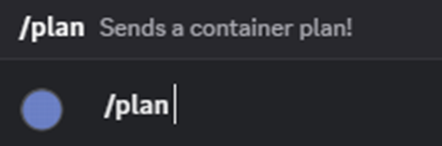
Now let’s start the bot and see what happens. The command (as always) gets registered and can be used.
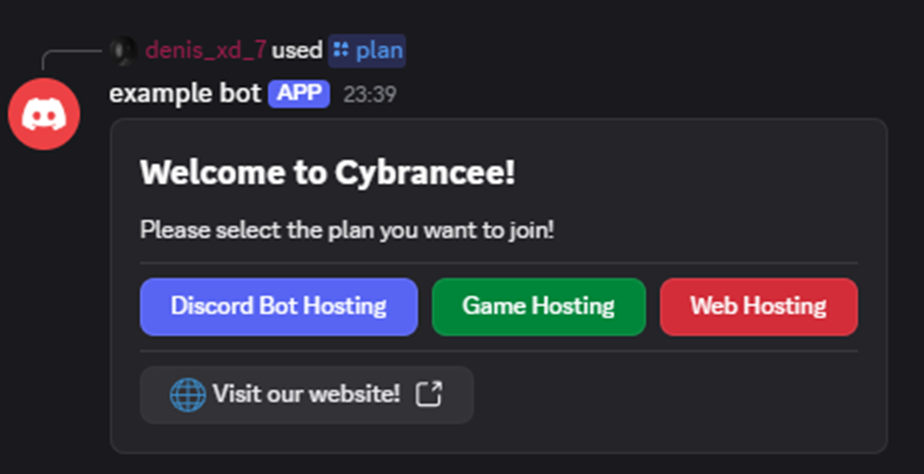
As you can see, the bot sends the container with the buttons and separators that we’ve set. I think you noticed already that we can now place buttons inside the container and with different colors. Very cool, right? This gives us an infinite number of possibilities.
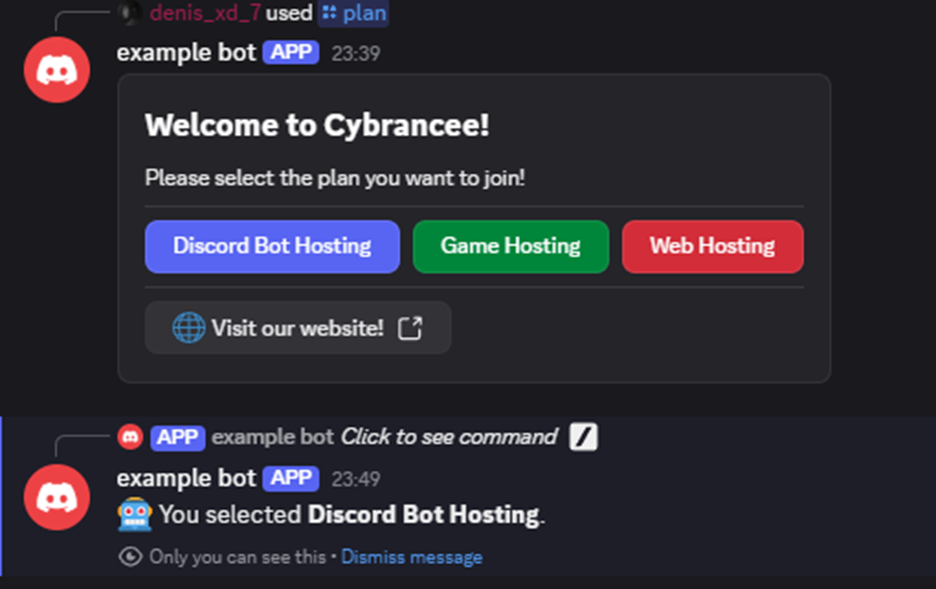
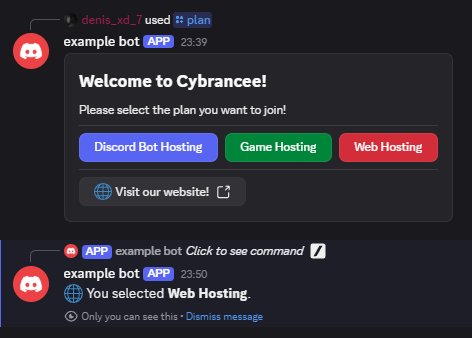
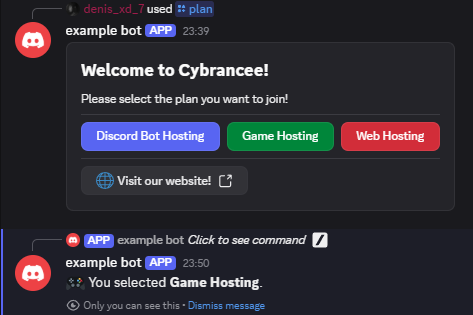
As always, if we press any of the buttons, it sends us a confirmation, and the link button sends us to the website.
But this is not all of it, just by adding this line of code when creating the container, you can mark it as a spoiler.
.setSpoiler(true)
If you encounter any problems making these manually, you can use this site to create your custom menus, containers, buttons, etc.
3. Testing and Feedback
Before rolling out these new features to your whole community, test them first. Test them by yourself or get a few users to test them and give you feedback. This will allow you to fix anything that does not work exactly right and to make changes.
Why Use Components V2?
You might ask yourself, “Do I really need this?” If you want to build up a big community or become the next best developer, then yes! Components V2 gives you new ways to make your community more interesting. It’s all about creating an interactive atmosphere where users can interact with each other.
Final Thoughts
Overall, Components V2 brought a huge improvement to how developers design interactive experiences in Discord. It feels like Discord has finally given developers like me the tools we’ve needed for a long time – more control, better structure, and cleaner code. Whether you’re building advanced Discord bots or just experimenting for fun, Components V2 makes the process smoother and more enjoyable. I genuinely believe it’s a must-try for anyone working with Discord bots.