

In a Minecraft server, there are only three worlds. These consist of the overworld, the Nether, and the End. Most server owners eventually want more than what’s built in Vanilla Minecraft, such as a superflat creative world where builders can build without having to gather materials, a dedicated PvP arena separate from the main survival world, or even a resource world that resets periodically and doesn’t affect the main world’s terrain.
Normally, adding worlds like these means running a second (or possibly a third) Minecraft server. This requires another hosting plan just to host more worlds.
Instead of purchasing and running multiple servers, you can use the Multiverse plugin to create multiple Minecraft worlds on one server and manage them in one place.
What is Multiverse?
The Multiverse core plugin allows you to create and manage your worlds using commands all in a single server, with the ability to customize each world’s rules, settings, and even inventories.
Multiverse is only supported on Spigot, Paper, Purpur, and Bukkit. If your server software is set to vanilla or other software, you need to switch it to one of the supported server software. It is highly recommended to use the Paper server software, as Multiverse is well optimized with Paper.
In this blog, we will use Cybrancee as the host, which provides a one-click install library to directly install Multiverse onto your server.
Installing
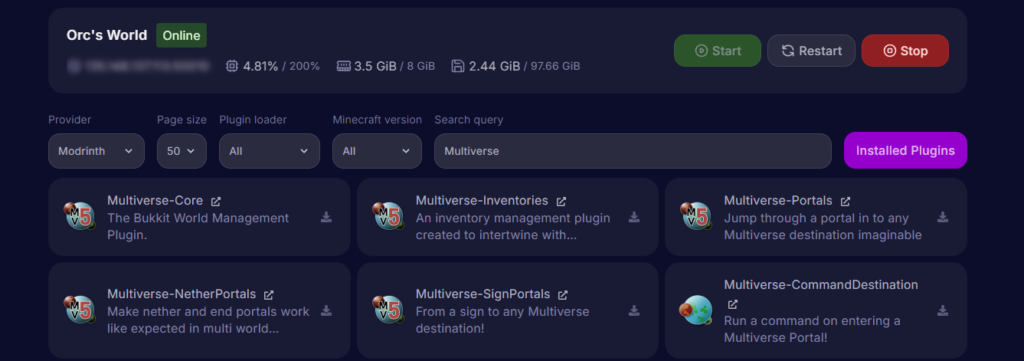
Once you complete the setup, you can now install the Multiverse plugin. You can either download the plugin from the official Modrinth page or install it directly on your server in your server panel.
Most hosting providers, including Cybrancee, allow you to install the plugin directly from the panel. Click the plugins tab in your server panel and search for Multiverse. Click the download button, and it will automatically be downloaded and added to your server’s plugins folder. Make sure you restart your server after installation.
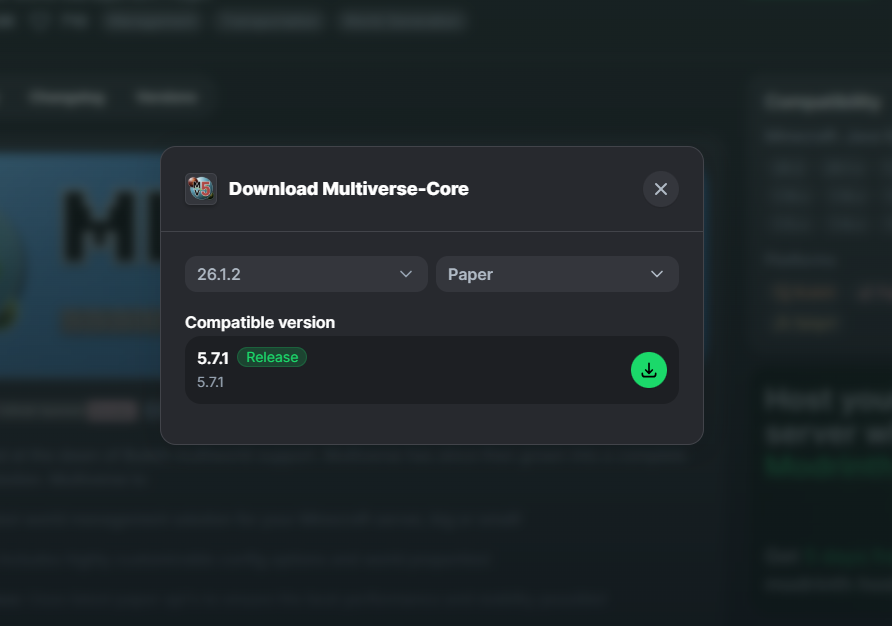
If you choose to install it from the official Modrinth page, click the green Download button and select your server’s version and software. You might see two versions: a stable version and a beta version. Make sure to choose the stable version for the best performance. Once you have finished downloading the plugin JAR file, head to your server files and drop the JAR file into the /plugins folder, and restart your server.
Creating a world
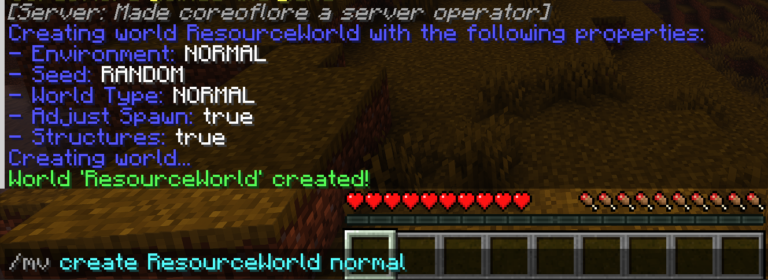
Once you finish installing the plugin and have restarted your server, you can finally create worlds. To create a world, you need to type the following command:
/mv create <worldname> <environment>
You can choose your world name. Make sure to pick a recognizable name and use underscores (_) instead of spaces if your world name is more than one word. For the environment, you can pick between NORMAL, NETHER, or END. Normal means the overworld. You must pick one of the environments to generate the world.
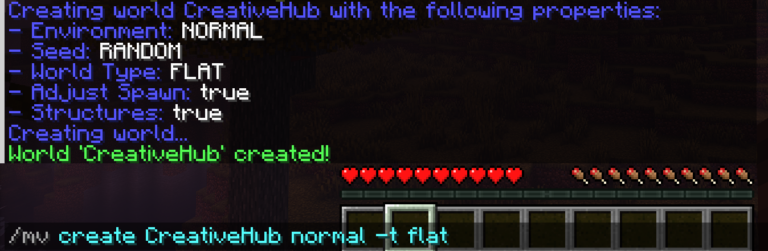
You are also able to add flags when creating a world to adjust its generation. When you add a flag, you add it to the end of the command. For example:
/mv create <worldname> <environment> --flag1 --flag2
Here are some flags you can add when generating a world to adjust the world’s generation:
| Flag Name | Description | What to add to the command |
| World type | You can generate the world to be either flat (a completely flat world with only a few layers of dirt), amplified (extremely high terrain peaks), or large_biomes (more expansive biomes). | --world-type <worldtype> |
| Seed | If you have a specific seed in mind, you can use the seed flag to generate the world with that specific seed. | --seed <seed> |
| No structures | If you prefer a world without any structures, you can use the no structures flag to prevent the generation of them. | --no-structures |
| Generate bonus chest | You can also generate a bonus chest that has starter tools, items, and food. It will be located at the world spawn once the world is generated. | --generate-bonus-chest |
Once you press Enter, Multiverse will begin generating the world. This process may take up to 2 minutes. You will see a notification in the chat and in the server console when the world generation is complete.
Teleporting to your new world
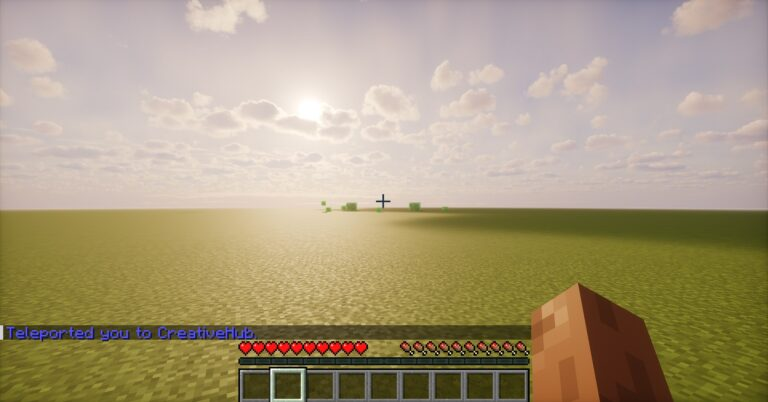
To teleport to your new world, you must use the Multiverse teleport command. You cannot use the vanilla /tp command to do this. Type the following command:
/mv tp <username> <worldname>
The username entered will be teleported into that world once the command is run.
Adjusting the first spawn location
By default, players who first join your server will spawn in whatever world is shown in server.properties; usually the name is called “world”. If you wish to have new players land in a specific world when joining, you need to run two commands.
You need to first allow the first-spawn-override configuration by setting this to true using:
/mv config first-spawn-override true
Next, you need to specify which world you want new players spawning in. Run the following command:
/mv config first-spawn-location <worldname>
Now, new players will spawn in that world you specified instead of the default Minecraft world.
Per-world configuration

Each world can have its own rules, such as a creative world with no mobs and PvP, or a survival world with hard difficulty and PvP on. To modify the properties of each world, use the /mv modify command.
/mv modify <worldname> set <property> <value>
Some of the most commonly adjusted properties include:
PvP– Turn player combat on or off.Difficulty– Set the world’s difficulty (peaceful, easy, normal, or hard).Gamemode– Set the default gamemode of the world (Survival, Creative, Spectator)Allow-Weather– Turn rain or thunder on or off in a specific world.
If you want to reset a specific world’s property to its defaults, run /mv modify <worldname> reset <property>. This does not reset the whole world’s properties, only that specific property.
Multiverse Portals Addon
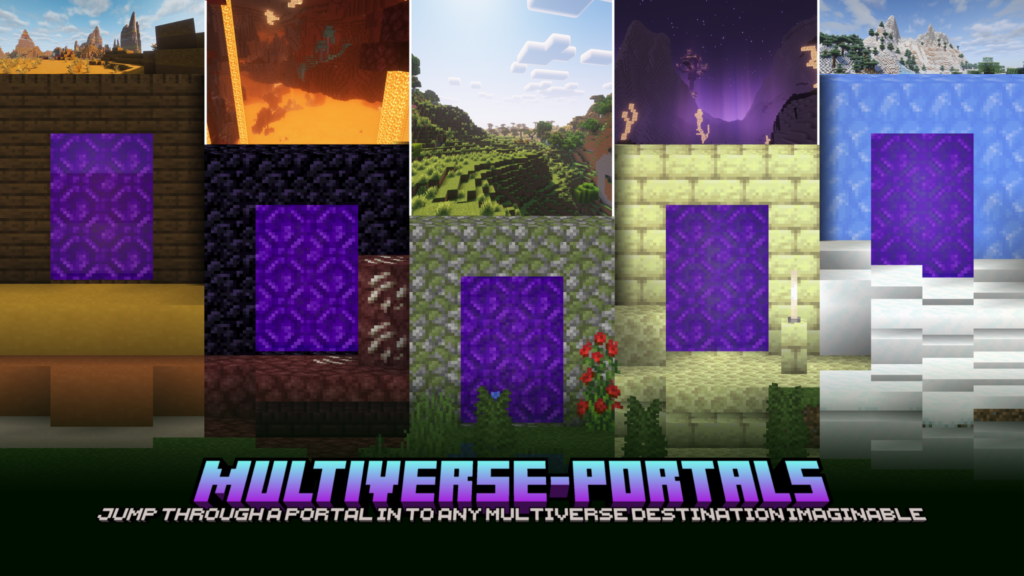
You can only teleport to worlds using commands. However, if you want the ability for you and your players to teleport to worlds without commands and instead go through a portal to join them, you can install the Multiverse Portals plugin addon.
This is a separate plugin not included in the Multiverse core plugin, so you’ll either need to go to the official Modrinth page or install it directly within your server panel. Search for “Multiverse Portals” and download and upload the JAR file into your /plugins folder. Then restart the server and join the server when it’s online.
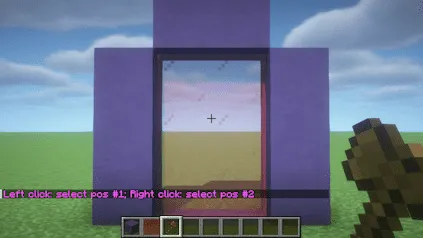
Now, create two portals like a Nether portal. It does not matter the size, block, or orientation. As long as it looks like a Nether portal, it works.
Then, you will need to get the Multiverse Portals Wand. This is how you will create your portals. Hold the wand and left-click one corner of the portal and then right-click on the opposite corner. Your portal is now selected. Make sure you create your portal by typing the command:
/mvp create [name]
Repeat this process with your second portal.

Now, you’ll need to connect both portals. To connect them, type the following command:
/mvp modify [portal1 name] destination [portal2 name]
Repeat the command but flip the portal names so you can travel between both portals.
By default, only players with the permission multiverse.portal.access.<portalname> (OP players) are allowed to go through portals. Players without this permission cannot access portals. This is worth disabling on public servers, but keep it on if you want to control who can go through which portal.
To disable this and allow all players regardless of permissions to access portals, type and run the following command:
/mvp config enforce-portal-access false
If you also want entities (such as mobs) to enter through portals, type and run the following command:
/mvp config teleport-entities true
You will need to restart your server for these changes to go into effect.
Multiverse nether portals addon
If you attempt to go through a nether portal or an end portal in a multiverse-created world, you may be blocked from doing so as the portals aren’t connected. In order to connect them, you will need the Multiverse Nether Portals plugin.
Like the Multiverse Portals addon, you must download the plugin from either the official Modrinth page or directly on your server panel. You must also restart your server.
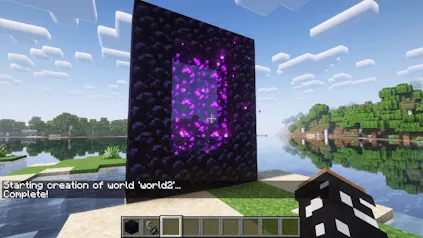
Once you have installed the plugin, you will need to run this command:
/mvnp link <end/nether> <world1> <world2>
What this command means is that when a player steps in either the end or nether portal in world1, they will be teleported to world2. Repeat this command for all the worlds that you want connected.
Multiverse inventories addon
When you generate multiverse worlds, your inventory will stay the same across all worlds. However, if you want to have separate inventories for each world, you can install the Multiverse inventories addon. You can download the plugin JAR from the official Modrinth page or from your server panel.
Once you have installed the plugin and restarted your server, that’s it! The server’s default worlds will share the same inventories, but the other worlds you have created will have their own separate inventories automatically.
If you want to customize which worlds share what, you can create a group.
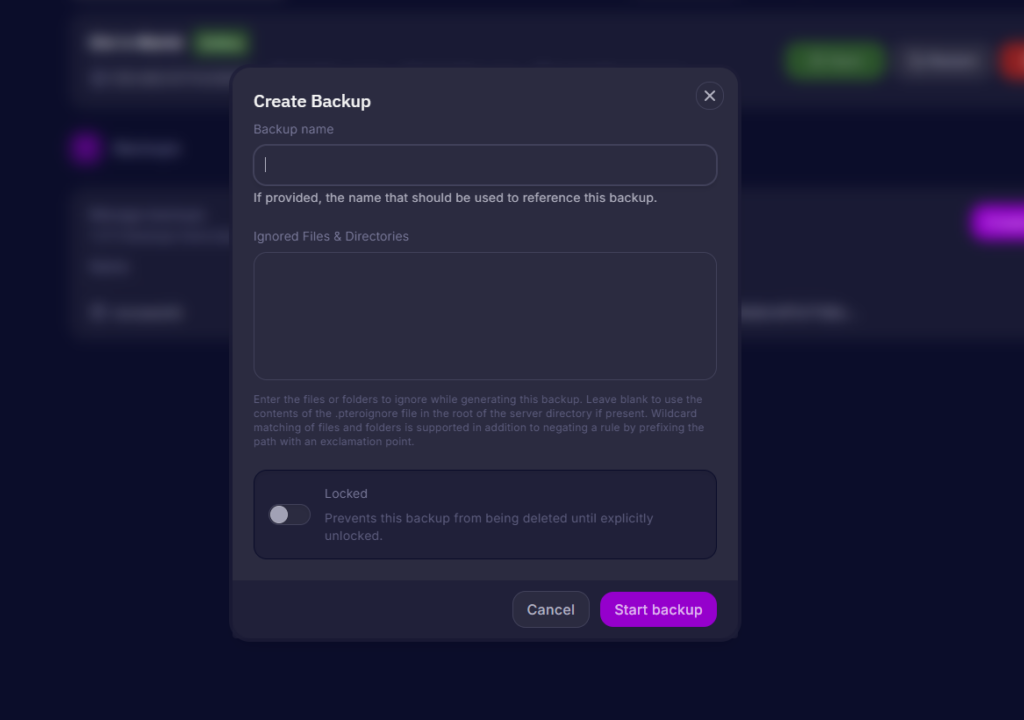
Before creating groups, it is highly recommended to back up your server before making changes, as an incorrect configuration may lead to loss of player inventory data. Most hosts allow you to create backups in your server panel, such as Cybrancee. You should also make changes before players have joined the worlds you are configuring, as existing player data may be overwritten if they have existing data in those worlds.
To create a group, you’ll need to use the /mvinv create-group command:
/mvinv create-group <group-name> <world1,world2,...> <share1,share2,...>
You can choose the name of the group in group-name. Make sure to choose something recognizable to you. You’ll then need to add the world names, separated by commas, to be included in the group. Finally, you can choose what properties are shared in this group. You can choose between players’ inventories, enderchests, experience levels, health, hunger level, and more. If you want to share all properties, just type all to share everything between the worlds in this group.
It is also recommended to toggle on a player’s last location. Last Location is a feature that allows players to return to their last known position in a group when they teleport back to it. By default, Last Location is disabled. To turn it on, run the following command: /mvinv toggle last_location
Unloading worlds
Every loaded world consumes RAM and CPU due to chunk and entity loading, whether or not a player is currently in those worlds. If you have a world that is not currently in use, consider unloading the world.
To do this, run the command below:
/mv unload <worldname>
This removes the world from active memory without deleting it. The world files will not be deleted when a world is unloaded. If any players are in that world when it is unloaded, they’ll be moved out of that world automatically.
When you’re ready to load the world again, run:
/mv load <worldname>
Troubleshooting
“Unknown command” when running Multiverse commands: Multiverse isn’t installed correctly, or your server didn’t restart after installation. Confirm the plugin is in your /plugins folder, then restart.
World generation is stuck: If you are generating large or amplified worlds, it may take longer than two minutes. Make sure to check your console for errors, and if there is no activity for five minutes, restart your server and try again.
Can’t teleport to world with commands: Make sure you typed your username and the world name correctly. A typo will cause issues. Also, check to make sure the world is actually created and loaded. Joining an unloaded world will not work.
Portals aren’t teleporting players: Make sure you linked both portals (portal1 to portal2, and portal2 to portal1). A one-way link doesn’t link them both automatically.
Summary
The Multiverse plugin allows you to create multiple worlds in a single Minecraft server, each with its own rules, properties, inventories, and portals.
Once you install the plugin, you can create worlds with /mv create. After generating a world, you can customize the difficulty, PvP, and weather properties per world with /mv modify.
You can also install the three add-on plugins to enhance your worlds. To teleport between worlds without commands, set up portals using the Multiverse Portals plugin. To connect the Nether and End portals in Multiverse worlds, use the Multiverse Nether-Portals plugin. Finally, the Multiverse-Inventories plugin allows you to have inventories for each world or group.
If you’re looking to expand your Minecraft server with more worlds, choose Cybrancee’s Minecraft Server Hosting. Cybrancee offers exceptional hosting with a generous 90-day money-back guarantee.
Happy Creating!