




An unmoderated Minecraft server may attract hackers and griefers. Without moderation, these rule-breakers can disrupt the server gameplay and ruin the experience for other players on your server.
To help moderate your server, it’s important to turn on a whitelist and set up player permissions.
In this blog, we will go over both a whitelist and player permissions, if you need them, and how to set them up.
What is a whitelist, and do I need one?
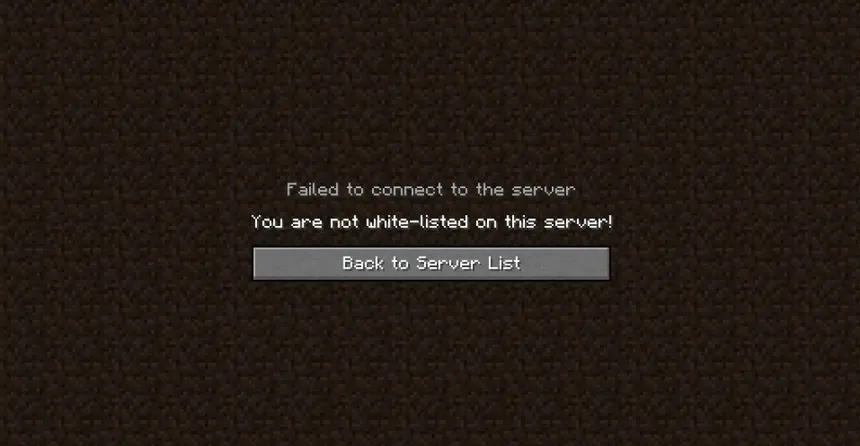
A Minecraft server whitelist is a security feature that restricts who can join your server to only players you approve of. Without a whitelist enabled, anyone who has the server IP address can join.
It is highly recommended to have a whitelist enabled on private servers, such as a friends-only server. However, public servers should not have a whitelist enabled; instead, set up player permissions.
How do I set up a whitelist?
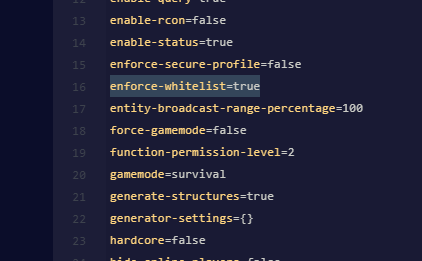
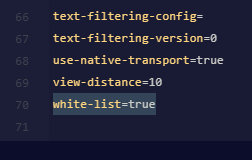
Step 1: Go to your server’s server.properties file and set “enforce-whitelist” and “white-list” to true. This way, you now have a whitelist, and it will be enforced, so if non-whitelisted players join, they will be kicked.

Step 2: You will need to restart your server for the changes to go into effect. Press the restart button to restart your server and wait for the server to go back online.

Step 3: Go to your server’s console page and type the following command into the console. You can also run these commands in-game if you have /op or have permissions: whitelist add [username]
You will need to input the username of the person you want added to your server. Make sure you type it in correctly; the username is case-sensitive.

Step 4: If you need to remove someone from your whitelist, type the following command into the console: whitelist remove [username]

Step 5: To check who is currently on your server’s whitelist, run whitelist list, and it will show the total count and the usernames of each player on the whitelist.
Troubleshooting
I added a player to the whitelist, but it says they aren’t whitelisted when they try to join: This is most likely due to a typo or capitalization issue. Usernames are case-sensitive, so double-check the username and try again.
Players that aren’t on the whitelist are still able to join: You probably didn’t turn both enforce-whitelist and white-list to true in your server.properties file. Make sure you switch both of them to true and restart your server.
What are player permissions, and do I need them?
Operator (also known as “OP”) is Minecraft’s built-in way to grant admin access without installing a plugin or a mod. Running op <username> in your console gives that player elevated commands immediately. However, a player added just to help moderate your server can also issue destructive actions, such as giving items to some or all players or even stopping the server without even accessing the console.
Player permissions allow giving certain commands and access to certain players or groups without using /op. This is perfect to assign moderators access to moderation commands or assign a special rank that includes access to more commands. For example, you can allow certain players or groups access to commands such as /kit, /tpa, and /home without giving them full access to all commands.
Private servers don’t usually need player permissions, as the server owner only having OP is enough, but it’s highly recommended to have player permissions set up on public servers for certain groups such as moderators.How to set up player permissions?
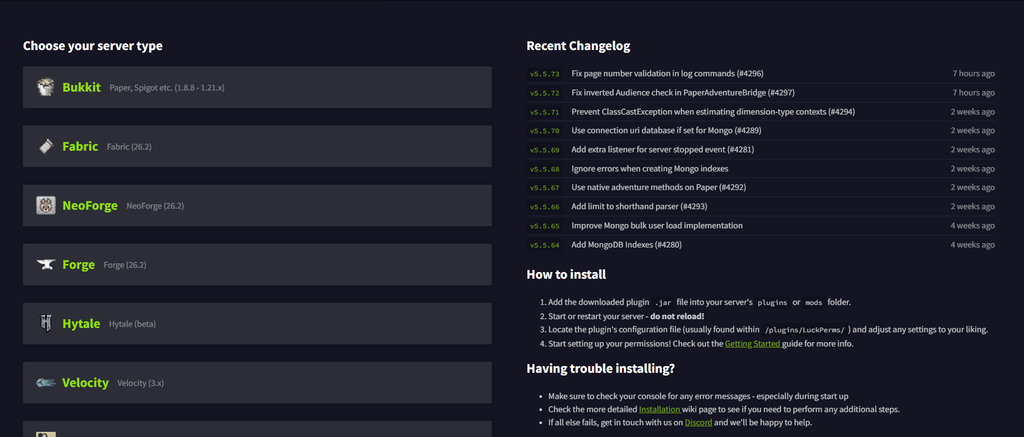
You will need a player permissions plugin to handle assigning permissions. We will use LuckPerms as it’s the most popular and widely used plugin to manage player permissions.
Step 1: You will need to install the LuckPerms plugin. Go to luckperms.net and press the download button. Select your server software, and the .jar file will start downloading. Place the LuckPerms jar file into your server’s plugins or mods folder.
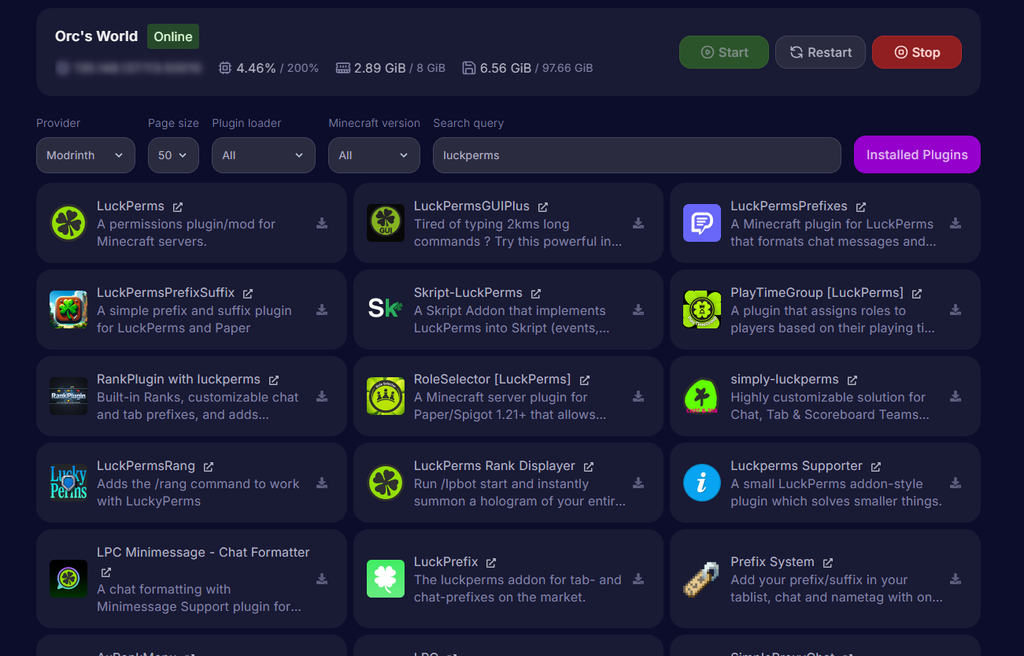
Some hosting providers, such as Cybrancee, allow you to install it directly in your server’s control panel. If your hosting provider supports this, go to your plugins tab in your server control panel and search for LuckPerms (sometimes it might be on the front page). Press the install button, and it will automatically be added to your plugins or mods folder.

Step 2: You will need to restart your server so LuckPerms is enabled. Press the Restart button to restart your server and wait for it to start up.

Step 3: In your server’s console, run lp editor and click the link to open the LuckPerms editor in your browser. You can optionally run this command in-game if you have OP.
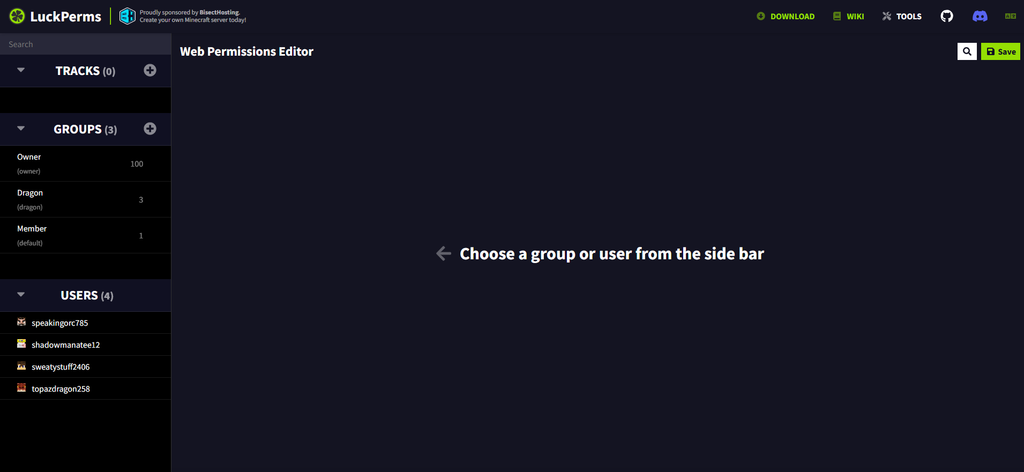
Step 4: You are now in the LuckPerms editor. We will create a group for moderators in the editor. Under the groups dropdown, select the plus button.
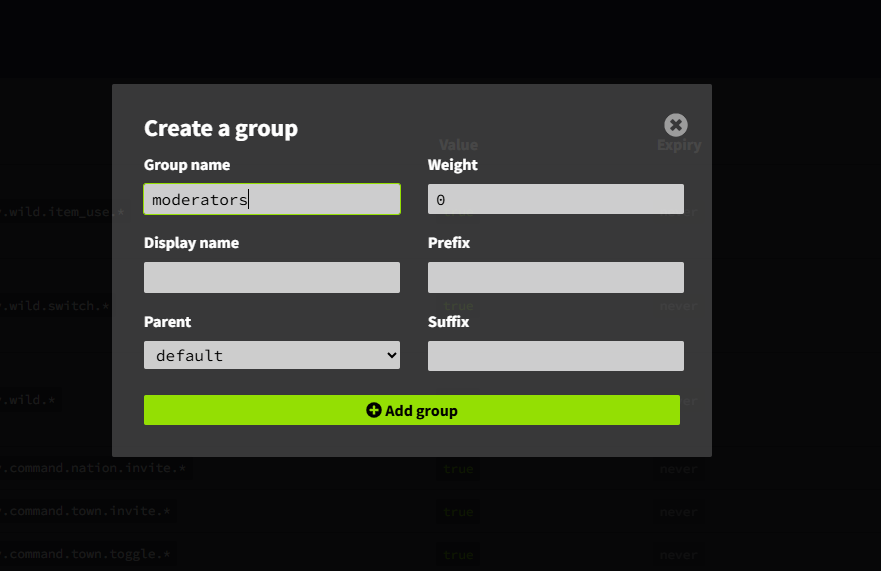
Step 5: Name your group moderators (or whatever you want to call it; just name it something memorable) and set your parent group to default. Then press “Add group”.
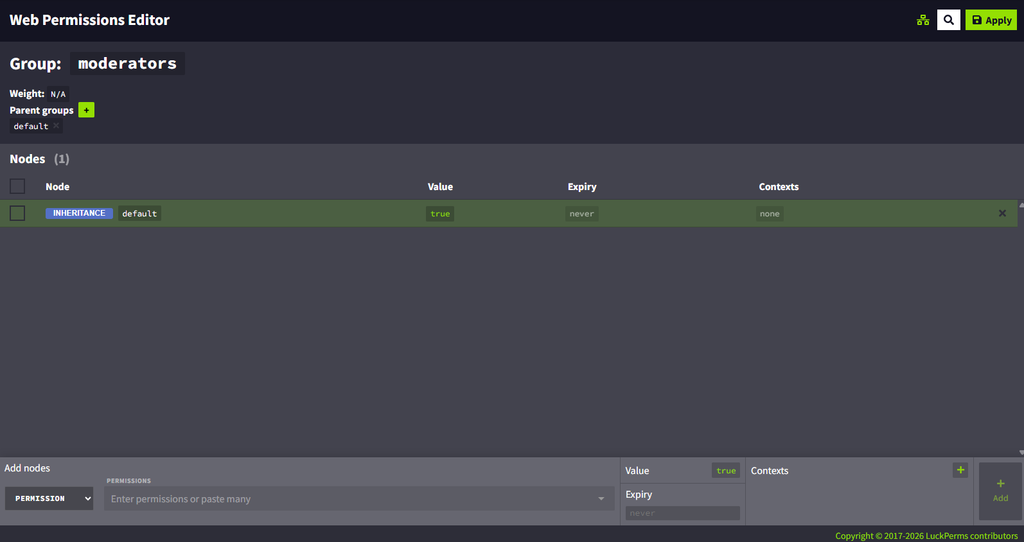
Step 6: You will be brought to the group you have created. You’ll now have to add permissions to this group so moderators can use them. Here is a list of recommended permissions to give to your moderators:
minecraft.command.ban (Ban players)
minecraft.command.ban-ip (Ban IPs)
minecraft.command.pardon (Unban players)
minecraft.command.pardon-ip (Unban IPs)
minecraft.command.kick (Kick players)
minecraft.command.banlist (View the ban lists)

Step 7: Although not required, it is highly recommended that you assign weights to your group in case you have more than one group. The LuckPerms weight system is used to resolve conflicts when a player belongs to more than one group. The highest weight a player is assigned always wins and overrides the lower player groups.
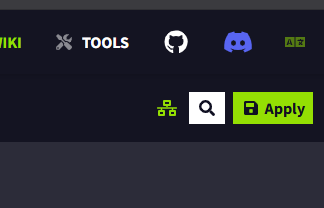
Step 8: Once you are satisfied with your changes, press the apply button. In some cases, you may be required to verify changes with your server’s console by running a command. If that’s the case, copy the command and paste it into the console and run it. Your changes will now be applied, and you do not need to restart your server.
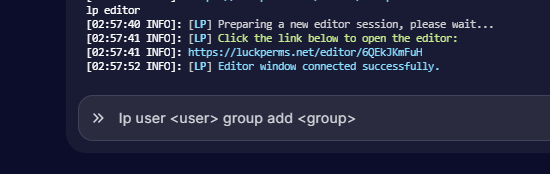
Step 9: Now you need to assign your moderators to the moderators group you have created. Type the following command into the console, replacing <user> and <group> with the username you want to be added to the group and the group name: lp user <user> group add <group>
You have now created a moderator group using LuckPerms for your Minecraft server.
Highly Recommended: Disable Vanilla OP
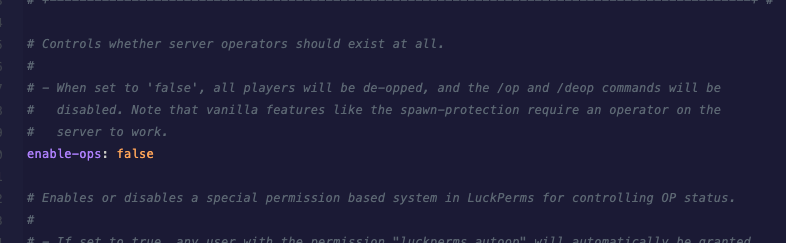
Giving /op access to players gives them unrestricted access to dangerous commands that can harm your server and bypass all permissions nodes that are set up. It’s highly recommended you don’t use the vanilla op on the server, and LuckPerms gives you an easy way to disable it.
In the LuckPerms folder under your plugins or mods folder, find the configuration file (config.yml) and open it. Scroll down until you find the enable-ops configuration option. Change it from “True” to “False” and save the file. You will need to restart your server for this change to take effect.
Note that if there are players that are currently /op, they will be deoped automatically and the /op and /deop commands will no longer work. Make sure your permissions groups are all set up prior to doing this, as the server owner will also be deoped too.
Troubleshooting
Running lp commands in the console returns “Unknown Command”: This usually means either LuckPerms wasn’t installed or didn’t load properly. Check either your plugins or mods folder and confirm the LuckPerms jar is there. If it is, check your console log from the last restart for a plugin load error. Plus, make sure you install the latest version, as older versions may fail to load.
My changes in the LuckPerms editor aren’t taking effect: After pressing apply, LuckPerms may require you to enter a command directly into your server’s console to verify you want the changes to go into effect. If you skip that step, none of your edits will take effect. Make sure you check your console output and the LuckPerms web editor to see if you need to do anything to verify the changes, and they should go into effect shortly after completing them.
A player has commands from two different groups, and I’m not sure what is taking priority. This happens when a player belongs to two or more groups with no weight set on the affected groups. Make sure to set a weight value on each group to resolve the conflicts. Remember, the higher the weight assigned to the group, the higher the priority.
Common permissions node mistakes
Two mistakes come up constantly when server owners start adding permissions nodes.
The first one is using wildcard nodes (for example, minecraft.command.*) as a shortcut. Although it’s convenient, it grants every vanilla command at once to the players inside the group, including /stop or /op, essentially giving full-OP level power without actually OPing them. It is highly recommended you stick to the specific nodes for each command you actually want the group to have.
The second one is assuming all plugins share the same node format. The minecraft.command.x nodes only work for vanilla Minecraft commands. If you have other plugins that define their own permissions nodes, such as the EssentialsX plugin, it does not follow the same format as the vanilla permissions. For example, to use the /kit command, you need to use essentials.kit, not a minecraft.command node. If you add plugins to your Minecraft server, check the plugin’s documentation and verify the permissions nodes.
Do you need both, or just one?
If you’re running a small server for friends and/or family, a whitelist alone is usually enough. You control who joins, and since it’s a small trusted group, granting yourself OP covers essential moderation without additional setup.
However, if you’re running a public server that anyone can join, do not use a whitelist. It will block players from joining, which defeats the purpose of a public server. Instead, set up player permissions so you can bring in trusted moderators without handing them full OP access.
Sometimes, though, it might be useful to use a whitelist for certain situations for a public Minecraft server, such as conducting testing or running closed beta before fully opening up to the public.
Summary
To protect your Minecraft server, you can use either a whitelist or player permissions, or even both!
A whitelist decides who can connect to your server and is directly built into Minecraft and configured in your server.properties. To add players to your whitelist, run whitelist add <username> in your console.
Player permissions are a more advanced system where you can configure who has access to what commands on your server. To do this, you’ll need to use the LuckPerms plugin and create groups with permission nodes and assign them to your players.
It’s recommended for private servers to enforce a whitelist and possibly have player permissions depending on whether you want to have moderators on your private server, although for most cases it’s not necessary. For public servers, using a whitelist is not useful (unless you’re doing a closed beta or invite-only testing phase) and should set up player permissions for moderators.
If you want a Minecraft server for your friends or family, or a public server to grow your community, choose Cybrancee’s Minecraft Server Hosting. Cybrancee offers exceptional hosting with a generous 90-day money-back guarantee.
Happy Gaming!