



Running a Minecraft server, private or public, may have hackers and griefers trying to ruin the fun for everyone else. They can destroy people’s bases, mess up the server spawn, or make the experience less enjoyable for everyone. These problems can be addressed and prevented with the right plugins and settings.
In this blog, we will cover four ways to protect your server. These include locking down your server by using a whitelist, protecting builds from griefers with the GriefPrevention plugin, catching hackers with anti-cheat plugins, and backing up your server so you can recover if something goes wrong.
Locking down your server by using a whitelist
A whitelist restricts who can join your server to people you approve of. If anyone that you don’t approve of tries to join your server, they will be blocked from joining.
This is a perfect security feature for private servers such as a friends-only Minecraft server where people you know are the only people playing on your server. However, for public servers, this isn’t needed. This is because adding a whitelist blocks your server from being discovered and prevents your server from growing.
Setting up a whitelist
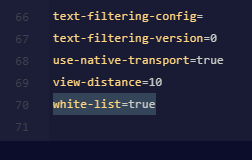
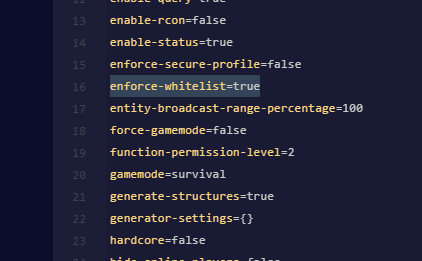
Step 1: Go to your server’s server.properties file and set “enforce-whitelist” and “white-list” to true. This way, if non-whitelisted players join, they will be kicked as your whitelist will now be enabled.

Step 2: Restart your server so the changes you made in the server.properties file will go into effect. To do this, press the restart button to restart your server and wait for the server to go back online.

Step 3: Go to your server’s console page and type the following command into the console. You can also run these commands in-game if you have /op or have permissions: whitelist add [username]
You will need to input the username of the person you want added to your server. Make sure you type it in correctly; the username is case-sensitive.

Step 4: If you need to remove someone from your whitelist, type the following command into the console: whitelist remove [username]

Step 5: To check who is currently on your server’s whitelist, run whitelist list, and it will show the total count and the usernames of each player on the whitelist.
If you want more details about setting up a whitelist for your Minecraft server, including some troubleshooting tips, check out our blog on setting up a whitelist.
Protect bases from griefers by using GriefPrevention

The GriefPrevention plugin is a popular and widely used plugin across many Minecraft servers to claim land to prevent griefers from destroying builds in the area. You use a golden shovel to claim two corners of the area to create your claim, and everything within it becomes protected. Other players can’t break blocks, place blocks, open chests, or interact with anything inside a claim unless the land claim owner grants permission.
Installing GriefPrevention
To install GriefPrevention on your server, follow these steps.
Step 1: Verify that your server is compatible and supports the GriefPrevention plugin. The plugin is only for non-modded software, so software such as Forge and Fabric won’t work. The plugin supports Spigot, Bukkit, and Paper. We recommend using the Paper software as it has full compatibility with Spigot and Bukkit and has better performance. Also, make sure your server is on version 1.17 or higher.
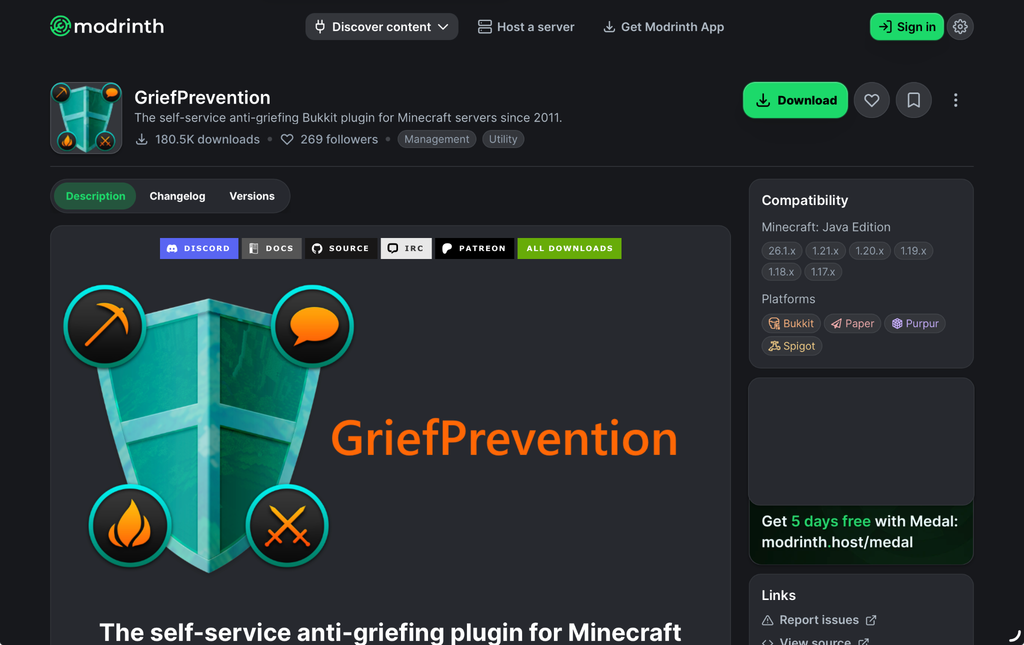
Step 2: Download the .jar file from the Modrinth website and place it into your server’s /plugins folder.
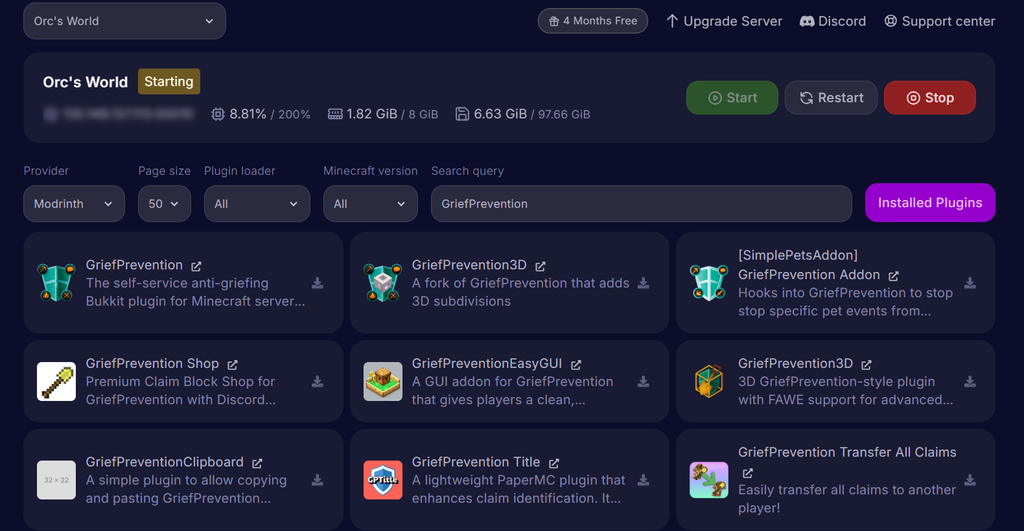
Some hosting providers, such as Cybrancee, also let you download it in their server control panel and put it into your server’s /plugins folder automatically.
Step 3: Restart your server (or start it if currently offline), and the plugin should load during the server startup. You’ll now need to configure the GriefPrevention settings.
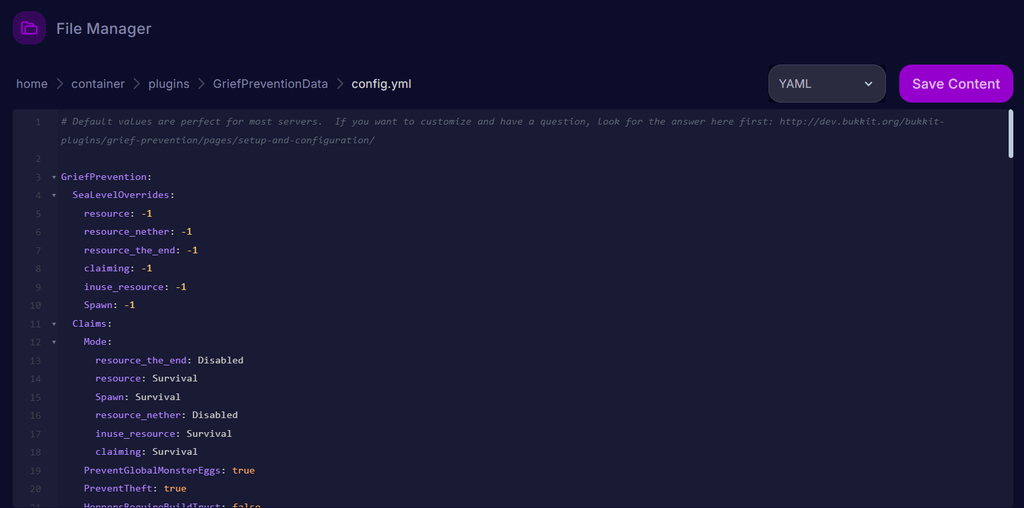
Step 4: Go to your /plugins folder and find the GriefPrevention folder. Find the config.yml file, and you’ll need to configure the settings to your liking.
Key GriefPrevention Settings to Adjust
There are many configuration options for GriefPrevention; however, there are a few key configuration options to look at:
- Claim blocks per hour: This controls how quickly you accumulate the currency used to claim land. You need claim blocks to claim land, and the more area you try to claim, the more claim blocks are needed. Be careful when configuring this option, though. If you increase the claim blocks per hour too much, new players can take over huge chunks of the map before anyone else can claim. If you decrease the claim blocks per hour too much, builders trying to build a good base will get frustrated.
- Lock all doors: By default, only iron doors are locked. If you want more security for bases, consider turning this feature on so all doors will be locked and require being trusted by the land claim owner.
GriefPrevention Best Practices
- Reclaim abandoned land automatically: If any players quit or go inactive, their claims will sit locked forever, which can waste space on your map that could be used for new players. GriefPrevention supports automatic claim expiration after a period of inactivity (that can be configured in your config.yml). If you implement this, it’s a good idea to let players know about the expiration time in advance so players aren’t confused or frustrated.
- Create an admin claim around the server spawn or important common areas: Anything that is meant to be open to the public or otherwise permanent (such as community hubs, spawns, or shops) should be claimed under an admin so it doesn’t expire and get griefed by bad actors.
- Understand the three types of trust commands: The main
/trustcommand grants access to edit the entire claim, which should only be used for people you really trust, such as your friends. If you want to give access to use the levers, buttons, and beds inside a claim without giving edit access, use the/accesstrustcommand. If you want to give access to the crafting tables and chests on the land claim, you can use the/containertrustcommand. Note that using/containertrustalso gives access to the levers, buttons, and beds.
How to Stop Hackers: Anti-Cheat Plugins

Anti-cheat plugins detect, block, and prevent players from using unfair modifications, cheat clients, and exploits. These plugins monitor player behavior against what should be physically possible in Minecraft and what the player behavior actually is. If a player’s action goes against what’s possible in vanilla Minecraft, the plugin takes action by either issuing commands (which are configured in their configuration files) or blocking the action entirely.
These plugins can detect the following:
- Movement: Monitors a player’s movement coordinates and detects irregularities such as the player’s max walk speed, sprint speed, and jump height. This blocks speed hacks, high jumping, flying, and no-clipping through blocks.
- Combat: Monitors a player’s timing, distance, and angle of hits and detects unusual frequencies or behaviors. This blocks auto-clickers and extreme reach modifications, such as exploiting the entity and player hitboxes.
- Inventory: Watches actions inside a player’s inventory, such as shift-clicking and rapid drag events. When items move between slots faster than physically possible in Minecraft, it gets flagged. This blocks potential duplication exploits.
- Packets: Tracks the rate and timing of packets exchanged between the player and the server. This tracking can detect players who delay packets, flood packets to cause crashes, or send false packets to cover up other cheats.
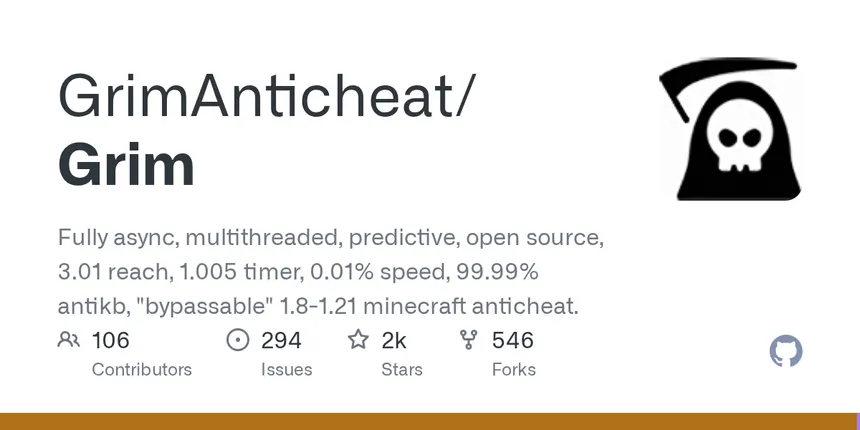
There are many anti-cheat plugins available; however, the most popular free plugin is Grim Anticheat. Grim keeps a replica of the world for each player by reviewing chunk data packets, block placements, and block changes. Using this replica will allow the anti-cheat to access the world state to perform its checks thoroughly for better accuracy.
If you want to know how to install it and configure the settings the right way, check out our in-depth blog on anti-cheats.
Note that while anti-cheat plugins are great to have, no detection system catches everything perfectly, as there could be false positives or a player can go undetected.
Creating backups of your server in case something goes wrong
Whitelisting, land claims, and anti-cheat plugins help prevent damage from expanding on your server. However, if your world gets corrupted, your anti-cheat plugin doesn’t update properly, or the server crashes unexpectedly, you may lose all of your progress immediately unless you have server backups.
In Cybrancee’s server control panel, you can create automatic server backups using the scheduling feature without installing other plugins or changing configuration files.
How to Create Automatic Backups by creating a schedule
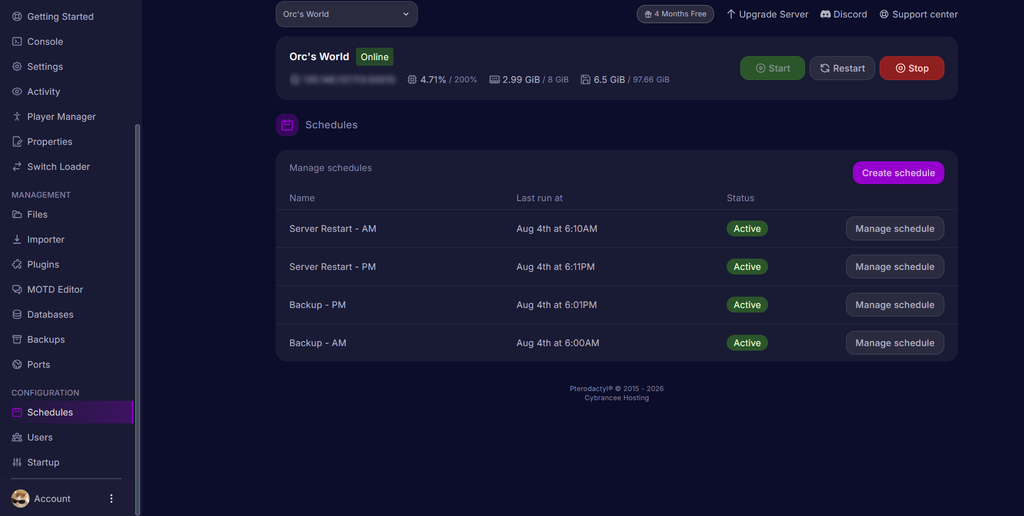
Step 1: Go to your server panel and click on the Schedules tab. Click on “Create Schedule”.
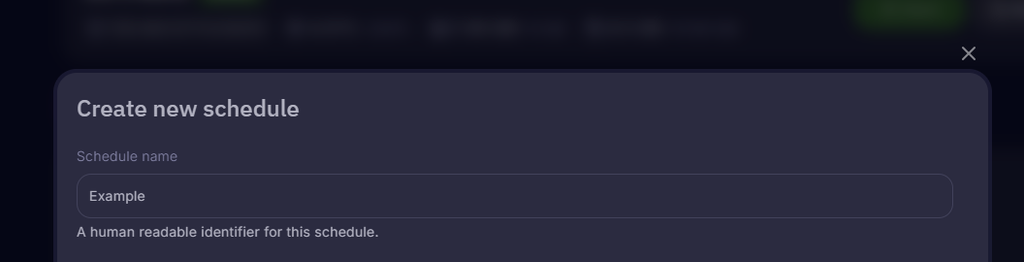
Step 2: Type a name for your schedule. Make sure you pick a name that is recognizable in case you need to edit your schedule after creation.
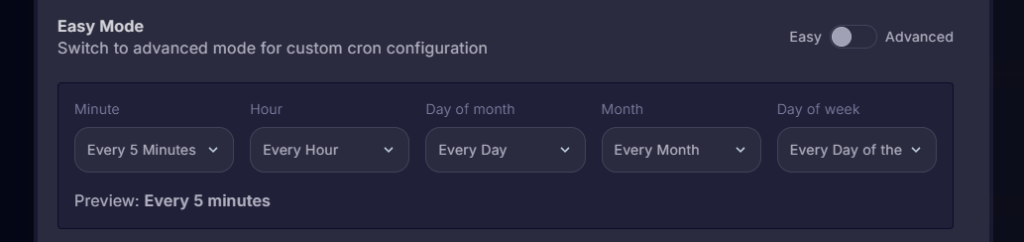
Step 3: Set the interval at which you want your server to be backed up. For example, if you want to restart your server at midnight every day, set “Minute” to “Once” and set “Hour” to “Every Day at Midnight”.
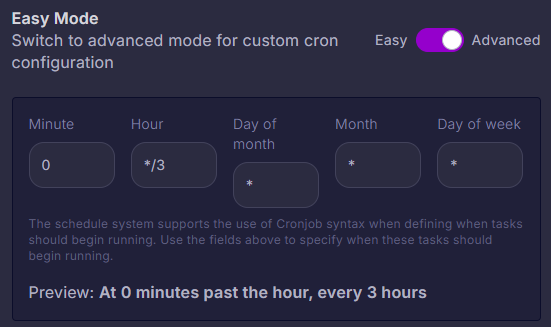
If you want to set a more specific time or interval to back up your server, such as backing up every three hours, switch the mode to advanced. This will allow you to edit the cron job syntax directly for more precise control. Note in the cron job syntax that the “*” means “every” and “/” with a number right after means the increments. So, for example, if you have day of the month, month, and the day of the week as “*” while the minute is set as 0 and the hour set as “*/3”, it will run every three hours.
For most server owners, easy mode has enough options.
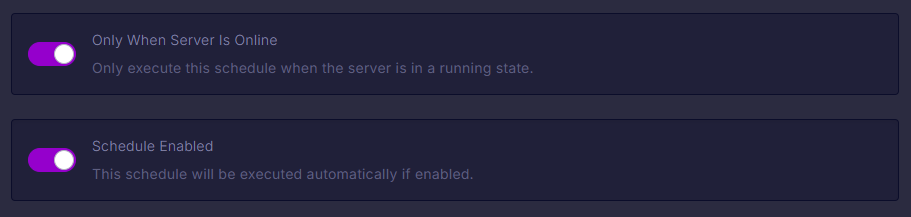
Step 4: Make sure you enabled the schedule, and turn on “Only When Server Is Online.” This will prevent backups from being made while it’s offline, as no data changes are happening.
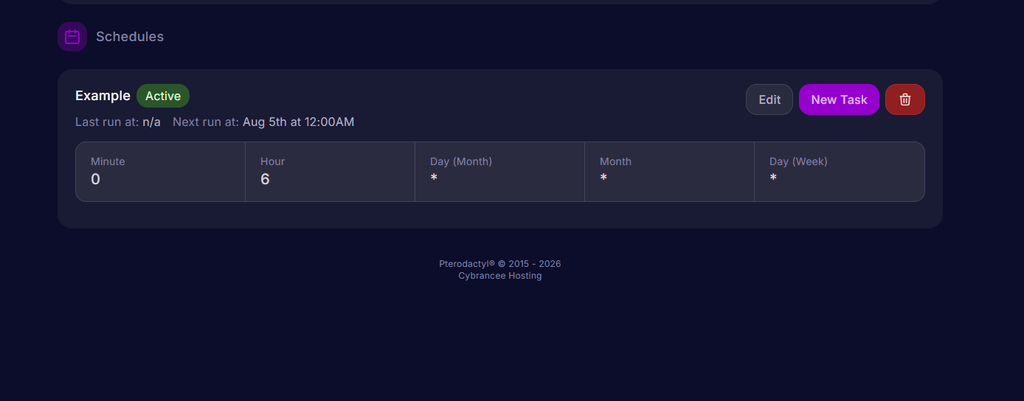
Step 5: Create your schedule and open your new schedule. You’ll now need to add a new task by clicking the “New Task” button.
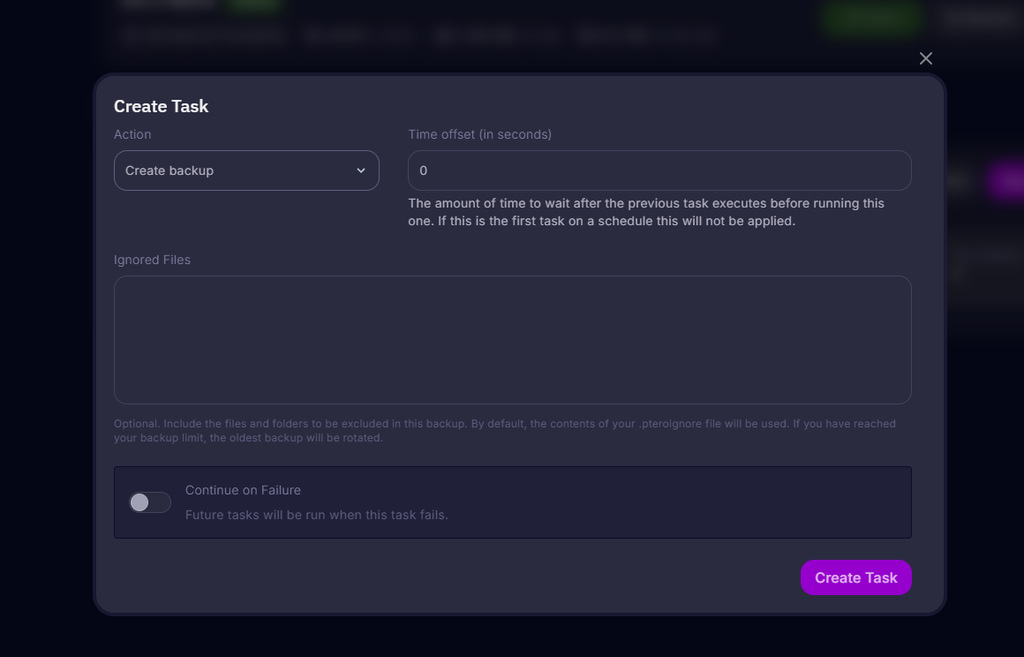
Step 6: In the Create Task screen, change the action to “Create backup” and then create the task. If you want to exclude certain files from the backup, add them in the ignored files box. You may want to exclude certain log files (such as Minecraft’s log files) as they aren’t needed in a server backup.
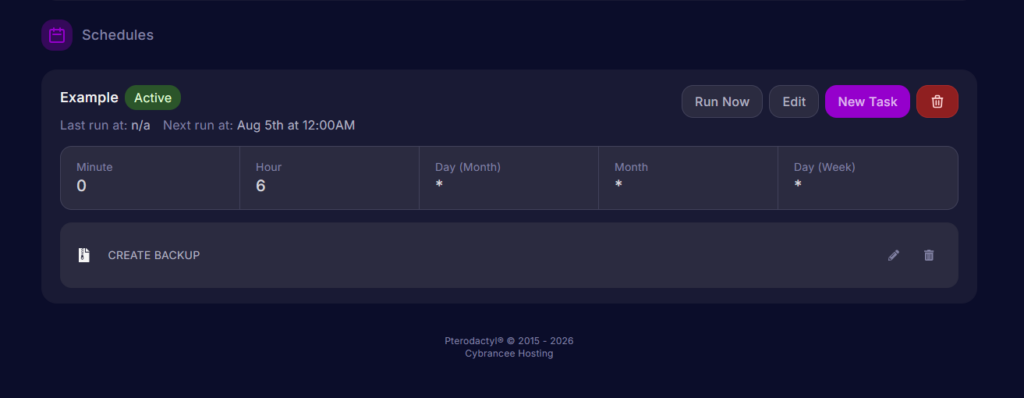
You have now created an automatic backup for your Minecraft server.
Warning: You only have three backup slots on your server. If you have filled all three backup slots when the schedule runs, your oldest backup will be overridden unless you lock the backup. If all three backup slots are locked, your schedule will fail.
Where do I find my server backups?
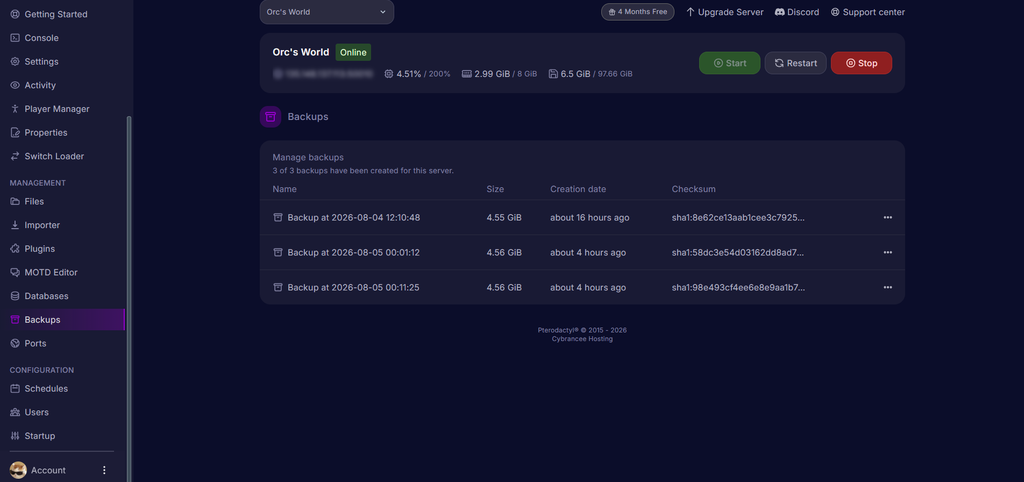
You can find your server backups in the backups tab of the server panel.
In this tab, you can see each of your backups, including the file size and when it was created. You can also create a manual backup here if you would like.
For each backup, you can also download it to your computer, restore it, lock it (to prevent it from being overwritten automatically or being deleted accidentally), or delete it.
For a more detailed breakdown about creating automatic backups for your Minecraft server, check out the How to Set Up Automatic Backups blog.
Summary
Protecting your Minecraft server from griefers or hackers needs plugins to claim land to protect against griefers, anti-cheat plugins to prevent hackers from cheating, a whitelist for private servers to prevent people you don’t know from joining, and an automatic backup schedule in case something goes wrong and you can revert the changes quickly.
If you want a Minecraft server for your friends or family, or a public server to grow your community, choose Cybrancee’s Minecraft Server Hosting. Cybrancee offers exceptional hosting with a generous 90-day money-back guarantee.
Happy Gaming!