
-
Minecraft
-
- How To Allowlist a Minecraft Bedrock Server
- How to Enable Cheats on a Minecraft Bedrock Server
- How to Upload and Use a Custom Map on a Minecraft Server
- How to Disable the Minecraft Server Watchdog
- How to Join a Bedrock Minecraft Server on Xbox
- How To Connect a Domain to Your Minecraft Server (Cloudflare and Plesk)
- How to See Your Additional Minecraft Ports
- How to Download Your Minecraft World
- How to Change the MOTD of Your Minecraft Server
- How to Set a Custom World Seed on Your Minecraft Server
- How to Allow Cracked Versions of Minecraft to Join Your Server
- How to Create a Flat World in Minecraft
- How to Increase/Decrease the Player Slots in Minecraft
- How to Change the View Distance on Your Minecraft Server
- How to Agree to Your Minecraft Server's EULA
- How to Change Your Minecraft Server Version
- How to Change Minecraft Servers Player Slots
- How to Configure RCON on Your Minecraft Server
- Which Version of Java for Your Minecraft Version
- Minecraft Loaders Explained: Forge, Vanilla, Fabric, Paper, Bedrock, NeoForge
- How To Upload a Minecraft World or Transfer a Local Server
- How to Enable Experiments on Minecraft Bedrock
- How to Configure Autosaving in Minecraft
- How to Reset Your Minecraft World
- How to Change the Tick Rate on a Minecraft Server
- How to Move Your Realms World to a Minecraft Server
- How to Change the Mob Spawn Rate on a Minecraft Server
- How To Setup Whitelisting on Your Minecraft Server
- How to Reset World Statistics on Your Minecraft Server
- How to Find and Read Minecraft Crash Logs
- How to Upload an Existing Bedrock World to Your Minecraft Server
- How To Install the Pixelmon Modpack on Your Minecraft Server
- How To Reset a Player’s Data on Your Minecraft Server
- How To Filter Messages on Your Minecraft Server Console
- How To Trim Your Minecraft World Using WorldBorder
- How To Allow Bedrock Breaking, TNT Duping, and Other Exploits in PaperMC Servers
- How To Install Paper Plugins on Your Minecraft Fabric Server
- How To Change Your Minecraft Server Icon
- How To Change the Game Mode to Hardcore on Your Minecraft Server
- How To Create a Hardcore World on Your Minecraft Server
- How To Set Up Automated Broadcast Messages on Your Minecraft Server
- How To Force a Resource Pack on Your Minecraft Server
- How To Install Datapacks on Your Minecraft Server
- How to Enable/Disable doDaylightCycle on Your Minecraft Server
- How to Set an AFK Timeout on Your Minecraft Server
- How to Configure Function Permission Levels on Your Minecraft Server
- How to Enable or Disable IP Address Logging on Your Minecraft Server
- How to Enable the Query Protocol on Your Minecraft Server
- How to Configure Packet Rate Limiting on Your Minecraft Server
- How To Create a Custom Subdomain for Your Minecraft Server
- Show all articles ( 35 ) Collapse Articles
-
- How to Change the Simulation Distance on Your Minecraft Server
- How to Disable Player Advancement Announcements on Minecraft
- How to Set Up a World Border on Minecraft
- How to Disabled/Enable Creeper Explosions in Minecraft
- How to Disabled/Enable TNT in Minecraft
- How to Disable/Enable Fire Spread on Minecraft
- How to Disable the Nether in Minecraft
- How To Enable Command Blocks in Your Minecraft Server
- How to Configure or Disable Spawn Protection for Your Server
- How to Change Your Minecraft Server Gamemode
- How To View the Banlist in Minecraft
- How To Kick, Ban and Unban Players on Your Minecraft Server
- How to Change the Difficulty in Minecraft
- How to Change the Weather in Minecraft
- How to Change the Daylight Cycle in Minecraft
- How to Enable Flying on Your Minecraft Server
- How to Disable the End in Minecraft
- How To Make a Player OP (Operator) in Minecraft
- How to Give Your Minecraft Client More RAM
- How To Set the World Spawn on Your Minecraft Server
- How To Enable Coordinates on Your Minecraft Server
- How to Use NBTExplorer to Edit Minecraft World Data
- How To Edit Your Player Data
- Every Minecraft Cheat Command
- How to Enable or Disable PvP on Your Minecraft Server
- How to Enable or Disable Keep Inventory on Death on Your Minecraft Server
- How to Enable or Disable Mob Griefing on Your Minecraft Server
- How to Change the Player Sleeping Percentage on Your Minecraft Server
- How to Change the Spawn Radius on Your Minecraft Server
- How to Enable or Disable Raids on Your Minecraft Server
- Show all articles ( 15 ) Collapse Articles
-
- How to Improve the Performance of Your Minecraft Server
- How to Reduce RAM Usage on Your Minecraft Server
- How to See Your Ping in Minecraft
- How to Generate a Spark Report
- How To Fix Rubberbanding on a Minecraft Server
- How To Create a Timings Report on Your Minecraft Server
- How To Analyze a Timings Report
- How To Optimize the paper.yml File To Reduce Lag
- How To Optimize the spigot.yml File To Reduce Lag
- How To Trim Your Minecraft World Using WorldBorder
- How To Check the Network Status of a Minecraft Server
- How to Disable Anti-Xray on Your Minecraft Server to Save RAM
- How To Reduce Mob Spawning on Your Minecraft Server
- How to Configure Entity Broadcast Range on Your Minecraft Server
-
- How to Upload Mods to Your Minecraft Server
- How to Change Your Minecraft Server Forge Version
- How to Install GeyserMC on Your Minecraft Server
- How to Upload Forge Modpacks to Your Minecraft Server
- How To Update Modpacks on Your Minecraft Server (Panel or SFTP)
- How To Change the Fabric Version on Your Minecraft Server
- How to Add Simple Voice Chat to Your Minecraft Server
- How to Export Your Modpack to Curseforge
- How to Export Your Modpack to Modrinth
- How to Install 'All the Mods 10' on Your Minecraft Server
- How to Install ‘1.12.2 Pack’ on Your Minecraft Server
- How to Install 'All the Mods 9' on Your Minecraft Server
- How to Install 'SkyFactory' on Your Minecraft Server
- How to Add Addons to Your Minecraft Bedrock Server
- How To Set Up and Run RLCraft on Your Minecraft Server
- How To Install 'Feed The Beast' on Your Minecraft Server
- How to Install ‘Dawncraft’ on Your Minecraft Server
- How to Install MC Eternal on Your Minecraft Server
- How to Install 'FTB Evolution' on Your Minecraft Server
- How to Install and Use Resource Packs on Your Minecraft Server
- How to Read a Spark Report of Your Minecraft Server
- How to Upload Minecraft Plugins (Paper)
- How to Install Prominence II: Hasturian Era on Your Minecraft Server
- How to Use Chunk Generators in Minecraft
- How to Install Better MC on Your Minecraft Server
- How To Export a MultiMC Instance
- How To Create Instances in MultiMC
- How To Install Paper Plugins on Your Minecraft Fabric Server
- How To Set Up a Vote Notification System on Your Minecraft Server
- How To Link Your Discord Server to Your Minecraft Server
- How To Set Up BlueMap on Your Minecraft Server
- How To Install the Cobblemon Modpack on Your Minecraft Server
- How To Install and Set Up an Anti-Cheat (GrimAC) on Your Minecraft Server
- How To Install and Use CoreProtect on Your Minecraft Server (RollBack Griefing)
- How To Get a Live Map for Your Minecraft Server (Dynmap)
- How To Install LuckPerms on Your Minecraft Server
- How to Set Up TAB (Playerlist/Scoreboard) and PlaceholderAPI on Your Minecraft Server
- How To Lock Chests, Doors, and Furnaces on Your Minecraft Server
- How To Set Up Player Playtime Tracking on Your Minecraft Server
- How To Create a Reward Crate System on Your Minecraft Server (CrazyCrates)
- How To Add Custom Enchantments to Your Minecraft Server (ExcellentEnchants)
- How To Create Holographic Text at Your Server Spawn on Your Minecraft Server (DecentHolograms)
- How To Set Up a Skyblock on Your Minecraft Server (BentoBox)
- How To Let Players Chop Down Entire Trees Instantly on Your Minecraft Server (Timber)
- How To Allow Multiple Client Versions To Join Your Minecraft Server
- How To Link Your Minecraft Chat to Discord (DiscordSRV)
- How To Set Up a Player Bounty System on Your Minecraft Server (BetterBounty)
- How To Set Up an Economy System on Your Minecraft Server (EssentialsX and Vault)
- How To Automatically Clear Dropped Items To Reduce Lag (ClearLag) in Minecraft
- How To Restore Player Skins on Your Cracked Minecraft Server (SkinRestorer)
- How To Add Custom Name Tags and Colours on Your Minecraft Server (NametagEditX)
- How To Set Up a Login Password System for Your Minecraft Server (AuthMe Reloaded)
- How To Add Player Jobs to Your Server (Jobs Reborn)
- How To Let Players Sit, Crawl, and Lie Down on Your Minecraft Server (GSit)
- How To Automatically Sort Player Chests on Your Minecraft Server (ChestSort)
- How To Allow Players To Mine Spawners With Silk Touch on Your Minecraft Server (SilkSpawners)
- How To Filter Bad Language and Spam From Your Minecraft Server Chat (ChatControl)
- How to Automatically Replant Crops When Harvesting on Your Minecraft Server (AutoReplant)
- How To Block VPNs, Proxies, and Alt Accounts on Your Minecraft Server (FoxGate AntiVPN)
- How To Create Custom Bosses and Monsters on Your Minecraft Server (MythicMobs)
- How To Install and Use WorldEdit on Your Minecraft Server
- How To Create Multiple Worlds on One Minecraft Server (Multiverse-Core)
- How To Force Bots To Give Their Items and Pills to Human Players in Left 4 Dead 2
- How to Install Fabric API on Your Minecraft Server
- How to Safely Remove Plugins or Mods From Your Minecraft Server
- How to Update Minecraft Plugins Without Losing Configuration Data
- How to Stop X-Ray on Your Minecraft Server
- Show all articles ( 52 ) Collapse Articles
-
- How To Fix: java.lang.NumberFormatException: For input string: "default" in Minecraft Paper
- How to Fix the Getsockopt Error in Minecraft
- How To Fix 'Unknown host' Error in Minecraft
- What Different Join Errors Mean When Joining a Minecraft Server
- How To Fix the ‘The Authentication Servers Are Currently Not Reachable’ Error on a Minecraft Server
- How to Fix the 'Failed to Login: Null' Error on a Minecraft Server
- How to Fix the 'Timed Out' Error on a Minecraft Server
- How to Fix the 'Invalid Session' Error on a Minecraft Server
- How to Fix 'Failed to Verify Username' Error on Your Minecraft Server
- How to Fix the 'Java.net.SocketException' Error on a Minecraft Server
- How To Fix the ‘Chat Disabled Due to Missing Profile Public Key’ Error on Your Minecraft Server
- How to Fix Unable to Access Jarfile on a Minecraft Server
- How to Fix the ‘Invalid or Corrupt Jarfile’ Error on Your Minecraft Server
- How to Fix the ‘Failed to Check Session Lock’ Error on a Minecraft Server
-
Hytale
- How to Change the Server Name on Your Hytale Server
- How to Check Your Hytale Server Logs for Errors
- How To Install Mods on Your Hytale Server
- How to Enable or Disable the Server Whitelist on Your Hytale Server
- How To Add an Admin/Operator to Your Hytale Server
- How To Add Admin UI Mod to Your Hytale Server
- How To Increase the Number of Stackable Items on Your Hytale Server
- How to Assign Moderator or Admin Permissions on Your Hytale Server
- How To Enable or Disable Mob and NPC Spawning on Your Hytale Server
- How to Change the Difficulty on Your Hytale Server
- How to Update Your Hytale Server to the Latest Version
- How To Change the MOTD on Your Hytale Server
- How To Change the Maximum Player Slots on Your Hytale Server
- How to Reset/Regenerate Your Hytale Server World
- How to View the Online Players on Your Hytale Server
- How To Ban and Unban Players on Your Hytale Server
- How to Whitelist Players on Your Hytale Server
- How to Kick a Player From Your Hytale Server
- How to Set a Password on Your Hytale Server
- How to Enable Operators on Your Hytale Server
- How To Add Welcome Messages to Your Hytale Server
- How To Find a Hytale Player’s Username
- How To Configure PvE or PvP Zones on Your Hytale Server
- How to Find a Hytale Player's UUID
- How to Find Offline and Recent Players on Your Hytale Server
- How to Make a New World on Your Hytale Server
- How to Enable or Disable PvP on Your Hytale Server
- How to Enable or Disable Fall Damage on Your Hytale Server
- How to Pause Game Time on Your Hytale Server
- How To Increase the Amount of Mined Ores on Your Hytale Server
- How To Add an Item and Block Identifier to Your Hytale Server
- How to Change the World Seed on Your Hytale Server
- How To Place Torches While Using the Pickaxe in Hytale
- How To Add a Modlist UI to Your Hytale Server
- How To Teleport to Your House on Your Hytale Server
- How To Add a Functional Trash Container to Your Hytale Server
- How To Add Bags to Your Hytale Server
- Controlling NPC and Animal Spawning on Your Hytale Server
- How to Upload and Use a Singleplayer World on Your Hytale Server
- How to Configure Death Drops and Inventory Penalties on Your Hytale Server
- How To Fix Your Hytale Server Not Starting
- How To Change the Server Time/Day-Night Cycle on Your Hytale Server
- How To Reset Inventory When You Die on Your Hytale Server
- How to Reset Player Data on Your Hytale Server
- Show all articles ( 29 ) Collapse Articles
-
Rust
-
- How to Configure the Missile Silo Timer on Your Rust Server
- How to Configure Building Decay on Your Rust Server
- How to Configure Easy Anti-Cheat on Your Rust Server
- How to Configure Team Size on Your Rust Server
- How To Add Server Tags to Your Rust Server
- How to Change the Game Mode on Your Rust Server
- How to Change Your Rust Server Description, Header Image and URL
- How to Change the Name of Your Rust Server
- How to Change the Rust RCON Password
- How To Enable Hardcore Mode on Your Rust Server
- How To Setup Logging for Your Rust Server
- How to Set Up RCON on Your Rust Server
- How to Spawn Trains & Railways on Your Rust Server
- How To Update the Server Header Image on Your Rust Server
- How To Set a Custom Map on Your Rust Server
- How To Configure a Custom Domain for Your Rust Server
- How to Pair the Rust+ Mobile App With Your Server
- How To Point Your Rust Server to a Custom Domain Using Cloudflare
- How to Add Your Rust Server to Favourites
- How To Change Your Rust Server World Size and Seed
- How to List Your Rust Server as a Community Server
- How To Add Custom Chat Emojis on Your Rust Server
- How To Turn On Free Build Mode on Your Rust Server
- How To Configure Your Rust Server for PvE Gameplay
- How To Change Your Rust Server Icon or Logo
- How To Create a Softcore Rust Server
- How To Keep Tea Boosts After Player Death on Your Rust Server
- How To Stop Patrol Helicopters From Fleeing on Your Rust Server
- How To Activate Tutorial Island Mode on Your Rust Server
- How To Add Players to Custom Oxide Groups on Your Rust Server
- How To Change Your Rust Server Era to Medieval or Primitive
- How To Disable Radiation Zones on Your Rust Server
- How To Adjust Hackable Crate Timers on Your Rust Server
- How To Make Your Rust Server Premium
- How To Install the Discord Extension on Your Rust Server
- How to Configure PVP Damage Settings on Your Rust Server
- How to Locate the server.cfg File on Your Rust Server
- How to Disable Building Repair Cooldowns on Your Rust Server
- How to Transfer a Rust Server
- How to Control the Cargo Ship Event on Your Rust Server
- Show all articles ( 25 ) Collapse Articles
-
- How to Connect Centralized Banning to Your Rust Server
- How To Ban/Unban Someone on a Rust Server
- How To Set Administrators on Your Rust Server
- How To Make Your Rust Server Private
- How to See Your Ping in Rust
- How to Manage Time on Your Rust Server
- How to Set Up RCON on Your Rust Server
- How to Use Rust Oxide Permission System
- How to View Active Players on Your Rust Server
- How to Mute or Unmute Players on Your Rust Server
- How to Check Server Join History on Your Rust Server
- How to Use Console Commands for Airdrops on Your Rust Server
- Rust Admin Commands List
- How To Read Rust Error Logs
- Complete Guide to All Rust Debug Camera Commands
- How To Spawn Every Deployable Item on Your Rust Server
- How to Change the Weather Settings on Your Rust Server
- How to Find a User’s SteamID
- Show all articles ( 3 ) Collapse Articles
-
- How to Enable a Whitelist on Your Rust Server
- How to Configure Custom Loading Messages on Your Rust Server
- How To Install Oxide and Oxide Plugins on Your Rust Server
- How to Increase Item Stack Limits in Your Rust Server
- How to Increase Gather Rates in Your Rust Server
- How To Install Carbon and Carbon Plugins on Your Rust Server
- How To Make Your Rust Server Private
- How to Install Harmony Mods on Your Rust Server
- How to Activate Better Loot on Your Rust Server
- How to Set Up Automatic Server Messages on Your Rust Server
- How to Add Custom Kits on Your Rust Server
- How to Update Oxide/Rust on Your Rust Server
- How to Install Vanish Plugin on Your Rust Server
- How to Install Death Notes Plugin on Your Rust Server
- How to Install No Give Notices Plugin on Your Rust Server
- How to Install Quick Smelt Plugin on Your Rust Server
- How to Install Furnace Splitter Plugin on Your Rust Server
- How to Install Copy Paste Plugin on Your Rust Server
- How to Install NTeleportation Plugin on Your Rust Server
- How to Install Admin Radar Plugin on Your Rust Server
- How to Install Backpacks Plugin on Your Rust Server
- How to Install Remover Tool Plugin on Your Rust Server
- How To Adjust Recycler Collection Speed on Your Rust Server
- How to Mute or Unmute Players on Your Rust Server
- Trusted Rust Plugin Websites for Your Server
- How To Activate Instant Crafting on Your Rust Server
- How To Allow Locking of All Vehicles on Your Rust Server
- How To Enable Automatic Building Upgrades on Your Rust Server
- How To Enable Skip Night Voting on Your Rust Server
- How To Add Players to Custom Oxide Groups on Your Rust Server
- How To Add Custom Images to Signs on Your Rust Server
- How To Share Blueprints on Your Rust Server
- How To Install the Chaos Extension to Your Rust Server
- How To Install the Discord Extension on Your Rust Server
- How To View Player Inventories on Your Rust Server
- How to Configure PVP Damage Settings on Your Rust Server
- Show all articles ( 21 ) Collapse Articles
-
- How to Pair the Rust+ Mobile App With Your Server
- How To Setup the CCTV Camera in Rust With Code List
- How to Use the Rust+ App to Manage CCTV Cameras
- How to Set Up Smart Lights Using the Rust+ App
- How To Receive Notifications From Smart Alarms in Rust+
- How To Set Up Custom Radio Stations on Your Rust Server
- How to Connect Smart Alarms in the Rust+ App
- How To Change Your Rust Player Seed
- Complete Guide to All Rust Debug Camera Commands
- How To Spawn Every Deployable Item on Your Rust Server
- How To Adjust Hackable Crate Timers on Your Rust Server
- How To Make Cinematic Animations on Your Rust Server
- How To Record Demos on Your Rust Server
- How to Change the Weather Settings on Your Rust Server
- How to Join a Rust Server
- How to Manually Start the Deep Sea Event on Your Rust Server
- Show all articles ( 1 ) Collapse Articles
-
Valheim
- How To Add Mods to Your Valheim Server
- How to Enable Crossplay Support on Your Valheim Server
- How to Make Your Valheim Server Show on Community Servers
- How to Change Your Valheim World Name
- How to Change Your Valheim Server Name
- How To Upload Your Own World to Your Valheim Server
- How to See/Change Your Valheim Server Password
- How To Change the World Modifiers on Your Valheim Server
- How to Find a User’s SteamID
- How To Be an Admin on Your Valheim Server [+1.0]
- How To Enable a Whitelist for Your Valheim Server
- How To Kick and Ban Players on Your Valheim Server
- How To Connect to Your Valheim Server via Direct IP
- How to Install and Configure ValheimPlus on Your Valheim Server
- How To Install and Configure Epic Loot on Your Valheim Server
- How To Build Custom Mob Drop Tables Using Drop That on Valheim
- How To Install and Configure Better Archery on Your Valheim Server
- How To Roll Back Your Valheim Server to Pre-1.0
- How To Enhance Network Performance and Fix Desync on Your Valheim Server
- How To Recover a Corrupted Valheim World Using .db.old and .fwl.old Files
- How To Install and Configure Valheim Simple Auto Sort on Your Server
- How To Install and Configure Plant Everything on Your Valheim Server
- How To Install and Configure the Clock Mod on Your Valheim Server
- How to Install and Configure the Auto Fuel Mod on Your Valheim Server
- How To Install and Configure the ValheimRAFT Mod on Your Valheim Server
- How To Reset Your Server World on Your Valheim Server
- How to Use Admin Commands on Your Valheim Server
- How To Find Your Valheim Server IP Address
- How To Join or Connect to Your Valheim Server
- Show all articles ( 14 ) Collapse Articles
-
Palworld
-
- How To Make Your Palworld Server a Community Server
- How To Schedule a Palworld Server Restart With Scheduled Tasks
- How To Kick or Ban Players on Your Palworld Server
- How To See Your Ping on Your Palworld Server
- Best Palworld Server Settings for a Community Server
- Best Palworld Server Settings for PvP Servers
- How To Enable PvP on Your Palworld Server
- How To Automatically Clean Up Abandoned Bases on Your Palworld Server
- Palworld Server "Connection Timed Out" (Post-Update)
- How To Configure EXP and Loot Drop Rates on Your Palworld Server
- How to Host 50 Pals in a Single Base on Your Palworld Server
- How To Enable Admin Commands on Your Palworld Server
- How to Switch Palworld to Support Xbox/Gamepass
- How To Enable Crossplay on Your Palworld Server
- How To Become an Admin on Your Palworld Server
- How To Set a Server Password on Your Palworld Server
- How to Set an Admin Password on Your Palworld Server
- How to Change Your Palworld Server Description
- How To Change Your Palworld Server Name
- How To Switch Your Palworld Server To Support Steam
- How to Update a Palworld Server to the Newest Version
- How To Manage Player Visibility and Chat on Your Palworld Server
- How To Enable RCON on Your Palworld Server
- How to Adjust Supply Drop Frequency on Your Palworld Server
- How to Find a User’s SteamID
- How To Track PvP Loot Carried by Players on Your Palworld Server
- How To Enable Crossplay With PS5/Xbox on Your Palworld Server
- How To Update Your Palworld Server to Version 1.0
- How To Upload Your World to Your Palworld Server
- Show all articles ( 14 ) Collapse Articles
-
- How To Change the Difficulty on Your Palworld Server
- How To Edit Your Palworldsettings.ini File
- How To Generate and Apply a Custom WorldOption.sav on Your Palworld Server
- How To Edit the Gathering Rate on Your Palworld Server
- How To Adjust Health Regeneration Speeds on Your Palworld Server
- How To Toggle Character Persistence After Logout on Your Palworld Server
- How To Customize Enemy Loot Drops on Your Palworld Server
- How To Enable/Disable Character Decay on Your Palworld Server
- How To Adjust Equipment Durability Loss on Your Palworld Server
- How To Enable/Disable Item Weight Limits on Your Palworld Server
- How To Customize Day and Night Speed on Your Palworld Server
- How To Reduce Hunger and Sanity Loss on Your Palworld Server
- How To Disable Map Spawn Selection on Your Palworld Server
- How To Adjust Dungeon Respawn Time on Your Palworld Server
- How To Disable Raids on Your Palworld Server
- How To Adjust Pal Egg Hatching Time on Your Palworld Server
- How To Increase Pal Work Speed on Your Palworld Server
- How To Enable the Global Palbox on Your Palworld Server
- How Enable or Disable Predator Pals on Your Palworld Server
- How To Increase Pal Capture Rate on Your Palworld Server
- How To Change Player EXP Rate on Your Palworld Server
- How To Enable Fast Travel From Anywhere on Your Palworld Server
- How To Enable or Disable Friendly Fire on Your Palworld Server
- How To Enable Aim Assist for Controllers on Your Palworld Server
- How To Enable Aim Assist for Keyboard Players on Your Palworld Server
- How To Enable bIsMultiplay on Your Palworld Server
- How To Enable Hardcore Mode on Your Palworld Server
- How To Create a New World on Your Palworld Server
- How To Change the Spawn Rates on Your Palworld Server
- How To Change the Death Penalty on a Palworld Server
- How To Hide Rival Base Borders on Your Palworld Server
- How To Enable Base Defences Against Rival Players on Your Palworld Server
- How to Enable or Disable Manual Spawn Selection on Your Palworld Server
- How To Enable Looting Other Players Death Drops on Your Palworld Server
- How To Enable Permanent Death on Your Palworld Server
- How To Adjust Pal Damage Resistance on Your Palworld Server
- How To Change Player Attack Damage on Your Palworld Server
- How To Adjust Player Damage on Your Palworld Server
- How To Enable Backup Saves on Your Palworld Server
- How To Show Join/Leave Messages on Your Palworld Server
- How To Adjust the Global Building Limit on Your Palworld Server
- How To Adjust the Player Render Distance on Your Palworld Server
- How To Change Player Hunger Rates on Your Palworld Server
- How To Adjust Player Stamina on Your Palworld Server
- How To Change Pal Hunger Rates on Your Palworld Server
- How To Adjust Pal Stamina on Your Palworld Server
- How To Adjust Building Health on Your Palworld Server
- How To Adjust the Death Respawn Timer on Your Palworld Server
- How To Adjust Item Spoilage on Your Palworld Server
- Show all articles ( 34 ) Collapse Articles
-
- How To Unlock the Full World Map on Your Palworld Server
- How To Add Lighting & Shader Mods to Your Palworld Server (Steam and Game Pass)
- How To Add Mods to Your Palworld Server
- How To Install the Enhanced Visuals Mod on Your Palworld Server
- How Remove Mods From Your Palworld Server
- How To Turn Palworld Server Into a Base-Building RTS
- How to Configure a Hardcore Gameplay Mode on Your Palworld Server
- How To Configure a Night-Only Cycle on Your Palworld Server Using WorldOption.sav
-
- Articles coming soon
-
-
Terraria
- How to Upload a World to Your Terraria Server
- How to Update the tModLoader Version
- How To Be an Admin/Owner in TShock
- How to Change the Difficulty for Terraria
- Installing Terraria Mods With tModLoader
- How to Ban or Unban Players From Your Terraria Server
- How To Change the Day/Night Cycle in Terraria
- How to Add a Custom MOTD on Terraria
- How to Change Your Terraria Server Password
- How to Change the Size of Your Terraria Server World
- How To Add a Whitelist to Your Terraria (TShock) Server
- How To Add and Remove Admins From Terraria Your (TShock) Server
- How To Join Your Terraria Server
- How To Enable PVP in Terraria
- How To Create a New Terraria Character (on PC)
- How To Stop a Terraria World From Regenerating After Restarts
- How To Reset Your Terraria Server World
- How To Download Your Terraria Server World
- How To Install & Setup TShock on Your Terraria Server
- How To Change Your Terraria Server Version
- How To Use a Custom World on Your Terraria Server
- How To Setup Terraria Crossplay for PC and Mobile Edition
- How to Find a User’s SteamID
- How To Set Up the 1.4.5 Bigger & Boulder Update on Your Terraria Server
- How To Change the Max Players on Your Terraria Server
- How To Change the PvP Settings on Your Terraria TShock Server
- How To Modify Spawn Protection on Your Terraria TShock Server
- How To Disable Biome Spreading on Your Terraria TShock Server
- How To Set Character Restrictions on Your Terraria TShock Server
- How to Set Up Group Permissions and Prefixes in TShock
- How to Install Calamity Mod on Your Terraria Server
- How to Set a Custom World Seed on Your Terraria Server
- How to Change the Default Port on Your Terraria Server
- How to Enable Hardmode on Your Terraria Server
- How to Enable and Configure Auto-Save on Your Terraria Server
- How to Install Fargo's Mutant Mod on Your Terraria Server
- How to Install Plugins on Your Terraria TShock Server
- How to Manage and Disable Active Mods in tModLoader
- How to Set Up Automated Server Broadcasts in Terraria TShock
- How to Use Item and Tile Ban Lists in Terraria TShock
- How to Fix the "Lost Connection" Error on a Terraria Server
- How to Fix World File Corruption on Your Terraria Server
- How to Install Thorium Mod on Your Terraria Server
- How to Install Magic Storage Mod on Your Terraria Server
- How to Configure MOTD and Server Rules in Terraria TShock
- How to Configure Reserved Slots in Terraria TShock
- How to Configure Server Side Characters in Terraria TShock
- How to Fix Mod Dependency and Load Order Errors in tModLoader
- How to Install Terraria Overhaul Mod on Your Terraria Server
- How To Install The Stars Above Mod on Your Terraria Server
- How to Configure REST WebAPI in Terraria TShock
- How to Set Up Custom Spawn Protection in Terraria TShock
- How to Fix the Out of Memory Crash on a Modded Terraria Server
- Show all articles ( 38 ) Collapse Articles
-
Ark: Survival Evolved
- How to Enable Events on an Ark: Survival Evolved Server
- How to Change the Map on Your Ark: Survival Evolved Server
- How to Install Mods on Your Ark: Survival Evolved Server
- How to Enable Crossplay on an Ark: Survival Evolved Server
- How to Add a Password to Your Ark: Survival Evolved Server
- How to Allow Shared Accounts to Join Your Ark: Survival Evolved Server
- How To Enable Cave Flying in Ark: Survival Evolved
- How To Disable BattlEye Anti-Cheat on Ark: Survival Evolved
- How to Find a User’s SteamID
- How To Add and Remove Admins on Your Ark: Survival Evolved Server
- How To Configure the ‘GameUserSettings.ini’ File on Your Ark Survival Evolved Server
- How to Change the Auto-Save Interval on Your ARK: Survival Evolved Server
- How to Enable the Server Crosshair on Your ARK: Survival Evolved Server
- How to Change the Max Tamed Dinos Limit on Your ARK: Survival Evolved Server
- How To Enable/Disable Admin Command Logging on Your ARK: Survival Evolved Server
- How to Set Max Wild Dino Level on Your ARK: Survival Evolved Server
- How to Change the XP Multiplier on Your ARK: Survival Evolved Server
- How to Enable Player Disconnect Notifications on Your ARK: Survival Evolved Server
- How to Enable Player Join Notifications on Your ARK: Survival Evolved Server
- How to Enable Player Map Locations on Your ARK: Survival Evolved Server
- How to Change the Max Structures in Range Limit on Your ARK: Survival Evolved Server
- How to Change the Resource Respawn Radius on Your ARK: Survival Evolved Server
- How to Change the Idle Player Kick Timer on Your ARK: Survival Evolved Server
- How to Change the Multiplayer Tether Distance on Your ARK: Survival Evolved Server
- How to Change the Global Platform Saddles Limit on Your ARK: Survival Evolved Server
- How to Enable Third-Person Perspective on Your ARK: Survival Evolved Server
- How to Change the Platform Max Structures Limit on Your ARK: Survival Evolved Server
- How to Install the ARK Quality of Life Forges Mod on Your ARK: Survival Evolved Server
- How to Adjust Harvesting and Gathering Rate on Your ARK: Survival Evolved Server
- How to Set Up RCON for Remote ARK Server Management
- How to Set Up a Cluster Server (Cross-ARK Data Transfer)
- How to Speed Up Breeding, Egg Hatching, and Maturation Rates on Your ARK: Survival Evolved Server
- How to Auto-Unlock Engrams as Players Level Up on Your ARK: Survival Evolved Server
- How to Adjust Taming Speed on Your ARK: Survival Evolved Server
- Show all articles ( 19 ) Collapse Articles
-
DayZ
-
- How to Connect to Your DayZ Server
- How to Edit Types.xml on Your DayZ Server
- How to Set Admin Password / RCON Password on Your DayZ Server
- How to Change the Server Name on a DayZ Server
- How to Change the Max Players on a DayZ Server
- How to Add a Server Password to Your DayZ Server
- How to Change the Map on a DayZ Server
- How to Install a Custom Map on Your DayZ Server
- How to Change Weather Settings on Your DayZ Server
- How to Change Day and Night Cycle on Your DayZ Server
- How to Configure Your DayZ Server (serverDZ.cfg Explained)
- How to Set a Message of the Day (MOTD) on Your DayZ Server
- How To Identify a Player’s DayZ Identity ID
- How to Edit Animal Spawns on Your DayZ Server
-
- How To Install Mods on Your DayZ Server
- How to Install CF & VPPAdminTools on Your DayZ Server
- How to Fix Mods Not Loading on Your DayZ Server
- How to Install Expansion Mod on Your DayZ Server
- How to Install DayZ Expansion Vehicles
- How to Install a Custom Map on Your DayZ Server
- How to Install DayZ Expansion AI
- How to Disable Vehicle Damage in DayZ
- How to Configure DayZ Expansion Vehicles
- How to Configure DayZ Expansion Settings
- How to Configure DayZ Expansion AI
- How To Safely Remove a Mod From a DayZ Server
- What Is VPPAdminTools and How Does It Work in DayZ?
- How To Fix Mod Version Mismatch on Your DayZ Server
-
- How to Change Stamina Settings on Your DayZ Server
- How to Change Weather Settings on Your DayZ Server
- How to Change Day and Night Cycle on Your DayZ Server
- How to Enable or Disable Base Damage on Your DayZ Server
- How to Adjust Zombie Spawn Rates on Your DayZ Server
- How to Customize Loot Spawns on Your DayZ Server
- How to Increase Inventory Weight Limits on Your DayZ Server
- How to Add Custom Loot Areas to Your Map on Your DayZ Server
- How to Increase Helicopter Crash Sites on Your DayZ Server
- How Food, Water & Temperature Work on Your DayZ Server
- How to Change Player Spawn Gear on Your DayZ Server
-
Satisfactory
- How to Mod Your Satisfactory Server
- How to Join Your Satisfactory Server
- How To Add a Password to Your Satisfactory Server
- How To Adjust Your Satisfactory Server Settings
- How to Access the Ingame Console of Satisfactory
- How To Change Max Players on Your Satisfactory Server
- How To See Your Ping on Your Satisfactory Server
- How To Change the Server Name on Your Satisfactory Server
- How To Disable Auto-Pause on Your Satisfactory Server
- How to Unclaim Your Satisfactory Server
- How To Change or Reset the Admin Password on a Satisfactory Server
- How To Change the Name of Your Satisfactory World
- How To Download a Save From a Satisfactory Server
- How To Transfer a Single-Player Satisfactory Save to a Dedicated Server
- How To Make Your Satisfactory Server Private
- How To Upload Blueprints to a Satisfactory Server
- How to Fix Connection Timed Out on a Satisfactory Server
- How To Change the Starting Area on a Satisfactory Server
- How to Connect to Your Satisfactory Server Using IP and Port
- How to Find Your Satisfactory Server on the In-Game Server Browser
- How To Get Administrative Privileges in Satisfactory
- Satisfactory Command Cheatsheet
- How to Schedule Weekly Wipes or Seasonal Resets on Your Satisfactory Server
- Security Tips for a Public Satisfactory Server
- How to Find a User’s SteamID
- How to Create Additional Save Slots on Your Satisfactory Server
- How To Switch Your Satisfactory Server Between Early Access and Experimental Versions
- How To Automate Blueprint Distribution to All Players on Your Satisfactory Server
- Show all articles ( 13 ) Collapse Articles
-
Project Zomboid
-
- How To Setup RCON for Your Project Zomboid Server
- How To Whitelist a Project Zomboid Server
- How to Make Your Project Zomboid Server Private
- How To Set the Spawn Point of Your Project Zomboid Server
- How To Change the Name and Description of Your Project Zomboid Server
- How To Apply a Sandbox Preset on a Project Zomboid Server
- How To Become an Admin on Your Project Zomboid Server (B41/B42)
- How To Enable the MiniMap on Your Project Zomboid Server (B41/B42)
- How to Adjust Your Project Zomboid Server Settings
- How to Add a Password to a Project Zomboid Server
- How To Locate Your Project Zomboid Server Crash Logs
- How To Make Project Zomboid Servers Public
- How Reveal the Map on Your Project Zomboid Server (B41/B42)
- How to Configure Zombie Hearing and Vision Range on Your Project Zomboid Server
- How to Disable or Configure the Helicopter Event in Your Project Zomboid Server
- How To Enable and Configure the Starter Kit on Your Project Zomboid Server
- How to Enable Trash Containers Functionality on Your Project Zomboid Server
- How to Configure Vehicle Speed Limits on Your Project Zomboid Server
- How to Enable Safehouse Claim on Your Project Zomboid Server
- How to Enable Automatic Cleanup of Dropped Items on Your Project Zomboid Server (B41/B42)
- How to View Players Skill Progression Logs on Your Project Zomboid Server
- How To Fix the ‘Failed To Download Map From Server’ Error on Your Project Zomboid Server
- How to Fix the Reversion of Changes in Sandbox Options on Your Project Zomboid Server
- How to Configure Automatic Restarts on Your Project Zomboid Server
- How to Set Up Automatic Server Messages on Your Project Zomboid Server
- Restoring Electricity and Water on Your Project Zomboid Server
- How To Link Discord With Your Project Zomboid Server (Build 41 and Build 42)
- How To Install Mods on Your Project Zomboid Server (Build 42)
- How To Change Presets on Your Project Zomboid Server (Build 42)
- How To Fix "No Space Left on Device" on Your Project Zomboid Server
- How To Enable/Disable Steam Relay on a Project Zomboid Server (B41/B42)
- How to Change Starting Skill Points on Your Project Zomboid Server (B41/B42)
- How To Upload Your World to Your Project Zomboid Server (B41/B42)
- How To Create Custom Roles on Your Project Zomboid Server (Build 42)
- How To Change the Seed on Your Project Zomboid Server (B41/B42)
- How To Enable Loot Respawn on Your Project Zomboid Server
- How To Enable MultiHit on Your Project Zomboid Server (B41/B42)
- Show all articles ( 22 ) Collapse Articles
-
- How To Access the Admin Panel on a Project Zomboid Server (B41/B42)
- Managing User Access Levels in Project Zomboid
- Project Zomboid Admin Panel Options (Build 41)
- How To Spawn Items and Vehicles on a Project Zomboid Server
- How To Teleport on a Project Zomboid Server
- How To Kick or Ban a Player From Your Project Zomboid Server
- How To Change the Zombie Spawn Rates on Your Project Zomboid Server
- How To Display Players on the Map on a Project Zomboid Server (B41/B42)
- How To Change Playstyle on Your Project Zomboid Server
- How to Give Yourself XP Levels in Project Zomboid
- How to Get an Item ID on Your Project Zomboid Server
- How to View Other Players Inventories on Your Project Zomboid Server
- How to Remove Large Amounts of Zombie Corpses on Your Project Zomboid Server (B41/B42)
- How to Copy Structures/Tiles on Your Project Zomboid Server
- How to Modify Item/Object Properties on Your Project Zomboid Server
- How to Expand a Safezone Size on Your Project Zomboid Server
- How to Spawn Zombie Hordes on Your Project Zomboid Server
- How to Create PVP-Free Zones on Your Project Zomboid Server
- How to Disable Zombie Virus Infection on Your Project Zomboid Server
- How to Enable or Disable Fire Spread Mechanics on Your Project Zomboid Server
- How to Enable or Disable Sleep on Your Project Zomboid Server (B41/B42)
- How to Manually Regenerate Loot in a Container in Your Project Zomboid Server
- How to Enable or Disable PVP on Your Project Zomboid Server
- How to Enable or Disable Sledgehammer Usage on Your Project Zomboid Server
- How to Change How Often Your Project Zomboid Server Saves
- How to View the Designated Area of a Claimed Safehouse on a Project Zomboid Server
- How to Repair a Vehicle on a Project Zomboid Server
- How to Configure Vehicle Generation on Your Project Zomboid Server
- How to Increase Item Numbers Limit on Your Project Zomboid Server
- How to Disable Meta-Events on Your Project Zomboid Server
- How to Modify Weapon Damage on Your Project Zomboid Server
- How to Restore a Players Health Using Commands on Your Project Zomboid Server (Build 41)
- How to Configure Claimable Structure Types as Safehouses on Your Project Zomboid Server
- How To Modify the Automatic Expiration of Inactive Safehouse Claims on Your Project Zomboid Server
- How to Find a Player Steam ID on Your Project Zomboid Server
- How To Modify the Erosion Growth in Your Project Zomboid Server
- How To Modify the Durability of Player-Built Structures on Your Project Zomboid Server
- How to Configure the Number of Accounts a User Can Create to Join Your Project Zomboid Server
- How To Configure the Hunger and Thirst Rate of Players on Your Project Zomboid Server
- How To Add or Remove Traits From an Already Created Character on a Project Zomboid Server
- How To Set Up Extreme Weather on Your Project Zomboid Server
- How To Enable 'Destroy Mode' on Your Project Zomboid Server (Build 42)
- How to Find a User’s SteamID
- How To Reset a User’s Password on Your Project Zomboid Server
- Show all articles ( 29 ) Collapse Articles
-
- How To See Your Ping in Project Zomboid (B41/B42)
- How to Update Project Zomboid to the Latest Version
- How to Adjust Day Length Settings on Your Project Zomboid Server (B41/B42)
- How to Disable Zombie Respawn on Project Zomboid
- How to Reset a Character on Your Project Zomboid Server
- How to Enable Debug Mode on Your Project Zomboid Server (B41/B42)
- How To Enable Proximity Voice Chat on Project Zomboid (B41/B42)
- How to Fix the Reversion of Changes in Sandbox Options on Your Project Zomboid Server
- How To Remove Mods From Your Project Zomboid Server
-
Factorio
- How To Add a Password to a Factorio Server
- How To Add an Admin on Your Factorio Server
- How To Change the Scenario on Your Factorio Server
- How To Change the Difficulty on Your Factorio Server
- How To Create a New Save on Your Factorio Server
- How To Display Your Factorio Server on the Public Server List
- How to Find a User’s SteamID
- How To Enable Peaceful Mode on Your Factorio Server
- How To Keep Your Factorio Server Running With 0 Active Players
- How to Set Up an Offline Version of Your Factorio Server
- How to Whitelist Players on Your Factorio Server
- How to Upload a Single-Player World to Your Factorio Server
-
Unturned
- How To Find an Unturned User’s SteamID
- How To Enable Cheats on Your Unturned Server
- How To Change Game Difficulty on Your Unturned Server
- How To Become an Admin on Your Unturned Server
- How To Configure Auto-Saving on Your Unturned Server
- How To Enable/Disable PVP on Your Unturned Server
- How To Enable Third Person Mode on Your Unturned Server
- How To Ban, Unban, or Kick a Player From Your Unturned Server
- How To Install OpenMod and Plugins on Your Unturned Server
- How To Make Your Unturned Server Private
- How To Whitelist Your Unturned Server
- How To Whitelist Players on Your Unturned Server
- How To Install Workshop Mods on Your Unturned Server
- How To Enable Map Mods on Your Unturned Server
- How To Upload or Download a Savegame on Your Unturned Server
- How to Find a User’s SteamID
- How To Change the Map of Your Unturned Server
- How To Install RocketMod on Your Unturned Server
- How To Change the Name, Description and Icon of Your Unturned Server
- How To Change Your Unturned Server Links
- Show all articles ( 5 ) Collapse Articles
-
Garry's Mod
- How To Change the Name of Your Garry's Mod Server
- How To Enable RCON on Your Garry’s Mod Server
- How To Enable the In-Game Console on Your Garry’s Mod Client
- How To Enable Cheats on Your Garry’s Mod Server
- How To Ban or Kick Players on Your Garry’s Mod Server
- How To Add Gamemodes to Your Garry’s Mod Server Using Steam Workshop
- How To Make Your Garry’s Mod Server Private
- How To Make Players Auto-Download Workshop Addons
- How To Add a Steam Workshop Collection to Your Garry’s Mod Server
- How To See the Ping of Your Garry’s Mod Server
- How to Mount Counter-Strike: Source and Team Fortress 2 Content to Your Garry's Mod Server
- How to Add Garry’s Mod Workshop Maps on Your Server
- How To Upload a Custom Map to Your Garry’s Mod Server
- How To Upload a Custom Loading Screen on Your Garry’s Mod Server
- How To Add Custom Startup Parameters to Your Garry’s Mod Server
- How To Install DarkRP to Your Garry’s Mod Server
- How To Install Custom Addons to a Garry’s Mod Server
- How to Find a User’s SteamID
- Show all articles ( 3 ) Collapse Articles
-
Enshrouded
- How To Set a Password on an Enshrouded Server
- How To Change the Max Players on Your Enshrouded Server
- How to Change Your Server Name on Your Enshrouded Server
- How to Find a User’s SteamID
- How To Change the Crafting Speed on Your Enshrouded Server
- How To Change the Day Length on Your Enshrouded Server
- How To Change the Difficulty on Your Enshrouded Server
- How To Change the Enemy Settings on Your Enshrouded Server
- How To Change the Food and Hunger Settings on Your Enshrouded Server
- How To Change the Gather Rate on Your Enshrouded Server
- How To Create a New World on Your Enshrouded Server
- How To Change the Experience Gain on Your Enshrouded Server
- How To Download ArvronChronozon's Storehouse World for Enshrouded
- How To Disable Death Penalties on Your Enshrouded Server
- How To Download a Save to Singleplayer From Your Enshrouded Server
- How To Switch Between Proximity and Global Voice Chat on Your Enshrouded Server
- How To Enable or Disable Text and Voice Chat on Your Enshrouded Server
- How To Adjust Perk Point Costs on Your Enshrouded Server
- How To Adjust Fishing Difficulty on Your Enshrouded Server
- How To Adjust Player Health on Your Enshrouded Server
- How To Adjust Player Mana on Your Enshrouded Server
- How To Update Your Enshrouded Server to Version 1.0
- Show all articles ( 7 ) Collapse Articles
-
7 Days to Die
- How to Find a User’s SteamID
- How To Change the Difficulty on Your 7 Days To Die Server
- How To Add and Remove Admins on Your 7 Days To Die Server
- How To Change the Jar Refund Settings on Your 7 Days To Die Server
- How To Add a URL to Your 7 Days To Die Server
- How To Change the Map on Your 7 Days To Die Server
- How To Change the PvP Settings on Your 7 Days To Die Server
- How To Change the Server Visibility on Your 7 Days To Die Server
- How To Change the Storm Frequency on Your 7 Days To Die Server
- How To Change the Server Description on Your 7 Days To Die Server
- How To Disable Anti-Cheat on Your 7 Days To Die Server
- How To Disable Biome Progression on Your 7 Days To Die Server
- How To Change the Password for Your 7 Days to Die Server
- How To Kick or Ban Players on Your 7 Days to Die Server
- How To Remove the Death XP Penalty on Your 7 Days To Die Server
- How To Restart a Map on Your 7 Days To Die Server
- How To Upload a World to Your 7 Days To Die Server
- How To Download a Save From Your 7 Days To Die Server
- How To Enable Cheats on Your 7 Days To Die Server
- How To Install Beta Branches on Your 7 Days To Die Server
- How To Install an Overhaul Mod on Your 7 Days To Die Server
- How To Update to the Latest Experimental on Your 7 Days To Die Server
- How To Set Up Twitch Integration on Your 7 Days To Die Server
- How To Install Custom Prefabs on Your 7 Days To Die Server
- How To Install Mods on Your 7 Days To Die Server
- How To Spawn Near Players on Your 7 Days To Die Server
- How To Use a Randomly Generated World on Your 7 Days To Die Server
- How To Run Crossplay on Your 7 Days To Die Server
- How To Reset the Player Data on Your 7 Days To Die Server
- How To Find a Player's EOS ID on Your 7 Days to Die Server
- How To Change the Blood Moon Frequency on Your 7 Days To Die Server
- How To Change Zombie Speed Settings on Your 7 Days To Die Server
- How To Change Day and Night Length on Your 7 Days To Die Server
- How To Change Drop on Death Settings on Your 7 Days To Die Server
- How To Change Loot Respawn Times on Your 7 Days To Die Server
- How To Change Air Drop Frequency on Your 7 Days To Die Server
- How To Change Player XP Multipliers on Your 7 Days To Die Server
- How To Change Land Claim Block Settings on Your 7 Days To Die Server
- How To Enable Chunk Reset on Your 7 Days To Die Server
- How To Change the Max Player Limit on Your 7 Days To Die Server
- How To Change Max Spawned Zombies on Your 7 Days To Die Server
- How To Change Block Damage Settings on Your 7 Days To Die Server
- How To Change Loot Abundance on Your 7 Days To Die Server
- How To Enable Air Drop Markers on Your 7 Days To Die Server
- How To Change Blood Moon Enemy Count on Your 7 Days To Die Server
- How To Disable Enemy Spawning on Your 7 Days To Die Server
- How To Change Max Spawned Animals on Your 7 Days To Die Server
- How To Change the Blood Moon Warning Time on Your 7 Days To Die Server
- How To Change Player Safe Zone Settings on Your 7 Days To Die Server
- How To Enable Persistent Player Profiles on Your 7 Days To Die Server
- How To Change the Max View Distance on Your 7 Days To Die Server
- How To Change the Welcome Message on Your 7 Days To Die Server
- Show all articles ( 37 ) Collapse Articles
-
V Rising
- How to Find a User’s SteamID
- How to Change the Password of Your V Rising Server
- How To Change Your V Rising Server Game Mode (PvE, PvP, DuoPvP Etc…)
- How to Update Your V Rising Server
- How to Change the Name of Your V Rising Server
- How to Change the Server Description of Your V Rising Server
- How to Change the Maximum Player Limit of Your V Rising Server
- How to Change the SERVER FPS Limit of Your V Rising Server
- How to Enable Cheats / Admin Commands on Your V Rising Server
- How To Make Your V Rising Server Public or Private via Startup
- How To Make Your V Rising Server Public or Private via ServerHostSettings.json
- How to Restore Your V Rising Server
- How to Change the Day/Night Cycle Speed on Your V Rising Server
- How to Reset Your V Rising Server World
- How to Disable Castle Decay on Your V Rising Server
- How to Increase Resource Gathering Rates on Your V Rising Server
- How to Change the Blood Drain Rate on Your V Rising Server
- How To Ban and Unban Players on Your V Rising Server
- How to Allow All Waypoints to Be Unlocked on Your V Rising Server
- How to Allow Items to Be Teleported on Your V Rising Server
- How to Enable Free Castle Claiming on Your V Rising Server
- How to Change the Difficulty on Your V Rising Server
- How to Set Castle Limits on Your V Rising Server
- How to Reduce Blood Essence Drain on Your V Rising Server
- How to Set PvP Time Windows (Raid Hours) on Your V Rising Server
- How to Enable Full Loot PvP on Your V Rising Server
- How to Change Clan Size on Your V Rising Server
- How to Adjust Sun Damage on Your V Rising Server
- How to Adjust Player and Enemy Damage on Your V Rising Server
- How to Enable Global Chat on Your V Rising Server
- How to Increase Inventory Stack Sizes on Your V Rising Server
- How to Keep Inventory on Death on Your V Rising Server
- How to Increase Blood Essence Yield on Your V Rising Server
- How To Change the Auto-Save Interval on Your V Rising Server
- How To Set the Number of Auto-Save Slots on Your V Rising Server
- How To Enable RCON on Your V Rising Server Using Startup Variables
- How To Connect to Your V Rising Server via Direct Connect
- How To Enable Secure Mode on Your V Rising Server via ServerHostSettings.json
- How To Change the Save Name on Your V Rising Server via ServerHostSettings.json
- How To Enable Secure Mode on Your V Rising Server Using Startup Variables
- How To Adjust Equipment Durability Drain on Your V Rising Server
- How To Adjust Crafting Costs on Your V Rising Server
- How To Enable RCON on Your V Rising Server Using ServerHostSettings.json
- How To Change the Query Port on Your V Rising Server via ServerHostSettings.json
- How To Set Siege Weapon Health on Your V Rising Server
- How To Configure the Castle Damage Mode on Your V Rising Server
- How To Adjust Servant Convert Rate on Your V Rising Server
- How To Adjust Recipe Costs on Your V Rising Server
- How To Change the Building Cost Modifier on Your V Rising Server
- How To Adjust Equipment Stats on Your V Rising Server
- How To Adjust the Maximum Castle Floor Limit on Your V Rising Server
- How To Adjust the Castle Heart Damage Mode on Your V Rising Server
- How To Adjust Player Max Health on Your V Rising Server
- How To View All Connected Players on Your V Rising Server
- How To Remove Admin Access From a Player on Your V Rising Server
- How To Monitor Resource Usage on Your V Rising Server
- How To Set the Maximum Number of Admins on Your V Rising Server
- How To Kick a Player via Console on Your V Rising Server
- How To Use In-Game Admin Commands on Your V Rising Server
- How To Download Your V Rising Server Save Files
- How To Restart Your V Rising Server From the Console
- Show all articles ( 46 ) Collapse Articles
-
Left 4 Dead 2
-
- How To Change the Difficulty on Your Left 4 Dead 2 Server
- How To Change Your Left 4 Dead 2 Game Mode
- How To Configure Your Left 4 Dead 2 Server
- How To Create a Custom MOTD (Message of the Day) in Left 4 Dead 2
- How To Disable or Customise Friendly Fire Damage on Your Left 4 Dead 2 Server
- How To Increase the Max Player Limit (8+ Players) on Your Left 4 Dead 2 Server
- How To Change the Server Tickrate on Your Left 4 Dead 2 Server
- How To Adjust Zombie Mob Sizes on Your Left 4 Dead 2 Server
- How To Set a Custom Host Banner on Your Left 4 Dead 2 Server
- How To Enable Cheats on Your Left 4 Dead 2 Server
- How To Give Survivors More Health or Speed on Your Left 4 Dead 2 Server
- How To Enable “All-Talk” Voice Chat on Your Left 4 Dead 2 Server
- How To Restrict Votekicking to Admins Only on Your Left 4 Dead 2 Server
- How To Reduce Server Lag and Ping Spikes on Your Left 4 Dead 2 Server
- How to Password Protect and Hide Your Left 4 Dead 2 Server
- How To Disable Survivor Bot Spawns on Your Left 4 Dead 2 Server
- How To Turn On the “Realism” Modifier for Any Campaign in Left 4 Dead 2
- How To Host “Last Man on Earth” on Your Left 4 Dead 2 Server
- How To Enable Infinite Ammo Without Enabling Cheats in Your Left 4 Dead 2 Server
- How To Change Your Left 4 Dead 2 Server’s Matchmaking Region
- How to Enable "Headshots Only" (CO-OP Only) Mode in Your Left 4 Dead 2 Server
- How To Disable Car Alarms (Panic Events) on Your Left 4 Dead 2 Server
- How To Change the Special Infected Spawn Limits on Your Left 4 Dead 2 Server
- How To Force a Specific Campaign To Load on Server Startup in Left 4 Dead 2
- How To Adjust the Tank’s Health on Your Left 4 Dead 2 Server
- How To Completely Disable Tank and Witch Spawns on Your Left 4 Dead 2 Server
- How To Completely Disable In-Game Voice Chat on Your Left 4 Dead 2 Server
- How To Stop Players From Downloading Server Files on Your Left 4 Dead 2 Server
- How To Change the First Aid Kit Healing Speed on Your Left 4 Dead 2 Server
- How To Change the Gravity on Your Left 4 Dead 2 Server
- Show all articles ( 15 ) Collapse Articles
-
- How To Install SourceMod on Your Left 4 Dead 2 Server
- How To Install MetaMod on Your Left 4 Dead 2 Server
- How To Install an AFK Manager on Your Left 4 Dead 2 Server
- How To Enable “Vampirism” for Survivors on Your Left 4 Dead 2 Server
- How To Add a Jetpack Plugin to Your Left 4 Dead 2 Server
- How To Spawn Upgrade Boxes Everywhere on Your Left 4 Dead 2 Server
- How To Let the Charger Steer While Charging on Your Left 4 Dead 2 Server
- How To Add a Weapon Menu to Your Left 4 Dead 2 Server
- How To Enable “Drop Weapon” Functionality on Your Left 4 Dead 2 Server
- How To Enable Crawling While Incapacitated in Your Left 4 Dead 2 Server
- How To Add a Character Select Menu to Your Left 4 Dead 2 Server
- How To Enable Third-Person Mode for Survivors in Your Left 4 Dead 2 Server
- How To Let Players Control the Witch on Your Left 4 Dead 2 Server
- How to Auto-Revive Incapacitated Survivors on Your Left 4 Dead 2 Server
- How To Install Custom Campaigns (Add-On Maps) on Your Left 4 Dead 2 Server
- How To Enable Regenerative Healing on Your Left 4 Dead 2 Server
- How To Improve Survivor Bot AI on Your Left 4 Dead 2 Server
- How To Add Floating Boss Health Bars in Your Left 4 Dead 2 Server
- How To Lock the Safe Room Door Until All Players Are Ready on Your Left 4 Dead 2 Server
- How To Add an End-of-Campaign Map Voting Menu on Your Left 4 Dead 2 Server
- How To Spawn Melee Weapons in Every Starting Saferoom on Your Left 4 Dead 2 Server
- How To Add an Economy Store System for Buying Weapons and Perks on Your Left 4 Dead 2 Server
- How To Set Up Custom Chat Colors and Admin Tags on Your Left 4 Dead 2 Server
- How To Set Up Reserved Slots for VIPs and Admins on Your Left 4 Dead 2 Server
- How To Unlock Hidden CS:S Weapons on Your Left 4 Dead 2 Server
- How To Let Survivors Drop Their Secondary Weapons Upon Death on Your Left 4 Dead 2 Server
- How To Enable Auto-Bhop (Bunnyhopping) for Players on Your Left 4 Dead 2 Server
- How To Enable Special Infected Bots in Left 4 Dead 2 Versus Mode
- Show all articles ( 13 ) Collapse Articles
-
- How To Fix “Server Enforcing Consistency” Error on Your Left 4 Dead 2 Server
- How To Fix the “Steam Validation Rejected” Error on Your Left 4 Dead 2 Server
- How To Fix the “Disconnect: Client Timed Out” Error in Left 4 Dead 2
- How To Fix the “Host_Error: String Table Dictionary” Error When Loading Custom Maps in Left 4 Dead 2
- How To Fix “STEAM Auth Ticket Has Been Cancelled” Errors on Your Left 4 Dead 2 Server
- How To Fix the “Unable To Load Authentication Library” Error on Your Left 4 Dead 2 Server
-
Squad
- How to Find a User’s SteamID
- How to Exclude Factions on Your Squad Server
- How To Enable/Disable Team Switching on a Squad Server
- How to Set the Layer Map Rotation on Your Squad Server
- How to Set Up RCON on Your Squad Server
- How to Enable Server Demo Recording on Your Squad Server
- How to Advertise Your Squad Server on the Public Server List
- How to Configure Reserved Slots on Your Squad Server
- How to Set Up the MOTD on Your Squad Server
- How to Add Admins on Your Squad Server
- How to Ban/Unban a Player on Your Squad Server
- How to Set Up Automatic Broadcast Messages on Your Squad Server
- How to Configure the Public Queue Limit on Your Squad Server
- How to Set Maximum Player Slots on Your Squad Server
- How to Enforce Automatic Team Balance on Your Squad Server
- How to Change Your Squad Server Name
- Show all articles ( 1 ) Collapse Articles
-
Conan Exiles
- How to Find a User’s SteamID
- How To Keep Your Inventory on Death in Conan Exiles
- How To Change the XP Multiplier To Level Up Faster on Your Conan Exiles Server
- How To Change the Harvest Yield Multiplier on Your Conan Exiles Server
- How To Wipe the Map and Player Progress on Your Conan Exiles Server (Without Losing Settings)
- How To Install Mods on Your Conan Exiles Server
- How to Ban or Unban Players on a Conan Exiles Server
- How To Set Up a Whitelist for Your Conan Exiles Server
- How To Change the Maximum Clan Size Limit in Conan Exiles
- How To Configure the Message of the Day on a Conan Exiles Server
- How To Adjust Thrall Crafting and Breaking Speeds in Conan Exiles
- How To Adjust the Local Chat Radius on Your Conan Exiles Server
- How to Change Animal Pen Taming Speeds in Conan Exiles
- How To Speed Up Item Crafting Multipliers on a Conan Exiles Server
- How To Modify Resource Respawn Times on Your Conan Exiles Server
- How To Set Specific PvP Time Windows for a Conan Exiles Server
- How To Adjust Player Hunger and Thirst Rates in Conan Exiles
- How To Enable or Disable PvP on Your Conan Exiles Server
- How To Turn Off the Catch-Up Time Mechanic in Conan Exiles
- How To Modify Experience Multipliers for Kills and Harvesting in Conan Exiles
- How To Disable or Enable Friendly Fire on a Conan Exiles Server
- How To Modify Stamina Consumption Rates on Your Conan Exiles Server
- How To Toggle God Avatars On or Off in Conan Exiles
- How To Restrict Avatar Summoning Times on a Conan Exiles Server
- How to Change Player and NPC Damage Multipliers in Conan Exiles
- How to Enable or Disable Target Lock in Conan Exiles
- How To Change the Corpse Despawn Timer in Conan Exiles
- How To Adjust Sprinting Stamina Cost on Your Conan Exiles Server
- How To Restrict Corpse Looting on Your Conan Exiles Server
- How To Adjust Player Health Regeneration Rates in Conan Exiles
- How to Make Yourself an Admin on Your Conan Exiles Server
- How To Change Your Conan Exiles Server Name and Set a Password
- How To Connect to Your Conan Exiles Server
- How To Limit the Number of Purges Allowed per Day on Your Conan Exiles Server
- How To Completely Disable the Purge Mechanics on Your Conan Exiles
- How To Disable Building Decay on Your Conan Exiles Server
- How To Configure Structure Damage Settings on Your Conan Exiles Server
- How To Disable the Sandstorm Effect on Your Conan Exiles Server
- Show all articles ( 23 ) Collapse Articles
-
SCUM
- How to Find a User’s SteamID
- How to Change the Server Name on Your SCUM Server
- How to Change the Server Description on Your SCUM Server
- How To Add Admin Players to Your SCUM Server
- How to Change the Maximum Player Slots on Your SCUM Server
- How To Whitelist Players on Your SCUM Server
- How To Set a Server Password on Your SCUM Server
- How To Configure the Message of the Day (MOTD) on Your SCUM Server
- How To Change the Welcome Message on Your SCUM Server
- How To Ban and Unban Players on Your SCUM Server
- How To Silence Players on Your SCUM Server
- How To Set First- or Third-Person Perspective on Your SCUM Server
- How To Enable or Disable Global, Local and Squad Chat on Your SCUM Server
- How to Enable or Disable Events on Your SCUM Server
- How To Enable or Disable Mines and Traps on Your SCUM Server
- How To Enable or Disable Fog on Your SCUM Server
- How To Configure Respawn Options on Your SCUM Server
- How To Adjust Fame Gain Multiplier on Your SCUM Server
- How To Adjust Respawn Cooldowns on Your SCUM Server
- How To Adjust NPC Difficulty on Your SCUM Server
- How To Adjust NPC Health on Your SCUM Server
- How To Adjust Fuel Drain on Your SCUM Server
- How To Adjust Battery Drain on Your SCUM Server
- How To Adjust PvP Damage Multipliers on Your SCUM Server
- How To Enable or Disable Locked Loot Containers on Your SCUM Server
- How To Enable or Disable Coma on Your SCUM Server
- How To Enable or Disable Kill Notifications on Your SCUM Server
- How To Change the Maximum Ping Limit on Your SCUM Server
- How To Enable or Disable Voting on Your SCUM Server
- How To Enable or Disable Crosshairs on Your SCUM Server
- How To Enable or Disable Kill Claiming on Your SCUM Server
- How To Enable or Disable Map Access on Your SCUM Server
- How To Enable or Disable Automatic Parachute Opening on Your SCUM Server
- How To Enable or Disable New Player Protection on Your SCUM Server
- How To Adjust Mob Damage Multipliers on Your SCUM Server
- How To Enable or Disable Quests on Your SCUM Server
- How To Enable or Disable PvP on Your SCUM Server
- How To Enable or Disable Base Building on Your SCUM Server
- How To Configure Day/Night Cycle Speed on Your SCUM Server
- How To Set Respawn Prices on Your SCUM Server
- How To Adjust Vehicle Spawn Limits on Your SCUM Server
- Show all articles ( 26 ) Collapse Articles
-
Windrose
- How To Change the Invite Code on Your Windrose Server
- How To Change Boarding Difficulty Multiplier on Your Windrose Server
- How To Change Enemy Damage Multiplier on Your Windrose Server
- How To Change Ship Health Multiplier on Your Windrose Server
- How To Enable or Disable Immersive Exploration on Your Windrose Server
- How To Change Ship Damage Multiplier on Your Windrose Server
- How To Change the World Name on Your Windrose Server
- How To Enable or Disable Shared Quests on Your Windrose Server
- How To Change the World Difficulty on Your Windrose Server
- How To Configure Direct Connection on Your Windrose Server
- How To Change the Server Region on Your Windrose Server
- How To Enable or Disable Direct Connection on Your Windrose Server
- How To Change the Max Player Count on Your Windrose Server
- How To Change the Server Name on Your Windrose Server
- How To Change the Password on Your Windrose Server
- How To Enable or Disable Password on Your Windrose Server
- How to Find a User’s SteamID
- Show all articles ( 2 ) Collapse Articles
-
Sons Of The Forest
- How To Change the Server Name on Your Sons of the Forest Server
- How To Set a Password on Your Sons of the Forest Server
- How To Change the Max Player Count on Your Sons of the Forest Server
- How To Change the Game Mode on Your Sons of the Forest Server
- How To Skip the Network Test on Your Sons of the Forest Server
- How To Add an Admin to Your Sons of the Forest Server
- How To Remove an Admin From Your Sons of the Forest Server
- How To Enable Tree Regrowth on Your Sons of the Forest Server
- How To Enable or Disable Structure Damage on Your Sons of the Forest Server
- How To Enable or Disable Enemy Spawning on Your Sons of the Forest Server
- How To Change Enemy Health on Your Sons of the Forest Server
- How To Change Enemy Armour on Your Sons of the Forest Server
- How To Change Enemy Damage on Your Sons of the Forest Server
- How to Find a User’s SteamID
- How To Enable or Disable the Password on Your Sons of the Forest Server
- How To Connect to Your Sons of the Forest Server via Direct Connect (IP)
- Show all articles ( 1 ) Collapse Articles
-
Don't Starve Together
- How To Change the Name and Description of Your Don’t Starve Together Server
- How To Add Mods to Your Don’t Starve Together Server
- How to Find a User’s SteamID
- How To Disable Auto-Pause When Empty on Your Don’t Starve Together Server
- How To Enable PVP on Your Don’t Starve Together Server
- How To Set Your Don’t Starve Together Server to Private
- How to Change the Game Mode (Survival, Endless, Wilderness) on Your Don't Starve Together Server
- How To Configure World Generation on Your Don’t Starve Together Server
- How To Add an Admin to Your Don’t Starve Together Server
- How To Get a Cluster Token and Add It to Your Don’t Starve Together Server
- How To Change a Player’s Character on Your Don’t Starve Together Server
- How To Kick and Ban Players From Your Don’t Starve Together Server
- How To Upload a Save to Your Don’t Starve Together Server
- How To Change the Day Length on Your Don’t Starve Together Server
- How To Change the Resource Regrowth Settings on Your Don’t Starve Together Server
- How To Change the Season Length on Your Don’t Starve Together Server
- How To Disable Ghost Sanity Drain on Your Don’t Starve Together Server
- How To Disable the Max Health Penalty on Your Don’t Starve Together Server
- How To Enable Holiday Events on Your Don’t Starve Together Server
- How To Enable Portal Revives on Your Don’t Starve Together Server
- How To Enable Vote Kicking on a Don’t Starve Together Server
- How To Enable Spawn Protection on Your Don’t Starve Together Server
- How To Spawn Items in Your Don’t Starve Together Server
- How To Link Your Steam Group With Your Don’t Starve Together Server
- How To Find Your Klei ID on Dont Starve Together
- How To Whitelist Your Don’t Starve Together Server
- How to Get a Server Token for Your Don’t Starve Together Server
- How to Disable Specific Seasons on Your Don't Starve Together Server
- How To Change the Maximum Number of Players on Your Don’t Starve Together Server
- How To Change the World Size on Your Don’t Starve Together Server
- How To Set the Server Intent (Cooperative, Competitive, Social, Madness) on Your Don’t Starve Together Server
- How To Set a Password on Your Don’t Starve Together Server
- How To Add a Server Token to Your Don’t Starve Together Server
- How To Make Seasons Last Forever on Your Don’t Starve Together Server
- How To Change the Starting Season on Your Don’t Starve Together Server
- How To Change the Tick Rate on Your Don’t Starve Together Server
- How To Reduce Lag on Your Don’t Starve Together Server
- How To Fix Cave Connection Errors on Your Don’t Starve Together Server
- How To Regenerate Caves on Your Don’t Starve Together Server
- How To Set Up the Caves Shard on Your Don’t Starve Together Server
- How To Configure Portal Migration Between Shards on Your Don’t Starve Together Server
- How To Switch World Generation Presets on Your Don’t Starve Together Server
- How To Configure Multiple World Clusters on Your Don’t Starve Together Server
- How To Enable or Disable Caves on Your Don’t Starve Together Server
- How To Roll Back Your Don’t Starve Together Server to a Previous Day
- Show all articles ( 30 ) Collapse Articles
-
Counter Strike 2
- How to Host a Counter Strike 2 Server
- How To Enable the Developer Console on CS2
- How To Add a Password to Your Counter Strike 2 Server
- How To Change the Max Players on Your Counter Strike 2 Server
- How To Change the Server Name on Your Counter Strike 2 Server
- How To Disable Anti-Cheat on Your Counter Strike 2 Server
- How to Find a User’s SteamID
- How To Enable Infinite Ammo and Infinite Grenades for Practice on Your CS2 Server
- How To Enable/Disable Friendly Fire on Your CS2 Server
- How To Change the Map on Your CS2 Server
- How To Show Bullet Impacts and Grenade Trajectories on Your CS2 Server
- How To Install MetaMod on Your CS2 Server
- How To Install CounterStrikeSharp on Your CS2 Server
- How To Add & Manage Plugins on Your CS2 Server
- How To Kick All Bots or Add Specific Bot Difficulty Levels on Your CS2 Server
- How To Configure Round Time and Match Time on Your CS2 Server
- How To Add Custom and Workshop Maps to Your CS2 Server
- How To Enable Pause and Timeout for Competitive Play on Your CS2 Server
- How To Freeze Bots or Make Them Mimic Your Movement on Your CS2 Server
- How To Set Start Money on Your CS2 Server
- How To Enable/Disable Auto Team Balance on Your CS2 Server
- How To Install the GunGame Plugin on Your CS2 Server
- How To Set Up Practice Mode on Your CS2 Server
- How To Bind Keys Using Console on Your CS2 Server
- How To Enable/Disable sv_cheats on Your CS2 Server
- How To Configure Your CS2 Server
- How To Install a Player Model Manager Plugin on Your CS2 Server
- How To Install MultiAddonManager on Your CS2 Server
- How To Install MenuManagerCS2 on Your CS2 Server
- How To Install a Retake Plugin on Your CS2 Server
- How To Install PlayerSettings on Your CS2 Server
- How To Install AnyBaseLibCS2 on Your CS2 Server
- How To Configure Player Join Grace Time on Your CS2 Server
- How To Configure Player Respawn on Death on Your CS2 Server
- How To Configure Custom Gravity Settings on Your CS2 Server
- How To Configure an Endless Free-for-All Deathmatch on Your CS2 Server
- How To Enable/Disable Automatic Player Respawns on Your CS2 Server
- How To Configure Weapon and Item Drops on Your CS2 Server
- How To Install the MatchZy Plugin on Your CS2 Server
- How To Manage AFK Players and Auto-Kick Settings on Your CS2 Server
- How To Configure Random Spawns on Your CS2 Server
- How To Enable/Disable Knife Dropping and Manage Gun Drops on Your CS2 Server
- How to Update Your CS2 Server to the Latest Version
- How To Extend or Remove the Buy Time Limit on Your CS2 Server
- How To Set Starting Money on Your CS2 Server
- How To Increase/Decrease the Max Grenade Limit on Your CS2 Server
- How To Change the Maximum Rounds per Match on Your CS2 Server
- How To Control Match Clinching on Your CS2 Server
- How To Install MovementUnlocker on Your CS2 Server
- How To Install cs2-Fake-Rcon on Your CS2 Server
- How To Install ServerListPlayersFix on Your CS2 Server
- How To Configure Spawn Protection and Invulnerability on Your CS2 Server
- How to Auto-Equip Defuse Kits for CTs on Your CS2 Server
- How To Give Players Free Armor and Helmets on Your CS2 Server
- How To Change the C4 Bomb Timer on Your CS2 Server
- How To Configure Spectator Rules and Camera Restrictions on Your CS2 Server
- How To Create an Infinite Warmup on Your CS2 Server
- How To Enable All-Talk During Warmup and Halftime on Your CS2 Server
- How to Set Up a Jailbreak Server on Your CS2 Server
- How to Set Up an Admin Team on Your CS2 Server
- How to Set Permission Levels of Admins on Your CS2 Server
- How to Install and Configure CS2-ChatManager Plugin on Your CS2 Server
- How To Enable Buying Anywhere on the Map on Your CS2 Server
- How to Install the CS2-BotAI Plugin on Your CS2 Server
- How to Install AFKManager Plugin on Your CS2 Server
- How To Add Server Tags To Improve Visibility for Your CS2 Server
- How to Install and Configure CS2-Tags Plugin on Your CS2 Server
- How To Configure Overtime for Competitive Matches on Your CS2 Server
- How To Configure Voice Chat and All-Talk on Your CS2 Server
- How To Allow Dead Players To Talk to the Living on Your CS2 Server
- How To Install ZombieSharp Plugin on Your CS2 Server
- How to Install the InstaDefuse Plugin on Your CS2 Server
- How To Enable/Disable Warmups on Your CS2 Server
- How to Install the CS2KZ (Kreedz) Plugin on Your CS2 Server
- Show all articles ( 59 ) Collapse Articles
-
Abiotic Factor
-
Astroneer
-
Core Keeper
-
ASKA
-
Space Engineers
-
- How To Enable or Disable Oxygen and Pressurisation on Your Space Engineers Server
- How To Configure Asteroid Density on Your Space Engineers Server
- How To Configure Trash Removal and Auto-Cleanup on Your Space Engineers Server
- How To Reduce Lag by Limiting Floating Objects on Your Space Engineers Server
- How To Change the View Distance on Your Space Engineers Server
-
- How To Add an Admin to Your Space Engineers Server
- How To Set a Password on Your Space Engineers Server
- How To Turn the Weather System On or Off on Your Space Engineers Server
- How To Turn Off Turret Friendly Fire on Your Space Engineers Server
- How To Upload a Custom Local World to Your Space Engineers Server
- How To Enable In-Game Scripts on Your Space Engineers Server
- How To Enable Crossplay (EOS) for Xbox and PlayStation Players on Your Space Engineers Server
-
- How To Change the Day and Night Cycle on Your Space Engineers Server
- How To Disable Meteor Showers on Your Space Engineers Server
- How To Disable Thruster Damage on Your Space Engineers Server
- How To Enable or Disable Copy Paste Tool on Your Space Engineers Server
- How To Change the Inventory Size Multiplier on Your Space Engineers Server
- How To Enable Experimental Mode on Your Space Engineers Server
- How To Enable or Restrict Spectator Mode for Players in Space Engineers
- How To Enable or Disable Permanent Death on Your Space Engineers Server
- How To Enable or Disable Weather Lightning Damage in Space Engineers
- How To Enable Cargo Ships and Random Encounters on Your Space Engineers Server
- How To Remove or Increase the PCU Limit on Your Space Engineers Server
- How To Enable or Disable Third-Person View on Your Space Engineers Server
- How To Enable or Disable Jetpacks on Your Space Engineers Server
- How To Change Assembler and Refinery Speeds on Your Space Engineers Server
- How To Enable or Disable Weapons on Your Space Engineers Server
- How To Enable or Disable Drones on Your Space Engineers Server
- How To Enable or Disable Unknown Signals on Your Space Engineers Server
- How To Enable the Economy System and Trading Stations on Your Space Engineers Server
- How To Disable Target Lock on Your Space Engineers Server
- How To Change Block Limits To Be per Faction or per Player on Your Space Engineers Server
- How To Enable or Disable Player Progression (Tech Trees) on Your Space Engineers Server
- How To Set the Maximum Faction Count on Your Space Engineers Server
- How To Change Respawn Ship Cooldowns on Your Space Engineers Server
- How To Enable or Disable Destructible Blocks on Your Space Engineers Server
- How To Enable or Disable Realistic Sound on Your Space Engineers Server
- How To Limit the Maximum Number of Active Grids per Player in Space Engineers
- How To Enable “Voxel Hand” Permissions for Admins in Space Engineers
- How To Force Players To Spawn in Space Instead of on Planets in Space Engineers
- Show all articles ( 13 ) Collapse Articles
- How to Change Your Space Engineers Server MOTD
- How to Make Your Space Engineers Server Cross-Platform
- How to Change Your Space Engineers Server Description
- How to Change Your Space Engineers Server Name
- How to Change the Maximum Player Count on Your Space Engineers Server
- How to Change the Gamemode of Your Space Engineers Server
- How to Find a User’s SteamID
-
Insurgency: Sandstorm
-
- Articles coming soon
- How To Change Melee Hit Settings on Your Insurgency Server
- How To Configure AI Investigation Behaviour on Your Insurgency Server
- How To Enable/Disable Auto Team Balance on Your Insurgency Sandstorm Server
- How To Customise Supply Points on Your Insurgency Sandstorm Server
- How To Change AI Difficulty on Your Insurgency Sandstorm Server
- How To Adjust Maximum Player Health on Your Insurgency Server
- How To Enable Player Vote Kicking on Your Insurgency Sandstorm Server
- How To Set Up End-of-Match Map Voting on Your Insurgency Sandstorm Server
- How To Enable RCON on Your Insurgency Sandstorm Server
- How To Configure Friendly Fire Statistics on Your Insurgency Server
- How To Customise Advanced AI Perception and Detection Ranges on Your Insurgency Server
- How To Optimise Advanced AI Logic and Combat on Your Insurgency Server
- How To Customise Bot Movement and AI Behaviour on Your Insurgency Sandstorm Server
- How To Fix Rubberbanding on Your Insurgency Sandstorm Server
- How To Set AI Bot Limits on Your Insurgency Sandstorm Server
- How To Join Your Insurgency Sandstorm Server
- How To Set a Password on Your Insurgency Sandstorm Server
- How To Change the Name of Your Insurgency Sandstorm Server
- How To Set Max Player Limit on Your Insurgency Sandstorm Server
- How to Configure Headshot Damage Multipliers on Your Insurgency Server
- How to Find a User’s SteamID
- How to Update Your Insurgency Sandstorm Server to the Latest Version
- How To Enable/Disable Sprinting and Sliding on Your Insurgency Sandstorm Server
- How To Change the Pre-Round (Warmup) Time Duration on Your Insurgency: Sandstorm Server
- How to Change the Enemy Bot Difficulty on Your Insurgency Sandstorm Server
- How To Change the Final Extraction Timer on Your Insurgency Sandstorm Server
- How To Change or Disable the Game Time Limit on Your Insurgency Sandstorm Server
- How To Enable/Disable Vehicle Insertions on Your Insurgency Sandstorm Server
- How To Change the Match Win Limit on Your Insurgency Sandstorm Server
- How To Adjust Supply Point Rewards for Completing Objectives on Your Insurgency Sandstorm Server
- How To Change the Team Kill Forgiveness Timer on Your Insurgency Sandstorm Server
- How To Change the Team Kill Limit on Your Insurgency Sandstorm Server
- How To Enable/Disable Third-Person Spectating on Your Insurgency Sandstorm Server
- How To Enable/Disable Spectating on Your Insurgency Sandstorm Server
- How To Enable/Disable Killer Info on Your Insurgency Sandstorm Server
- How To Enable/Disable the Kill Feed on Your Insurgency Sandstorm Server
- How To Change Stamina Drain Rates on Your Insurgency Sandstorm Server
- How To Modify Objective Capture Times on Your Insurgency Sandstorm Server
- How To Change Player Respawn Timer Delays on Your Insurgency Sandstorm Server
- How to Add/Remove Admins on Your Insurgency Sandstorm Server
- How to Change Lighting Conditions (Day/Night Maps) on Your Insurgency Sandstorm Server
- How to Set Up a Weight-Impacted Stamina System on Your Insurgency Sandstorm Server
- How to Create a Hardcore One-Shot-Kill Tactical Realism on Your Insurgency Sandstorm Server
- How to Configure Server Suppression Effects on Your Insurgency Sandstorm Server
- How to Set Up a Custom Map Cycle on Your Insurgency Sandstorm Server
- How to Set Up an Aggressive AI Fire Support Bombardment on Your Insurgency Sandstorm Server
- How To Assign Admin Privileges on Your Insurgency Sandstorm Server
- How to Install Custom Mod Map on Your Insurgency Sandstorm Server
- How To Change the Round Time Duration on Your Insurgency Sandstorm Server
- How To Set Up a Server MOTD (Message of the Day) on Your Insurgency Sandstorm Server
- How to Force AI Bots to Use Smoke and Flashbangs on Your Insurgency Sandstorm Server
- How to Configure a Zero UI on Your Insurgency Sandstorm Server
- How to Setup an Arsenal Sandbox on Your Insurgency Sandstorm Server
- How to Create a Slow-Paced Milsim on Your Insurgency Sandstorm Server
- How to Setup an No-Respawn Elimination Mode on Your Insurgency Sandstorm Server
- How to Set Up Night Bots for Outpost Mode on Your Insurgency Sandstorm Server
- How to Configure Dynamic AI Scaling for Player Count on Your Insurgency Sandstorm Server
- How to Configure Proximity-Only Voice Chat on Your Insurgency Sandstorm Server
- How To Generate and Add a GSLT Auth Token for the Public Server Browser for Your Insurgency Sandstorm Server
- How to Disable the HUD and Killfeed on Your Insurgency Sandstorm Server
- How to Generate and Add a GameStats Token (GST) to Your Insurgency: Standstrom Server
- How to Configure a Sniper Alley Bot on Your Insurgency Sandstorm Server
- How to Set Up Flanking AI for Tactical Checkpoint on Your Insurgency Sandstorm Server
- Show all articles ( 48 ) Collapse Articles
-
-
Euro Truck Simulator 2
- How to Enable the Developer Console in Euro Truck Simulator 2
- How To Use Steam Workshop Mods With Your Euro Truck Simulator 2 Server
- How to Access the Server Config File in Euro Truck Simulator 2 Server
- How to Change the Max Player Limit on Your Euro Truck Simulator 2 Server
- How to Enable Anti-Collision Mode on Your Euro Truck Simulator 2 Server
- How to Change Your Euro Truck Simulator 2 Server Name
- How To Get and Set Up a Server Logon Token for Your ETS2 Server
- How to Make Your Server Friends-Only on Your Euro Truck Simulator 2 Server
- How to Add a Welcome Message to Your Euro Truck Simulator 2 Server
- How to Find a User’s SteamID
- How to Enable or Disable AI Traffic on Your Euro Truck Simulator 2 Server
- How to Enable or Disable the Speed Limiter on Your Euro Truck Simulator 2 Server
- How to Use the Mods Optioning Setting on Your Euro Truck Simulator 2 Server
- How To Toggle In-Menu Ghosting on Your Euro Truck Simulator 2 Server
- How to Install Mods on Your Euro Truck Simulator 2 Server
- How to Control Traffic Load on Your Euro Truck Simulator 2 Server
- How to Enable or Disable Player Damage on Your Euro Truck Simulator 2 Server
- How to Add Custom Radio Stations to Your Euro Truck Simulator 2 Server
- How to Enable or Disable Player Name Tags on Your Euro Truck Simulator 2 Server
- How to Change the Timezone on Your Euro Truck Simulator 2 Server
- How To Show or Hide Your Euro Truck Simulator 2 Server From the Server Browser
- How to Set a Password on Your Euro Truck Simulator 2 Server
- How to Add Custom Music to Your Euro Truck Simulator 2 Server
- How To Export Server Packages From Euro Truck Simulator 2
- How to Add a Moderator to Your Euro Truck Simulator 2 Server
- Show all articles ( 10 ) Collapse Articles
-
American Truck Simulator
- How to Change Server Name on Your American Truck Simulator Server
- How to Set a Server Password on Your American Truck Simulator Server
- How to Change Server Description on Your American Truck Simulator Server
- How to Add a Welcome Message on Your American Truck Simulator Server
- How to Enable or Disable Player Damage on Your American Truck Simulator Server
- How to Enable or Disable Traffic on Your American Truck Simulator Server
- How to Enable or Disable Speed Limiter on Your American Truck Simulator Server
- How to Enable or Disable Mod Optioning on Your American Truck Simulator Server
- How to Enable or Disable Name Tags on Your American Truck Simulator Server
- How to Make Your Server Private (Friends Only) on Your American Truck Simulator Server
- How To Hide Your Server From Server Browser on Your American Truck Simulator Server
- How to Change Maximum Vehicles on Your American Truck Simulator Server
- How to Adjust AI Vehicles Per Player on Your American Truck Simulator Server
- How to Adjust AI Vehicle Spawn Limit on Your American Truck Simulator Server
- How to Enable or Disable Hide in Company on Your American Truck Simulator Server
- How to Enable or Disable Hide Colliding Vehicles on Your American Truck Simulator Server
- How to Enable or Disable Service No Collision on Your American Truck Simulator Server
- How to Enable or Disable In Menu Ghosting on Your American Truck Simulator Server
- How to Change Maximum Players on Your American Truck Simulator Server
- How to Find a User’s SteamID
- Show all articles ( 5 ) Collapse Articles
-
Arma Reforger
- How to Find a User’s SteamID
- How To Force Repair Server Files on Your Arma Reforger Server
- How To Show or Hide Your Arma Reforger Server in the Browser
- How To Change the Max FPS Limit on Your Arma Reforger Server
- How To Disable Third Person View on Your Arma Reforger Server
- How To Change the Game Scenario on Your Arma Reforger Server
- How To Change the Server Region on Your Arma Reforger Server
- How To Enable BattlEye Anti-Cheat on Your Arma Reforger Server
- How To Change the Maximum Player Count on Your Arma Reforger Server
- How To Change the Server Name on Your Arma Reforger Server
- How To Set a Server Password on Your Arma Reforger Server
- How To Enable or Disable Automatic Updates on Your Arma Reforger Server
- How To Add Mods to Your Arma Reforger Server
- How to Find Mods for Your Arma Reforger Server
- How To Add Admins on Your Arma Reforger Server
- How To Change Network View Distance on Your Arma Reforger Server
- How To Toggle Crossplay on Your Arma Reforger Server
- How To Change Server Minimum Grass Distance on Your Arma Reforger Server
- How To Change Voice Chat UI Settings on Your Arma Reforger Server
- How To Change Max View Distance on Your Arma Reforger Server
- How to Ban/Unban Players on Your Arma Reforger Server
- How to Set a Player Reservation Timeout on Your Arma Reforger Server
- How to Remove Mods From Your Arma Reforger Server
- How To Kick a Player From Your Arma Reforger Server
- How to Whitelist/Blacklist RCON Commands on Your Arma Reforger Server
- How to Adjust Server Join Queue Limits on Your Arma Reforger Server
- How to Change the AI Limit on Your Arma Reforger Server
- How to Set Up an RCON Connection on Your Arma Reforger Server
- How to Enable Game Master Mode on Your Arma Reforger Server
- How To Configure Player Save Time on Your Arma Reforger Server
- Show all articles ( 15 ) Collapse Articles
-
Schedule I
- How To Add Admins on Your Schedule 1 Server
- How To Change Your Schedule 1 Server Name and Description
- How To Set a Server Password on Your Schedule 1 Server
- How To Increase the Max Player Cap on Your Schedule 1 Server
- How To Switch Your Schedule 1 Server to the Required Beta Branch
- How To Set Up Steam Authentication on Your Schedule 1 Server
- How To Enable Anonymous or Persistent Steam Game Server Login on Your Schedule 1 Server
- How To Fix Players Getting Disconnected During Login on Your Schedule 1 Server
- How To Secure Your Schedule 1 Server Against Unauthorized Access and Griefing
- How To Create Custom Staff Permission Groups on Your Schedule 1 Server
- How To Import an Existing Single-Player Save Into Your Schedule 1 Dedicated Server
- How To Fix “Version Mismatch” Errors Between Your Schedule 1 Server and Players
- How To Restrict Which Client Mods Can Join Your Schedule 1 Server
- How To Ban and Unban Players on Your Schedule 1 Server
- How To Install and Configure Better Employees on Your Schedule 1 Server
- How To Fix “Modded Client Rejected” Errors on Your Schedule 1 Server
- How To Install and Configure OverTheCounter on Your Schedule 1 Server
- How To Install and Configure MoreGuns on Your Schedule 1 Server
- How to Install and Configure Property Renovations on Your Schedule 1 Server
- How To Install and Configure AdvancedDealing on a Schedule 1 Server
- How To Install and Configure EvenBetterMiniMap on Your Schedule 1 Server
- How To Protect Your Schedule 1 Server From Malicious Mods and Security Threats
- How To Install and Configure the No More Trash Mod on Your Schedule 1 Server
- How To Install and Use the TrashGrabber PLUS Mod in Schedule 1
- How To Lower the Memory Usage of Your Schedule 1 Server
- How To Choose the Starting Quest Point for a Fresh Save on Your Schedule 1 Server
- How To Enable or Disable Sleeping on Your Schedule 1 Server
- How To Pause the World When No Players Are Online on Your Schedule 1 Server
- How To Install and Configure NetEye Security Cameras on Your Schedule 1 Server
- How To Change the Day and Night Cycle Time on Your Schedule 1 Server
- How to Clear World Trash and Dropped Items on Your Schedule 1 Server
- How To Configure Cartel Influence and Hostility on Your Schedule 1 Server
- How To Adjust Police Heat, Warrants, and Aggression on Your Schedule 1 Server
- How To Modify Player Ranks and Street Reputation on Your Schedule 1 Server
- How To Change Spawn Location on Your Schedule 1 Server
- How To Increase the Framerate Cap of Your Schedule 1 Server
- How to Install and Configure Cartel Enforcer on Your Schedule 1 Server
- How To Install and Configure AutoLaunder on Your Schedule 1 Server
- How To Install and Configure AutoRestock on Your Schedule 1 Server
- How To Install and Use the Auto Clear Completed Deals Mod in Schedule 1
- How To Install and Configure the K9 Patrol Mod in Your Schedule 1 Server
- How To Install and Use the SkillTree Mod in Your Schedule 1 Server
- How to Install and Configure the Schedule I FPS Boost Mod in Your Schedule 1 Server
- How To Install and Use the Mod Manager & Phone App Mod in Schedule 1
- How To Edit Player Cash and Bank Balance on Your Schedule 1 Server
- Show all articles ( 30 ) Collapse Articles
-
Discord Bot Hosting
-
- How to Use Selenium With Your Python Discord Bot
- How to Add Additional Python Modules on the Cybrancee Panel
- How to Use PyNaCl for Your Discord Bot
- How to Connect Your Python Discord Bot to a MySQL Database
- How To Set Up a HTTP Endpoint for Your Python Discord Bot
- How To Use SQLite for Your Python Discord Bot
- How to Change the Python Version of Your Discord Bot
- How to Enable Text-to-Speech (TTS) in Your Python Discord Bot
- How To Send Emails Using Your Python Discord Bot
- How to Create a Dropdown Menu on Your Python Discord Bot
- How To Use requirements.txt on Your Python Discord Bot
- How to Create a Button on Your Python Discord Bot
- How to Create Separators and Containers on Your Python Discord Bot
-
- How to Use Puppeteer With Your NodeJS Discord Bot
- How To Add Additional JavaScript Modules on the Cybrancee Panel
- How To Set Up a HTTP Endpoint for Your NodeJS Discord Bot
- How To Use SQLite for Your NodeJS Discord Bot
- How to Connect Your Node.js Discord Bot to MySQL
- How to Uninstall Node Packages on Your Discord Bot
- How to Change the NodeJS Version of Your Discord Bot
- What Is the package.json and package-lock.json File For
- How to Create a Dropdown Menu on Your NodeJS Discord Bot
- How to Create Separators and Containers on Your NodeJS Discord Bot
- How to Create a Button on Your NodeJS Discord Bot
- How To Send Emails Using Your NodeJS Discord Bot
- How To Enable Text-to-Speech (TTS) on Your NodeJS Discord Bot
- How To Update Your NodeJS Discord Bot’s Status
-
- How to Find a Discord Role ID
- How to Find a Discord Channel ID
- How to Find a Discord Guild ID
- How to Find a Discord User ID
- How to Enable Developer Mode on Discord
- How to Find a Discord Event ID
- How to Find a Discord Thread ID
- How to Find a Discord Message ID
- How to Automatically Restart Your Bot After Pushing Changes to GitHub
- How To Externally Host a Replit Discord Bot
- How to Reset Your Discord Bot Token
- How to Enable Privileged Intents for Discord Bots
- How To Pause Invites on Your Discord Server
- How To Enable Community on Your Discord Server
- How To Configure Your Discord Server Notifications
- How To Configure Your Discord Server Privacy Settings
- How To Make Your Discord Server Age-Restricted
- How To Get Your Discord Server on Discovery
- Show all articles ( 3 ) Collapse Articles
-
- Bot Is Running, but Doesn't Show as Online on the Cybrancee Panel
- Troubleshooting Common Database Connection Errors
- Troubleshooting Rate Limits on Your Discord Bot
- Explanation of NPM Vulnerability Messages
- Troubleshooting Common Puppeteer Browser Errors
- Troubleshooting Common Git Integration Issues
- Troubleshooting Common NPM Errors
- Discord Bot Slash Commands Not Showing After Registration
-
Web Hosting
-
- Articles coming soon
-
- How to Move a File in Plesk
- How to Rename a File in Plesk
- How To Add a ZeroSSL Certificate in Plesk
- Extending SSL Coverage to Include Mail in Plesk
- How to Upload Files in Plesk
- Creating Email Addresses in Plesk
- Enabling the .htaccess File in Plesk
- How to Create Additional Plesk Users
- How to Create MySQL Databases in Plesk
- How to Create MySQL Users in Plesk
- How to Create Subdomains in Plesk
- How to Extract From a Zip File in Plesk
- How to Force HTTPS in Plesk
- How to Update Your Plesk Profile Password and Email Address
- How to View Disk and Traffic Usage in Plesk
- Managing DNS in Plesk
- Accessing and Creating FTP Users in Plesk
- Accessing Emails Through Webmail in Plesk
- Adding an Addon Domain in Plesk
- Adding an SPF Record in Plesk
- Adding an SSL Certificate in Plesk
- Blocking IP Addresses From Accessing Websites in Plesk
- Changing the PHP Version in Plesk
- Changing the Upload File Size Limit in Plesk
- Setting Up Email Forwarding in Plesk
- Understanding and Modifying File Permissions in Plesk
- How to Set Up a Scheduled Job (Cron Job) in Plesk
- Show all articles ( 12 ) Collapse Articles
-
- How to Detach and Attach WPToolkit in Plesk
- How to Install a Plugin on WordPress
- How to Install a Theme on WordPress
- How to Upload a Plugin to WordPress
- How to Upload a Theme to WordPress
- How to Log Into WordPress via Plesk
- How to Secure Your WordPress Installation in Plesk
- Installing WordPress in Plesk
-
-
Domains
-
Control Panel
- How to Lock/Unlock a Backup on Your Cybrancee Panel
- How to Automatically Schedule Backups on Your Cybrancee Panel
- How to Delete a Backup on Your Cybrancee Panel
- How To Restore a Backup on Your Cybrancee Panel
- How To Create and Restore a Backup on Your Cybrancee Panel
- How to Create a Database on the Cybrancee Panel
- How to Easily Upload Folders to Your Cybrancee Panel
- How to Get a Cybrancee Panel Server IP Address
- How To Configure Schedules and Automatic Restarts on Cybrancee
- How to Add a Port in Your Cybrancee Panel
- Getting Support With the Cybrancee Panel
- How to Change the Egg Version on the Cybrancee Panel
- How To Connect to the Cybrancee Panel via SFTP
- How to Create a File on the Cybrancee Panel
- How to Move Files on the Cybrancee Panel
- How To Reinstall or Factory Reset Your Cybrancee Server
- How to Rename Your Cybrancee Panel Server
- How to Reset Your Password on the Cybrancee Panel
- How to Upload Files Through the Cybrancee Panel
- How to Enable Two-Step Verification on the Cybrancee Panel
- Using Cybrancee Panel Controls
- What Is CRON Syntax?
- Show all articles ( 7 ) Collapse Articles
-
Account
How to Enable or Disable Sleep on Your Project Zomboid Server (B41/B42)
1. Open Project Zomboid
2. Select the ‘Files’ tab
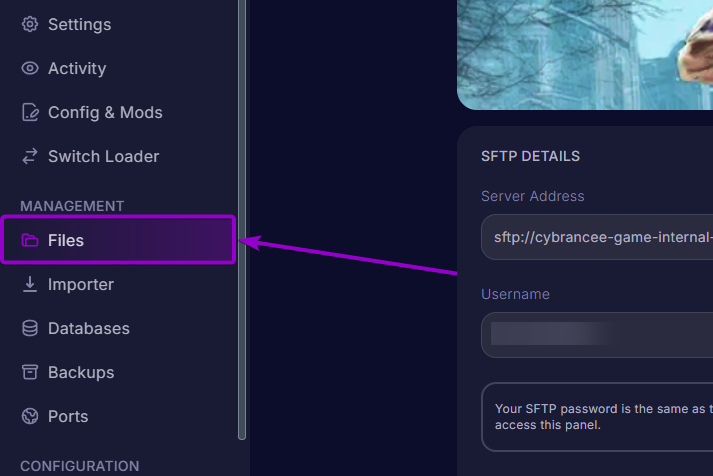
3. Locate the ‘Server’ Folder
You can find the folder in /home/container/.cache/Server.

4. Select the ‘Server.ini’ File
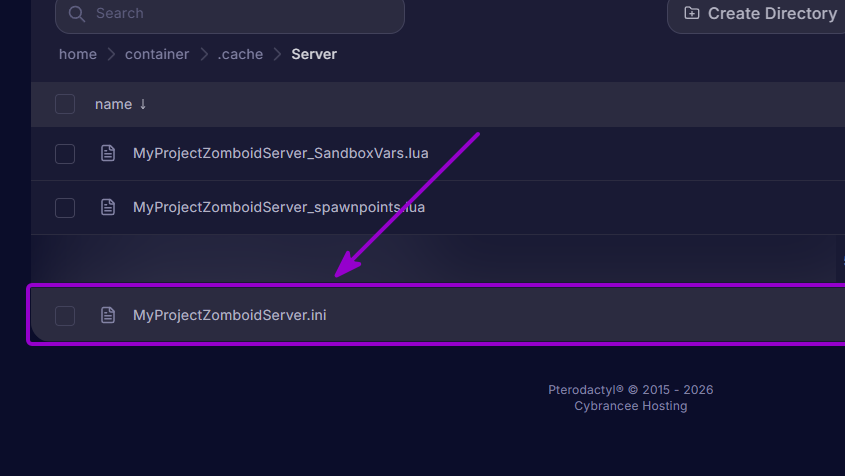
5. Locate the ‘Sleep’ Section
You can find the Sleep section starting from line 197 within the file.
(1) Set the ‘SleepAllowed’ option to ‘true’: This will allow players to sleep whether or not they are tired.
(2. OPTIONAL) Set the ‘SleepNeeded‘ option to ‘true’: This will make players be able to experience tiredness, allowing them to sleep only under these conditions.
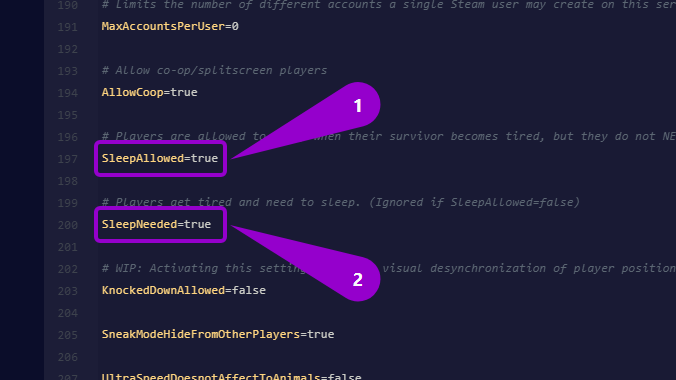
Then, save the changes:

6. Restart Your Server
Project Zomboid Server Hosting
Starts at $11.99

Table of Contents